

mimoLive has a very rich Remote Control Surface Editor which is used to create the actions for remote hardware controllers. Currently, mimoLive supports programmable X-keys keyboard by P.I. Engineering .
The following devices are tested successfully (others should work too but aren’t tested yet):
– X-keys XKE-128
– X-keys XK-80
– X-keys XK-24
– X-keys HD-15 (Please see special layout conditions for the remote control surface below)
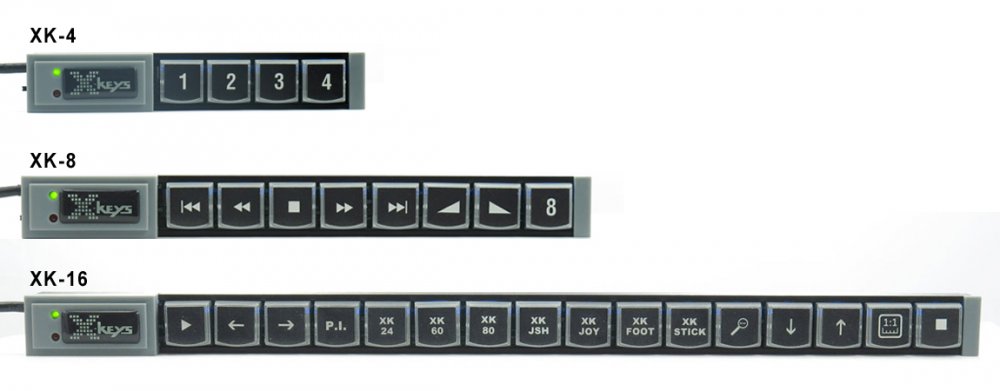
– X-keys XK-16 Stick (The layout of the Remote Control Surface will be 4×4)
– X-keys XK-8 Stick (The layout of the Remote Control Surface will be 4×2)
– X-keys XK-4 Stick
– X-keys XK-3 USB Switch Interface (The layout of the Remote Control Surface will be 2×1)
Setting up an X-keys Keyboard to be used for mimoLive
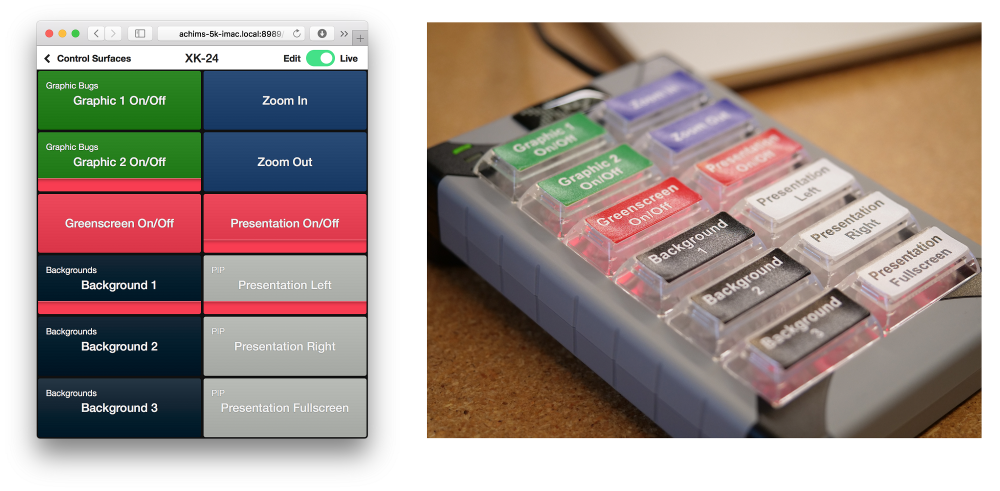
First, you need to create a Remote Control Surface that fits the grid size of your X-keys keyboard. Make sure to give it a useful name so you can easily identify it as the surface mapping for the remote control device later on.
Make use of different sizes of the buttons
X-keys keyboards can be configured with different button sizes like 2×1 or 2×2 keycaps. If you have very important features then give them a bigger button. In the Remote Control Surface, you are specifying you should set up the button size accordingly.
Next, you should connect your X-keys keyboard to your Mac. The first time you connect your X-keys device all the buttons will turn red. After a couple of seconds, all buttons should be turned off indicating mimoLive has recognised this device.
If you click on the Remote Device Setups button in the mimoLive document toolbar you will see a list of all your X-keys devices connected to your Mac.
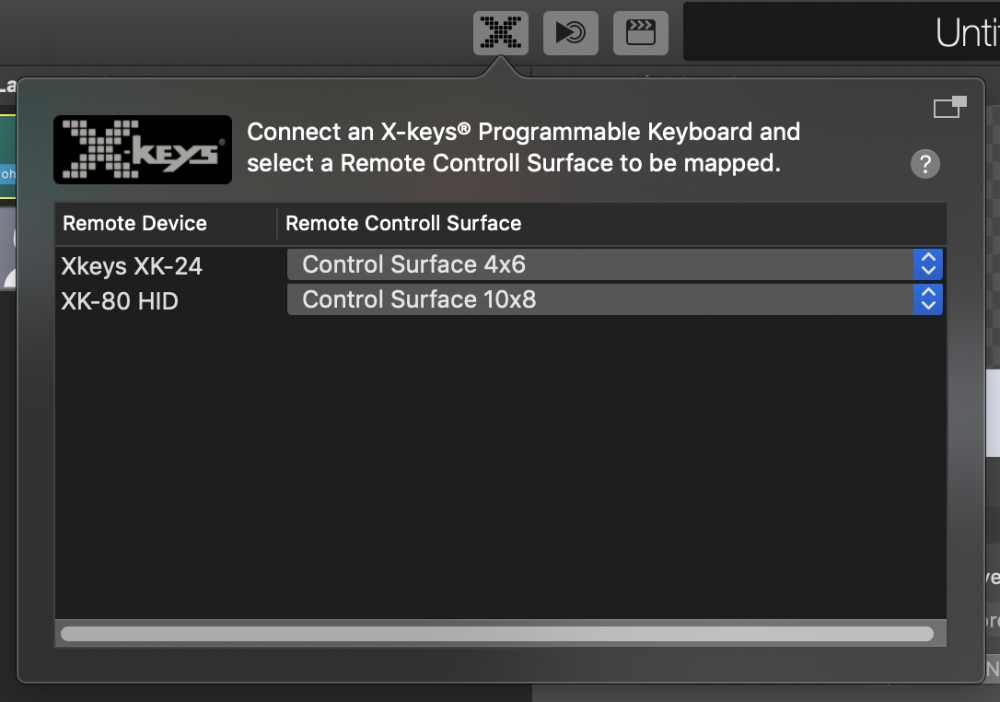
In the popup right next to the name of your X-keys model name you can select the appropriate Remote Control Surface you created earlier.
Now the X-keys keyboard should reflect the live state of your Remote Control Surface and is ready to be used.
Special Layout Conditions for X-keys Sticks
Because the X-key Sticks would make a really wide Remote Control Surface to work on we chopped them in junks of 4 buttons and stack them so that an X-keys XK-16 Stick will have a 4×4 grid and the X-keys XK-8 Stick will have a 4×2 Grid. This makes it much easier on the computer screen to define the actions for each button.
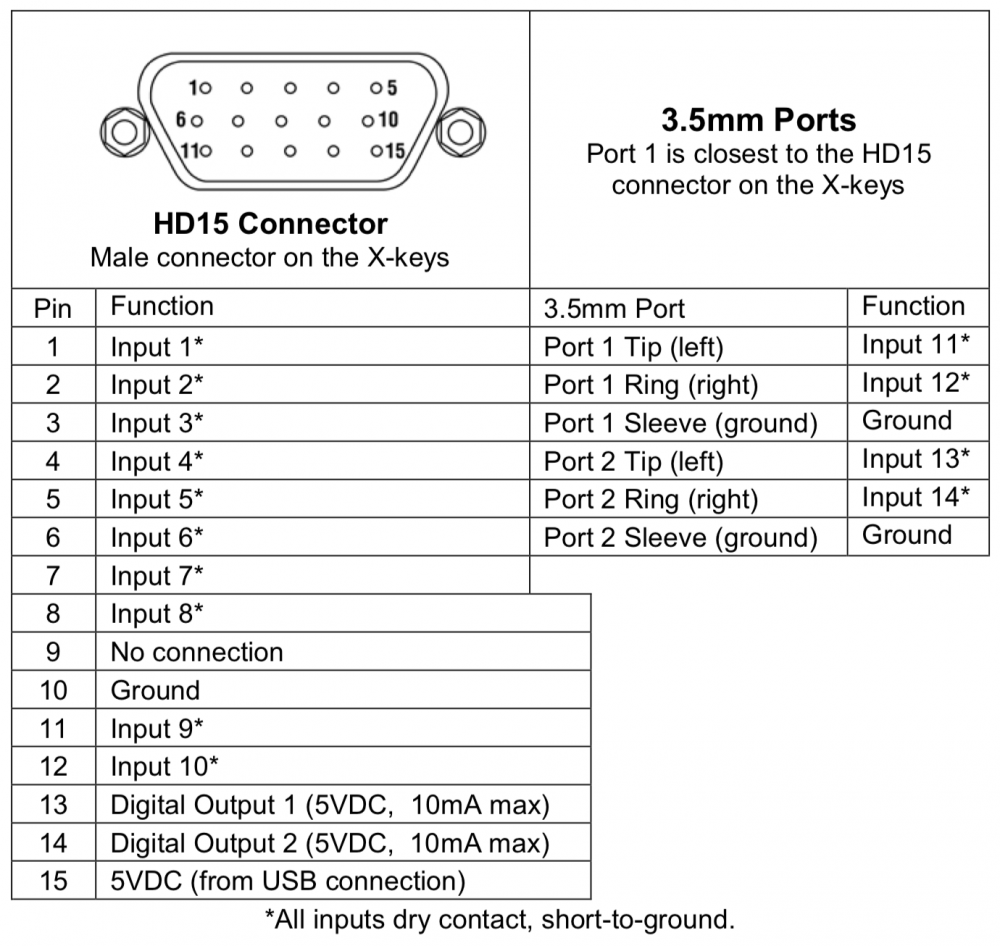
Special Layout Conditions for X-keys HD-15
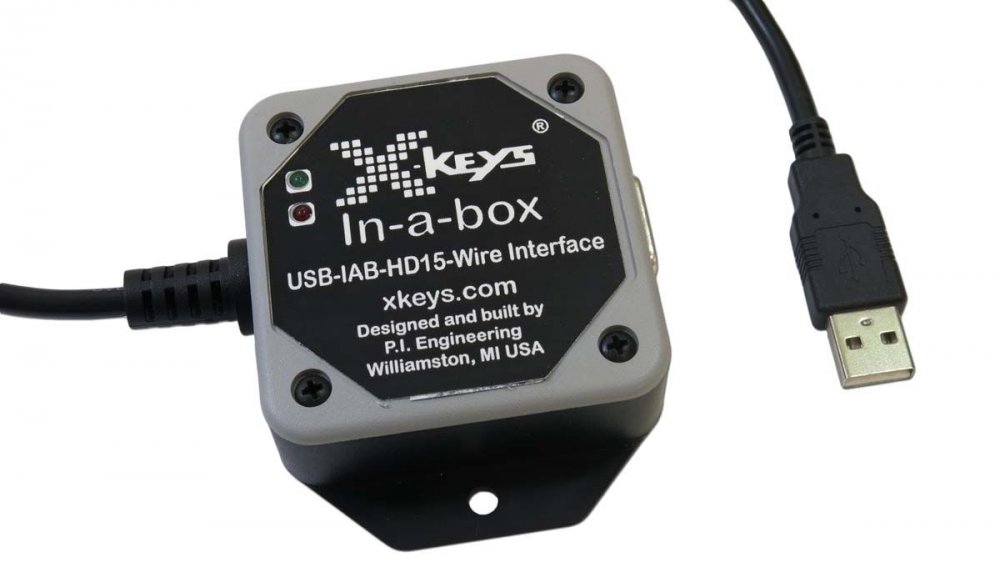
The X-keys HD-15 has no specific keyboard layout because you can connect any switch to it via a 15 pin connector. mimoLive maps the input ports to a 4×4 control surface grid as follows:
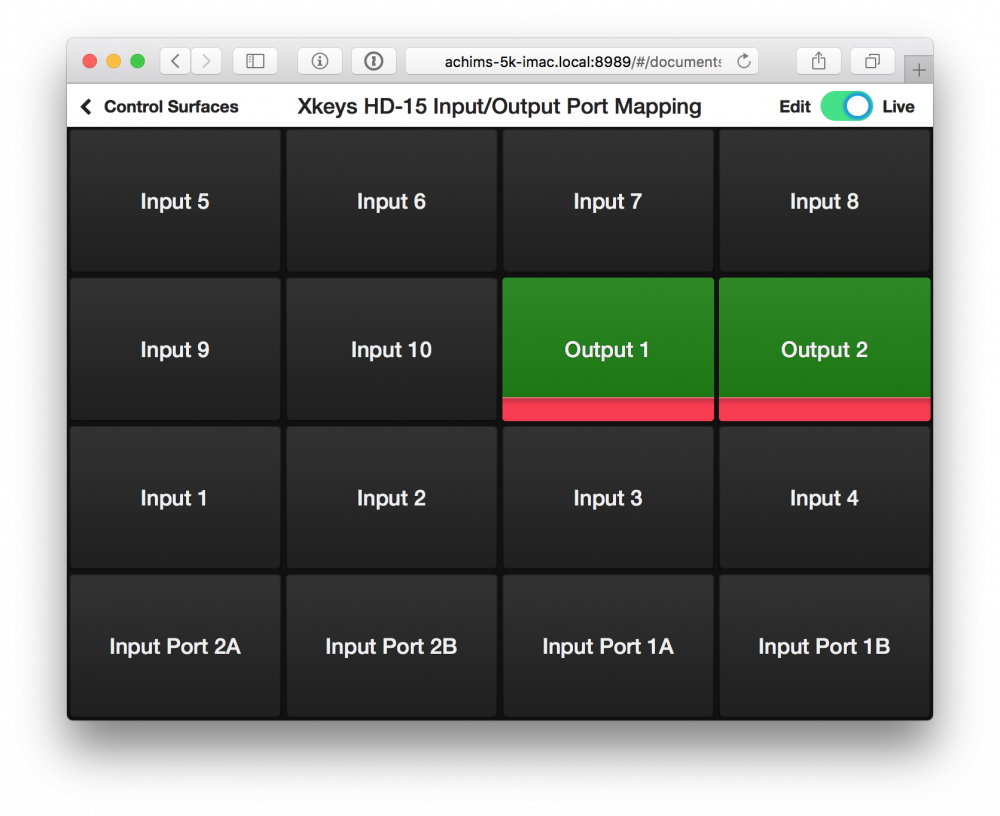
Both output ports can be triggered by the live indicator of the buttons on the remote control surface. If they are on “red” then the corresponding output on the X-keys HD-15 gets switched on.