
You can use an external audio mixer like the RØDECaster Pro for getting more control over your audio levels. In order to do this, you need a mixer that provides multiple input and output channels via USB. Some mixers only send the down-mix and not the separate inputs and only accept one signal from the computer. In the case of the RØDECaster, you need to switch it to USB Multitrack mode.
Receiving audio from the mixer
This part is relatively easy. Add an Audio source to your mimoLive document, call it “Audio from mixer” and select the mixed output in the Device popup:
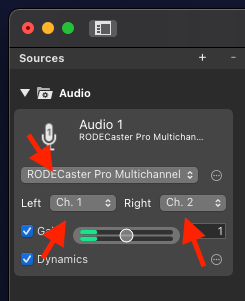
In this case, the RØDECaster Multichannel output is selected and it provides the stereo down mix through the Channels 1 and 2.
For each audio source that you want to use in an output, you need to have a corresponding layer in the Layer Stack. So, add an Audio Only layer to the layer stack, name it “Audio from mixer”, select the “Audio from mixer” source and switch it to live.
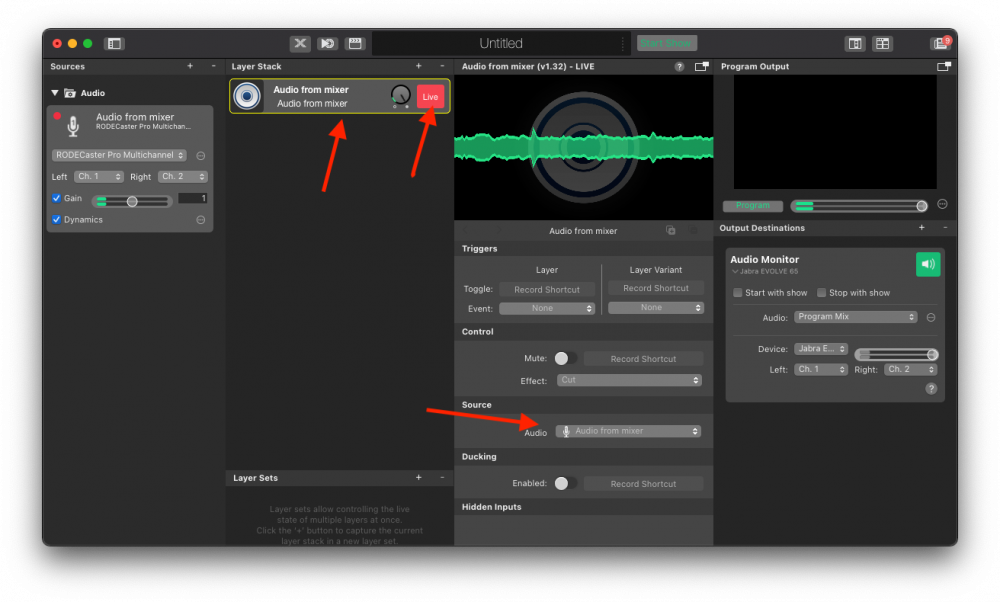
The down mix from your mixer is now in your Program out.
Sending audio to your mixer
Let’s say you have a playlist of audio files and would like to send them to your audio mixer so that you can use the faders to control the volume relative to your microphone.
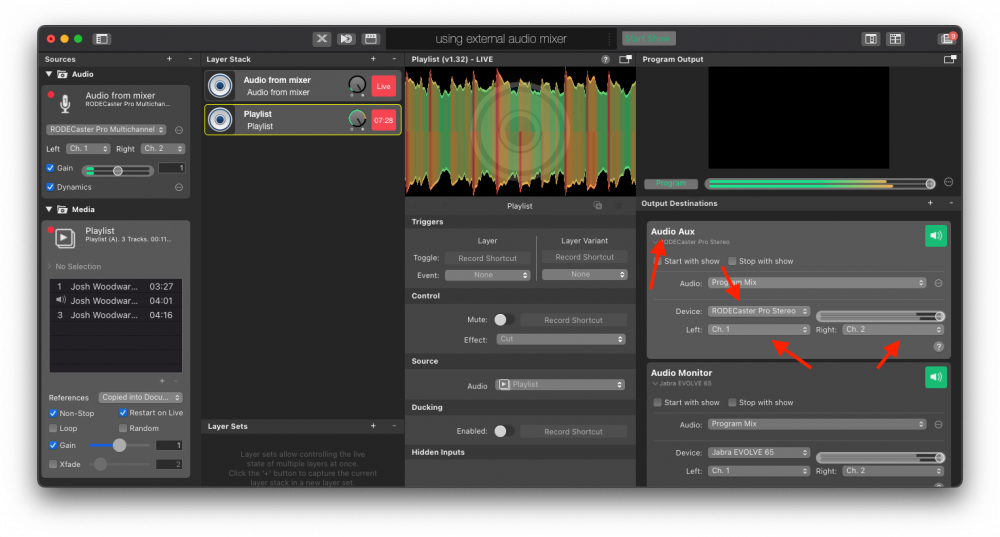
To do this, add the playlist to your mimoLive document, add an Audio Only layer to your layer stack, select the Playlist as the source for it and switch it live:

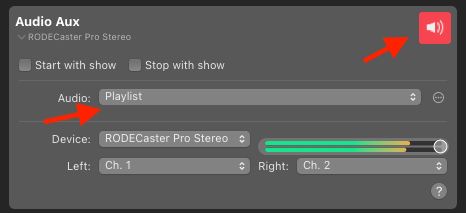
Now, to send the Playlist Audio to the mixer, add an Audio Aux output destination. Select your mixer from the Device popup menu and chose the Channels for Left and Right that you want to send the audio to. In the case of the RØDECaster, it has only one stereo channel to send audio back to the mixer:
If you now switch the Audio Aux to live using the green button, you will create a feedback loop, as the audio that’s sent to the mixer also includes the audio that comes in to the mixer.
To fix this, we set up a separate Audio Mix for this Audio output. Click on the Audio popup menu and select “Create a new audio mix”:
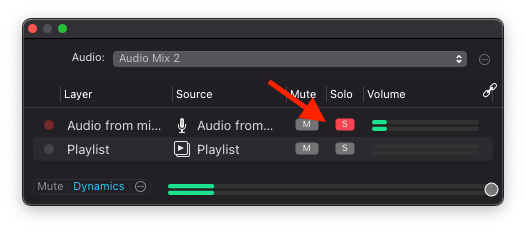
This brings up the Audio Mix panel. Here, click on the solo button “S” in the line containing the Playlist layer to send out only the audio from the playlist to the mixer:
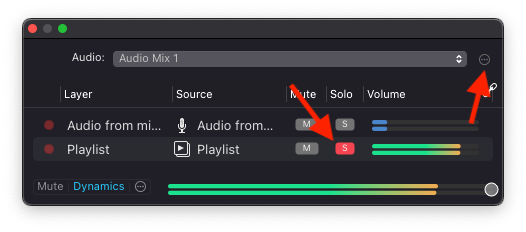
It makes sense to rename this mix with the action button in the upper right corner so that you can recognise it easily in the list of audio mixes later. In this example, use “Playlist”.
Next, make sure that your Audio Aux has the “Playlist” selected in the Audio popup, Then switch it to “Live”. The Audio from your Playlist is now available in your external mixer in the channels you selected and comes back in with the down mix through the Audio from mixer source but without causing a feedback loop and you can control its volume through the external mixer:
You can repeat this process to send out each mimoLive Source separately to the external audio mixer if the mixer has enough channels to support this.
Sending the audio from the external mixer to a recording or a live stream
You will notice that the Program Mix still contains the Playlist audio twice. At this time, the Program Mix can not be changed, but you can create a new mix that only contains the audio from the external mixer for use in recording or streaming your show or use the Audio from mixer source directly in the output destination.
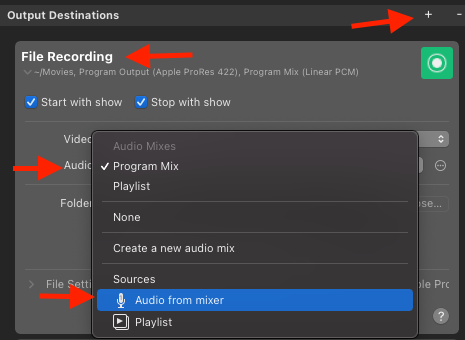
To illustrate this, we add a File Recording output destination. Then, click on the Audio popup and select the Audio from mixer source to be used in the file recording:
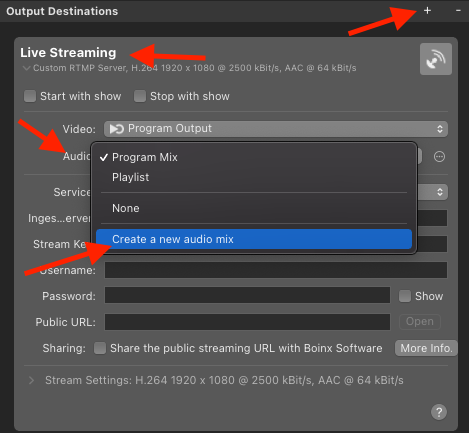
If you can only select an audio mix (like in this version of the Live Streaming output destination), simply create a new one by clicking on “Create a new audio mix” in the Audio popup:
This time, “Solo” the Audio from mixer:
Now you have the output from your mixer as the audio in your live stream and are able to control the Playlist volume along with your microphone volume in your mixer and also monitor your audio there.