
mimoLive® can help you to stand out when doing virtual online presentations by making them look like professional quality TV broadcasts.
This easy to use Virtual Presentation template is set up for a number of the most popular layouts and connects to Zoom, MS Teams, WebEx and other video conferencing services, can also record locally for best quality, and stream to LinkedIn, YouTube, Facebook, Twitter and more for a larger audience.
The Virtual Presentation template has been designed for the dual computer Professional Presentation Setup which is recommended so you can run your PowerPoint presentation more easily.
Enhancing Audience Engagement: Integrating Presenter and Presentation in Live Sessions
While many platforms you might be using for your live presentations like Zoom or MS Teams offer the option to share your screen for a presentation, that has several disadvantages:
- The audience becomes invisible to you because the screen sharing uses up all the space on your screen and in the UI of the platform on your end.
- You become invisible to the audience for the same reason on their end.
- You can’t “interact” easily with your presentation which makes it much less attractive.
The solution is to create a video output that includes both the speaker and the presentation in one, so that the connection to the audience isn’t lost as soon as you share your presentation.
Keep in mind that presentations shared this way are sent to the video conferencing platform using the same resolution as your video camera. Make sure that the text elements on your slides are big enough to be readable.
Let’s get started with looking at the available predefined layouts.
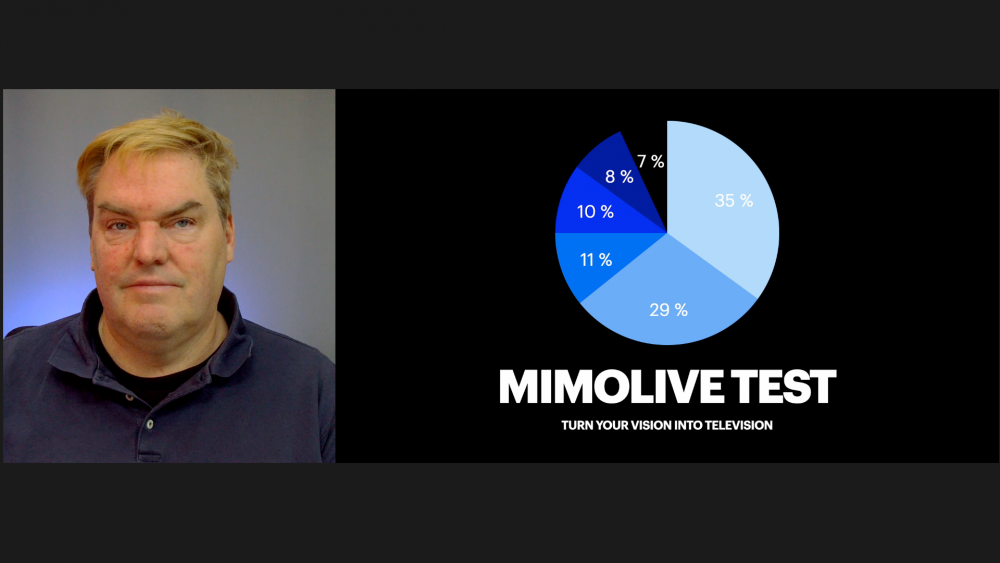
Side by Side
This is a classic look used for example by Steve Jobs and Apple for their legendary keynote streams. The layout puts the speaker next to the slides which are fully visible. The speaker can be to the left or to the right of the slides, depending on your preferences.
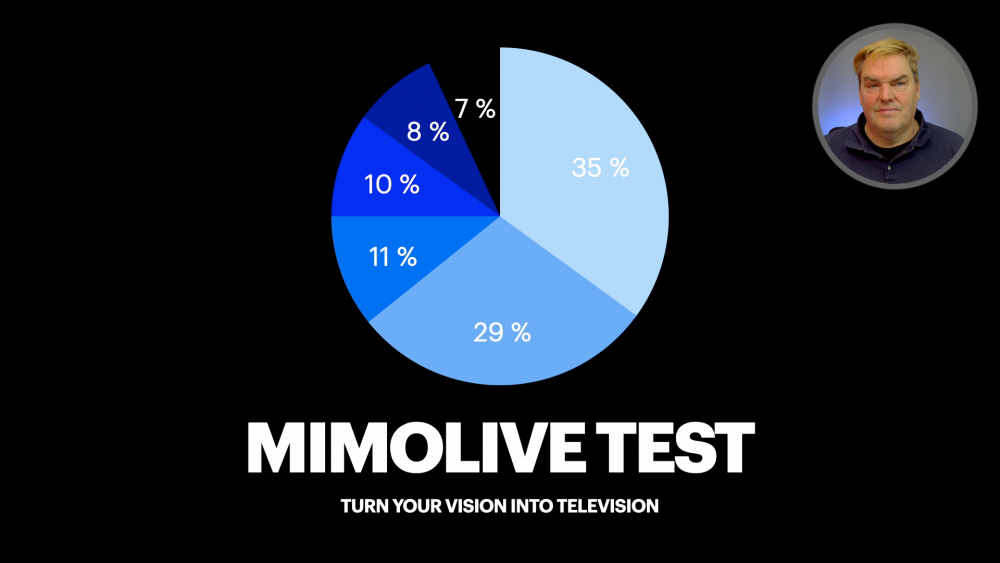
Picture in Picture
This layout allows for more use of the screen for the presentation and includes the speaker as a “Picture in Picture”. This is more engaging but you need to make sure that the speaker “window” doesn’t cover the content of your slides. The speaker can be in all four corners of the screen.
Immersive in Back
Using a technique called “keying” allows for removing the background of your camera. mimoLive offers a very easy to use “Background Removal” filter for this. You can then put the presentation in your background. Make sure you do not cover the relevant information, but you can move from left to right if your slides require it.
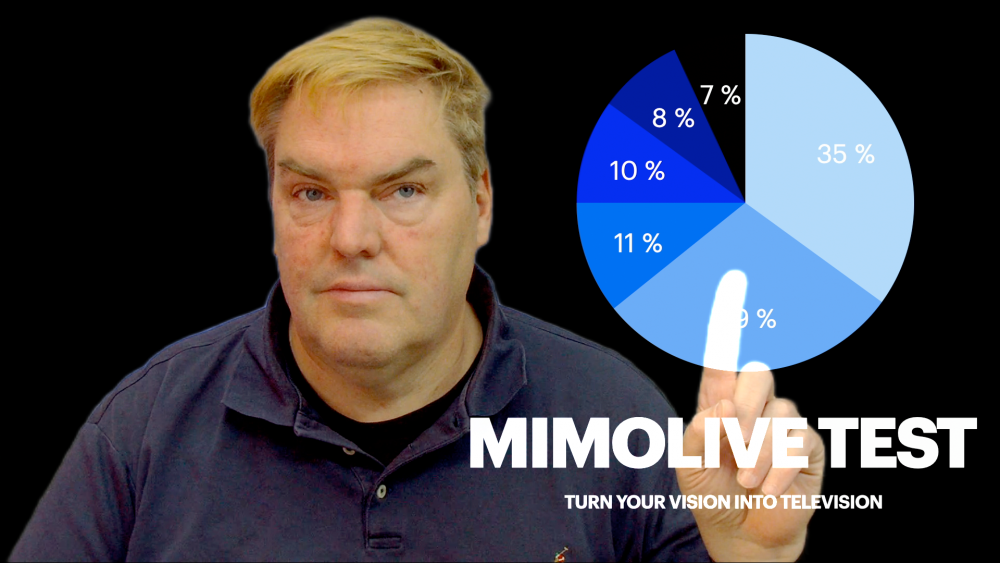
Immersive in Front
This layout is very unusual and therefore can make you stand out. The speaker is behind the slides and can point to things on the slide. In order for this to work, the background needs to be dark, preferably black. The slides background also needs to be black, because this layout is using a blend mode that adds the two images, speaker and slides, together. The effect is like there is a tansparent LED screen between speaker and camera. This allows the speaker to interact with the slides, an effect that’s guaranteed to dazzle the audience.
News Anchor
This presets inserts the Slides as an “over shoulder” on a virtual TV screen between speaker and the background. This allows the speaker to point to things on the slides while the background is still visible. The blur effect is created by image processing, so no high end camera with expensive lenses is needed.
Other graphical elements
mimoLive allows you to add many other graphical elements: Analog and digital clocks, countdowns, text, movies (how about showing your favourite meme) and other effects. In the standard configuration, we’ve added a station logo that you can set to your own logo to promote your brand. Once you become more familiar with mimoLive and the Virtual Presentation template you can experiment with the many layers available and create your very own personal template. You can also book a One-on-One Coaching where we go into your ideas and make them happen.
Setting up the Virtual Presentation template
Before you can use the template, you need to select your camera, microphone, presentation capture, presentation audio, speaker monitor and your logo. Here is a step by step guide:
Set up your camera
You can use almost any camera with the Virtual Presentation template. Of course, cameras of different quality will give you different quality results. More important than the camera, however, is the light: Make sure you have enough light for the camera to properly work and use as diffuse light sources as possible. Natural light is to be avoided as it has quite a lot of brightness variations over the day depending on the weather and the time of day.
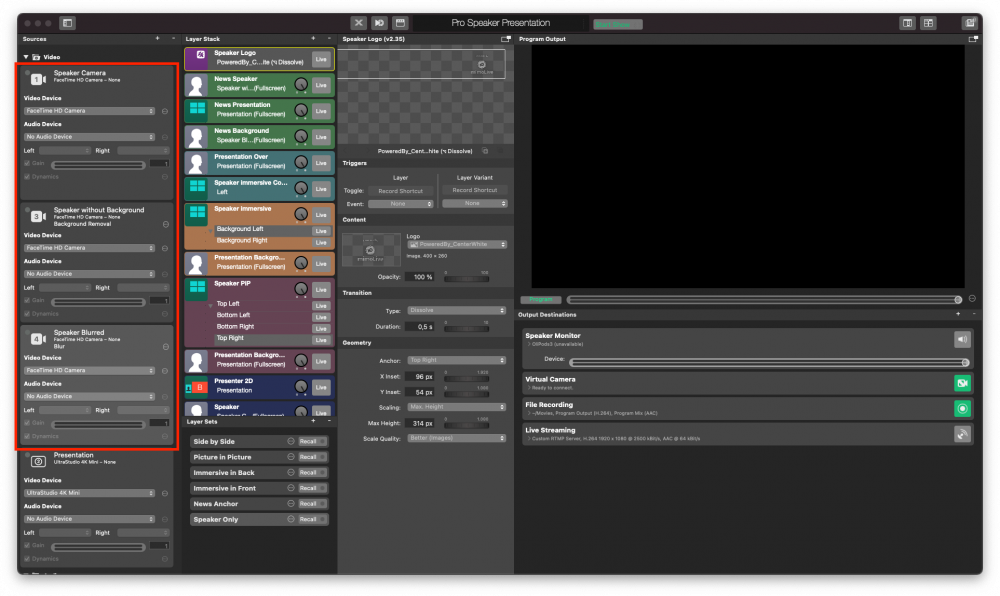
To select the camera, go to the Sources column and find the items “Speaker Camera”, “Speaker with Background” and “Speaker Blurred”:
There are three sources because there are different filters applied to the camera which are then used in the template to achieve different effects.
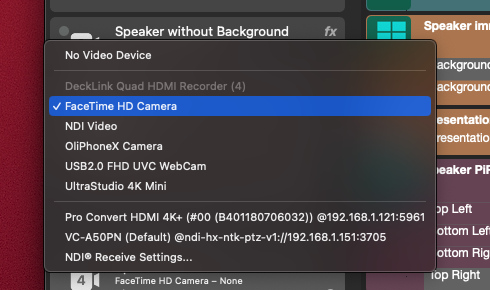
In each of the three Sources, click on the Popup Menu labelled “Video Device” and select your camera or capture device from the list:
Leave the “Audio Device” popup at “No Audio Device”.
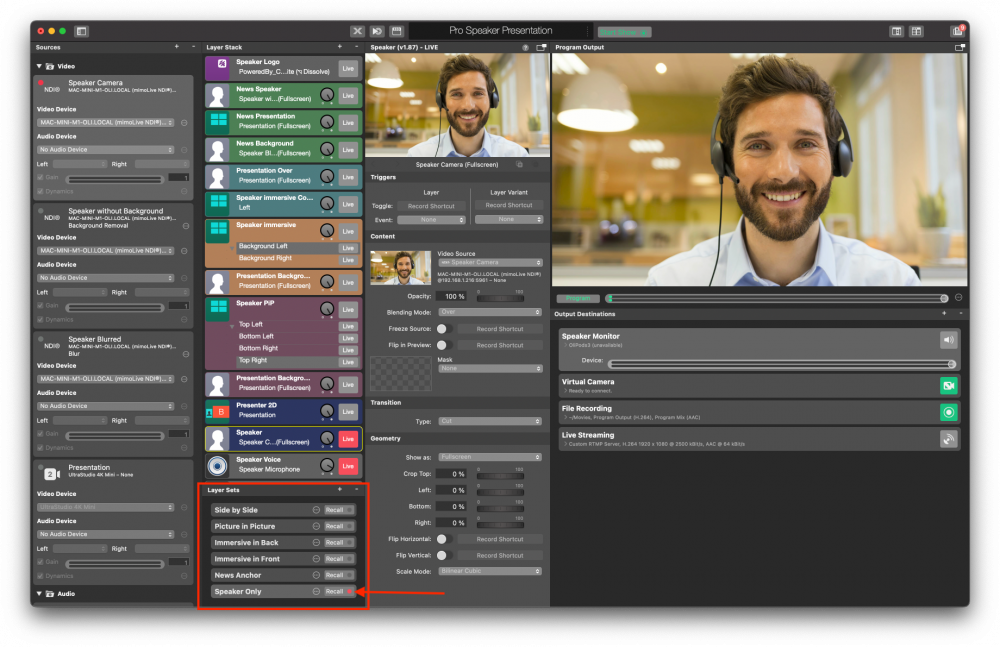
You should now see yourself through your camera in the Program Output to the right.
If not, find the Layer Sets at the bottom of the second column from the right and click on “Speaker Only”.
Set up your microphone
The microphone is treated as a separate device so that it can be turned on and off independently from the video. The right microphone depends on your setup and your preferences. If you want advice on what microphone to choose, we’re happy to help you in a one-on-one coaching session.
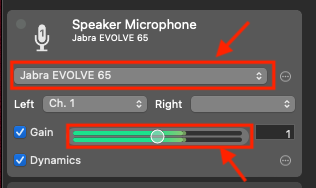
To select your microphone, scroll down in the Sources list to find the item labelled “Speaker Microphone” in the Audio section:
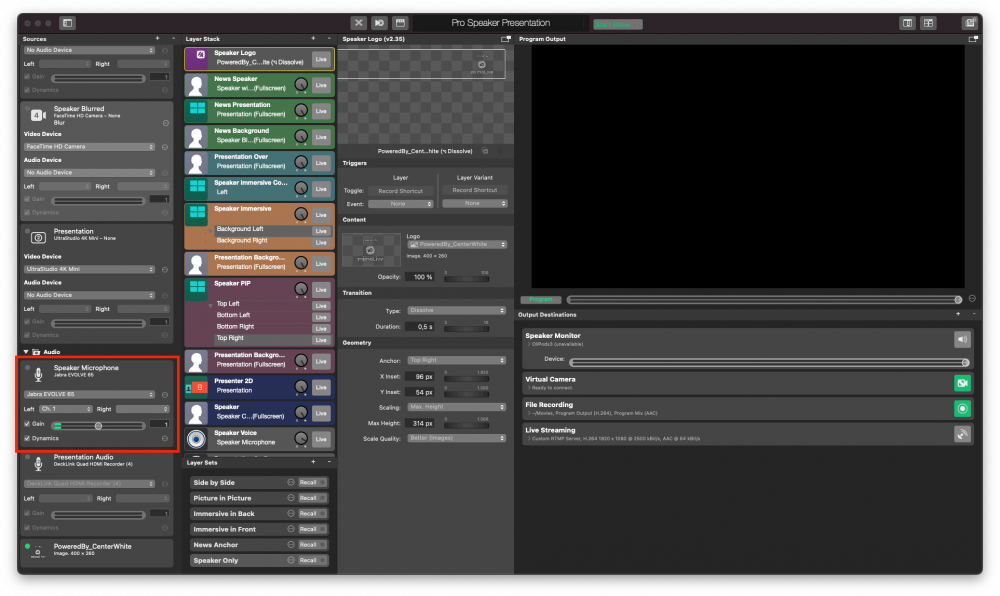
Again, select your microphone device from the popup menu:
To check if you selected the correct device, you can tap on your microphone and see the green level indicators move to the max corresponding with your tapping.
Set up the (PowerPoint) Presentation on the second computer
This assumes a two computer setup with a separate computer for your presentation as described in Professional Virtual Presentation Setup.
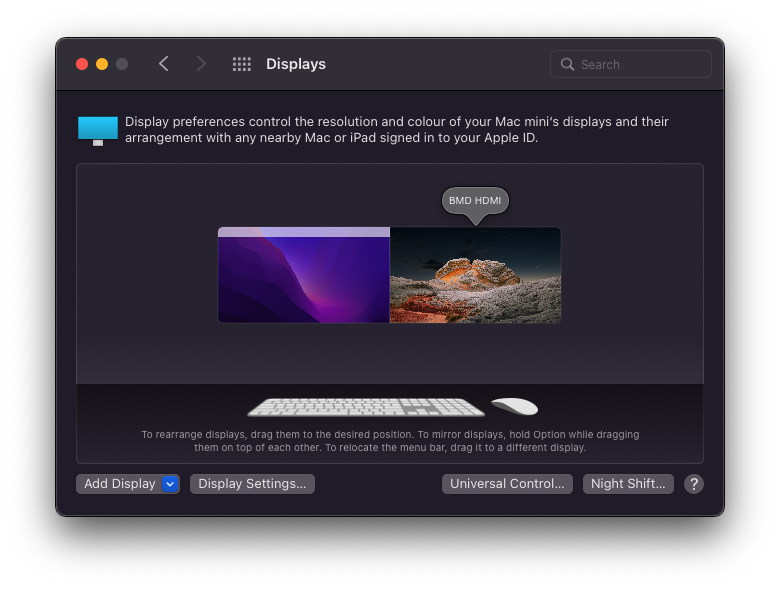
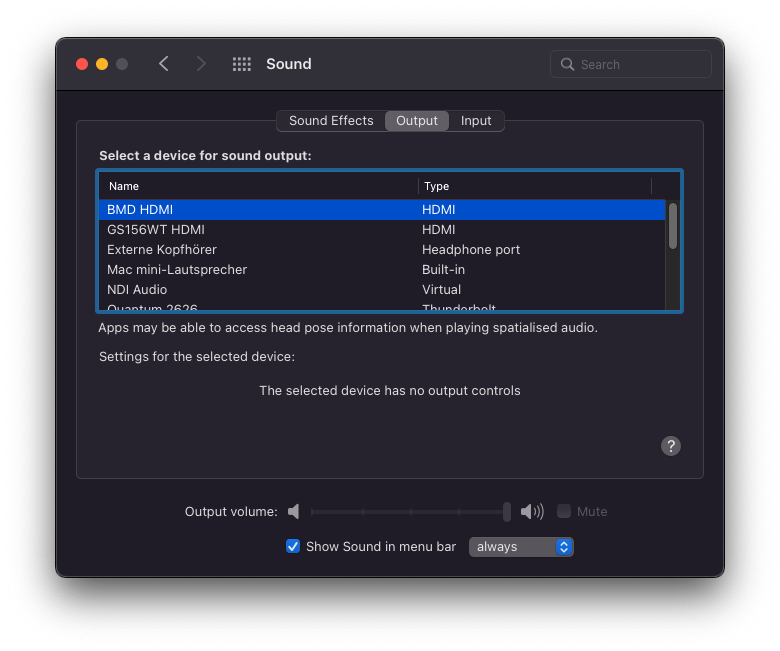
There are two things you need to do on the *second computer *with the presentation:
- Set up the HDMI display output that’s connected to your mimoLive computer via the HDMI capture device as a separate display and turn off mirroring if it is enabled. Basically you need to set it up as if you had it connected to a projector in a conference room or on a stage.
- Also make sure that the HDMI output is also selected as the default Audio Output so that the audio from the presentation is sent to your mimoLive.
Select the presentation source
Now that the presentation is properly set up on the presentation computer, you can select the input device that brings it into mimoLive. Go to the sources column and find the source named “Presentation” and select the capture device from the devices popup menu.
Then go to the Layer Sets and click “Recall” on the Side by Side set:
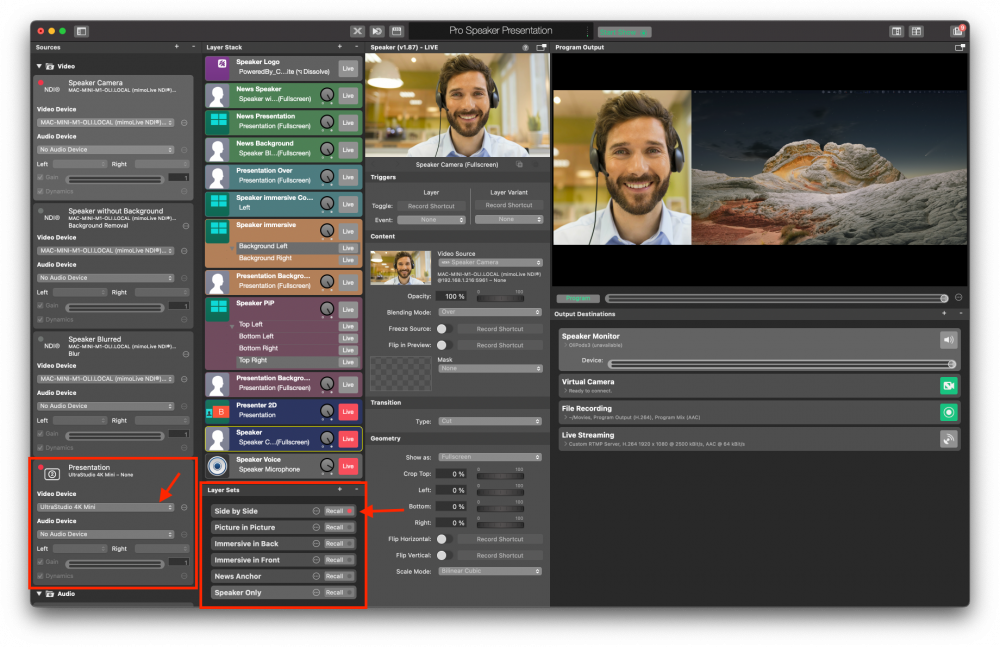
You should now see yourself and the presentation side by side.
Select the presentation audio
In order for the people on your Zoom call or watching your stream hearing the audio from your presentation, it needs to be channeled through mimoLive. The Virtual Presentation template has been set up to account for this. You only need to make sure that the audio output on your second “presentation” computer is set to HDMI and select the HDMI capture device as the audio device.
Find the Input labelled “Presentation Audio” in the Sources column in mimoLive and select the HDMI capture device from the device popup:

For a quick test play some audio on the presentation computer and check the green level meters in the Presentation Audio source.
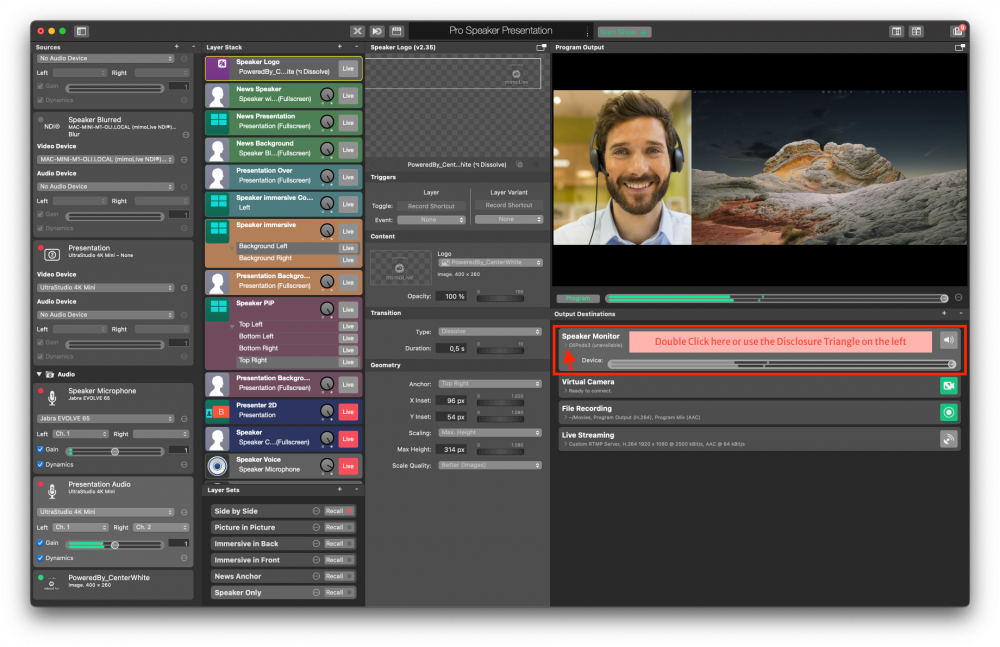
Select the Speaker Monitor
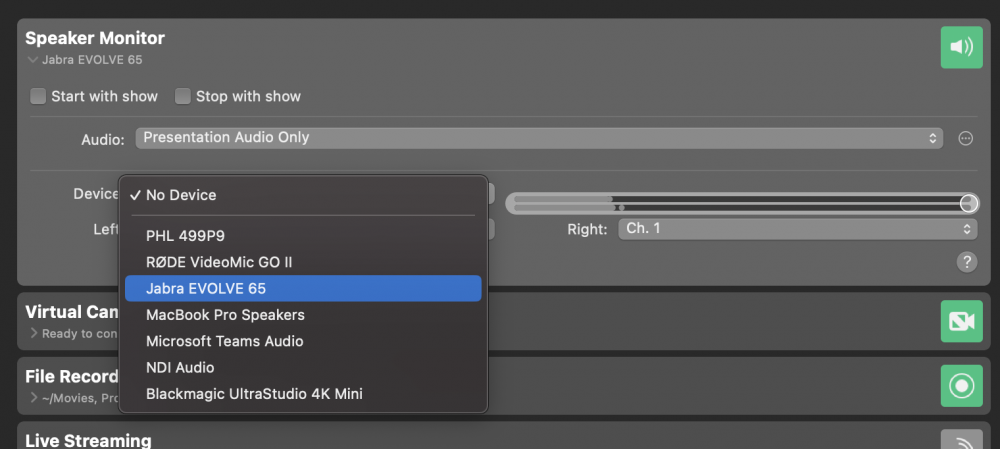
Usually the speaker also wants to hear the audio from the presentation. For this purpose, there is an Output Destination called “Speaker Monitor”. You can find it in the leftmost column and open the content by double clicking in the empty space between title and live button or using the disclosure triangle in front of the info:
This opens more options where you can select the headphones you want to use to listen in to the audio from your presentation:
To actually hear something in your headphones, you need to switch the Speaker Monitor to “Live”. To do this, click on the green button to the left until it turns red. In Broadcasting “Red” means live, “Green” means ready. The button will stay grey if the Output Destination isn’t configured properly.
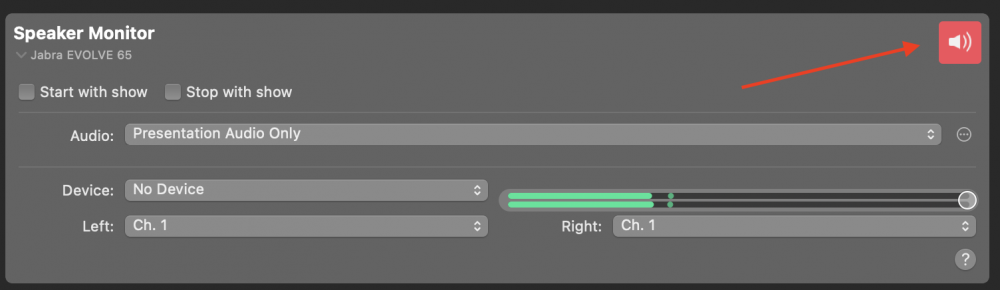
To adjust the volume of your headphones use the volume slider.
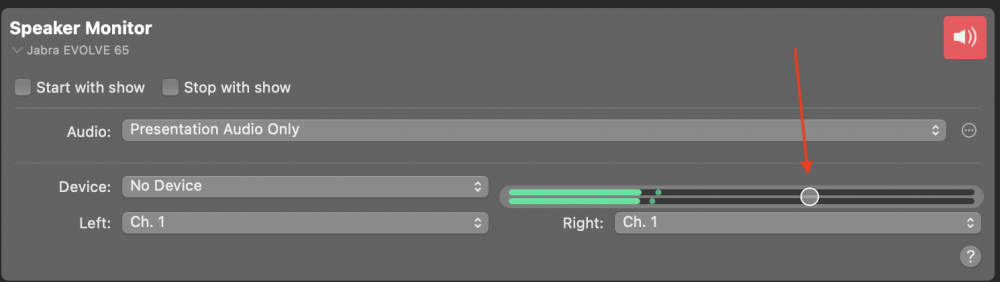
This does not change the volume sent to the live stream or Zoom. Use the Gain control in the Presentation Audio Source or the dial in the Presentation Audio layer to change that. You can also use the volume sliders on the Remote Control Surface for this as described further down.
Using the Virtual Presentation template for the first time
Now it is time for a test. Invite a friend to a Zoom call to practise using mimoLive and to give you feedback on audio levels, lighting and camera position.
Connecting the Virtual Presentation template to Zoom
The Virtual Camera plugin is responsible for making the connection to Zoom. You need to download and install it separately, but it is already set up in the Virtual Presentation template ready for use.
Please refer to “Sending Audio and Video to Zoom” on how to connect mimoLive and Zoom.
Setting up the Remote Control Surface to control the show
The Remote Control Surface puts the magic into your setup. You can load that on a smart phone or tablet and run your show using a touch interface. This way, you do not have to search for buttons in the App on your Mac while you’re giving your presentation. The Virtual Presentation template has a pre-configured Remote Control Surface that allows you to easily control the show.
To enable the Remote Control Surface, go to the menu mimoLive -> Preferences, find the Remote Control tab and check the “Allow Remote Control Access” box:

The Remote Control Surface is basically a web page, so you can load it on any device with a browser, like an Android phone or tablet, or another PC or your Mac. To open the Remote Control Surface on another device, simply enter the URL displayed in the screenshot above in the browser on the device. To open the Remote Control Surface on your Mac, you can click on the Remote Control button in the mimoLive document window top bar:

This opens the list of available Remote Control Surfaces.
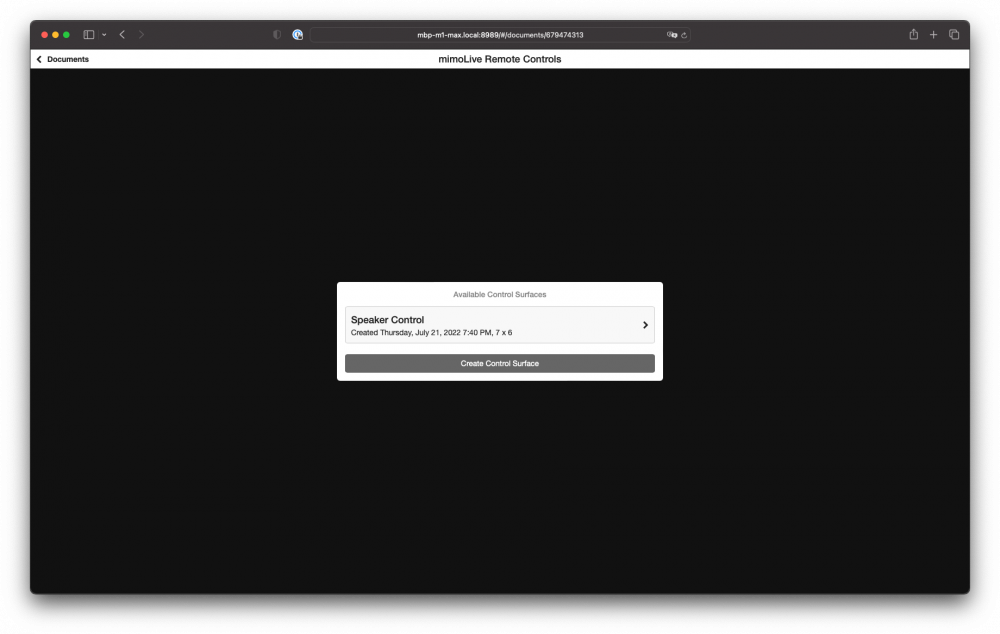
Click on “Speaker Control” to open the pre-configured Remote Control Surface:
On an iPad or iPhone, it is even easier to use the Remote Control Surfaces. Download the mimoLive Remote app from the App Store.
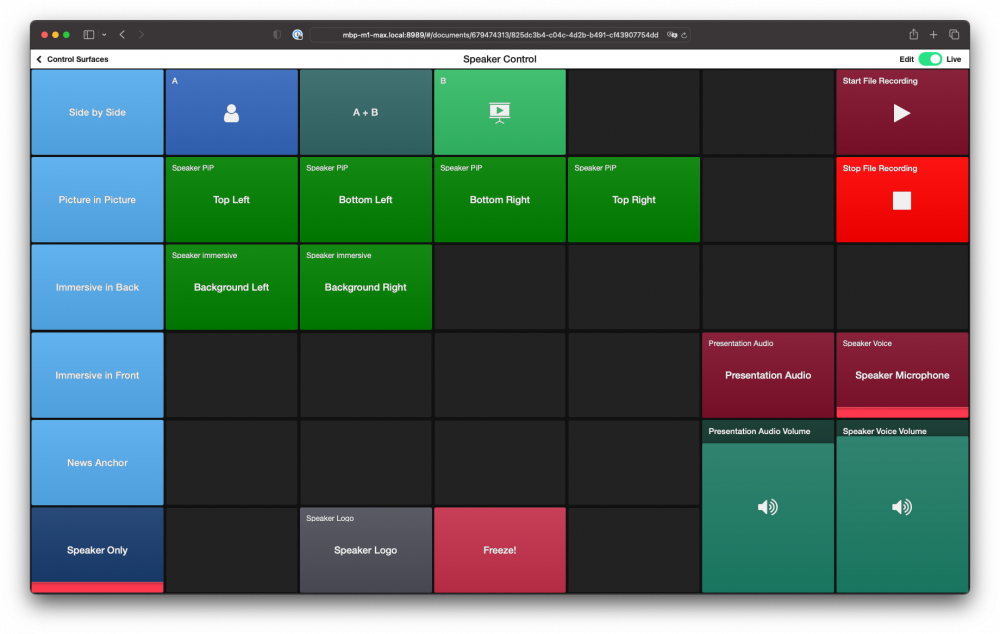
Using the Remote Control Surface
Using the Remote Control Surface is easy. Just tap on the button that is marked with the action you want to take. Just give it a try. Notice the red line at the bottom of a button which indicates that the corresponding element in the Layer Stack of mimoLive is live.
These are the actions on the Remote Control Surface:
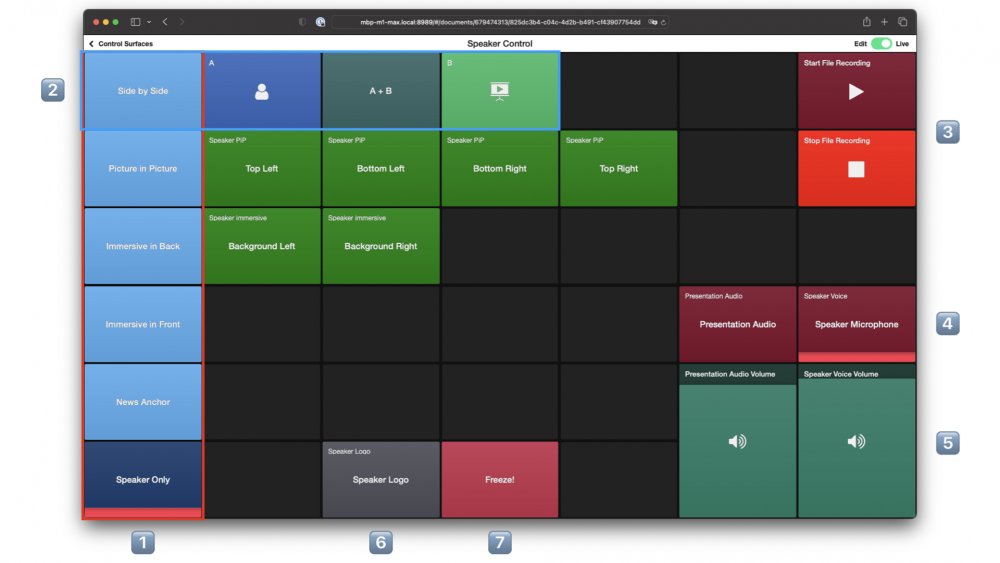
- In this vertical column there are buttons to trigger the different layouts as described at the beginning of this document.
- In each line there are the options for those layouts. To use a layout, first select the layout from the first column, then use the options.
- Start and Stop a local recording.
- Turn Presentation Audio and Speaker Microphone on and off.
- The two sliders allow you to balance the volume of your microphone and the audio from the presentation. You operate them by swiping up and down.
- Turn the Speaker Logo on or off.
- Need to sneeze or cough? The Freeze button stops your video and turns off your audio. Tapping the button again turns the audio back on and unfreezes your video.
It is best to play around as much as possible with the Remote Control Surface to familiarise yourself with the operation.
You can easily customize the Remote Control Surface by removing buttons you don‘t need or adding buttons for new things, moving buttons around or change their colors to suit your needs. Need help with that? Book your personal one-on-one coaching session with our mimoLive experts..
Amplifying Your Brand and Ensuring Quality: Logo Integration and Local Recording in mimoLive
mimoLive offers a lot of functionality and the Pro Speaker Presentation Template only scratches the surface. In this section, we will add your logo for branding and look at making a local recording.
Adding your Logo
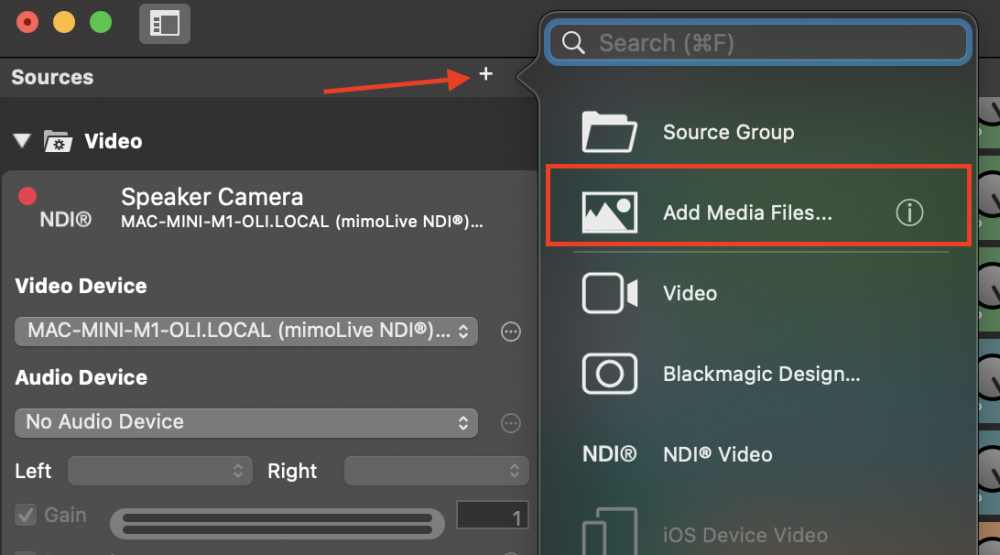
To add your logo to the template, drag and drop the logo image file from the Finder into the Sources column or use the „Add Media File“ command behind the „+“ icon to the top right of the Source column:
We recommend using a PNG file of your logo with transparency. This usually looks better than an image with a black or white background. Although the size can be adjusted in mimoLive, we recommend to make the PNG the size the logo should be.
Find the „Speaker Logo“ layer in the Layer Stack, go to the Content section of the Layer settings column and select the logo file you just added in the Logo popup:
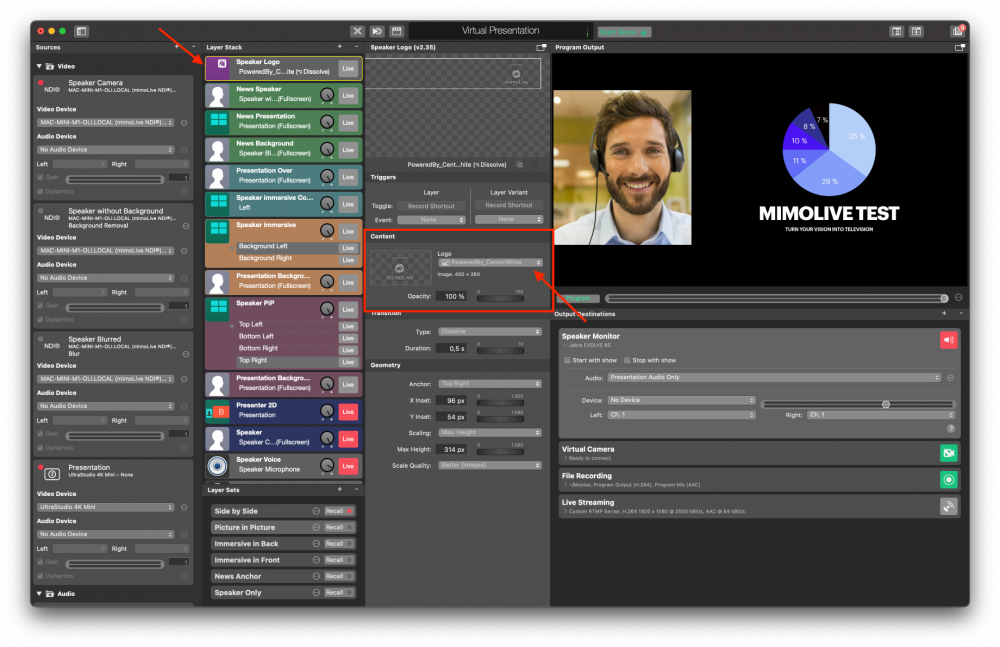
Turn the Layer on by clicking on the „Live“ button:

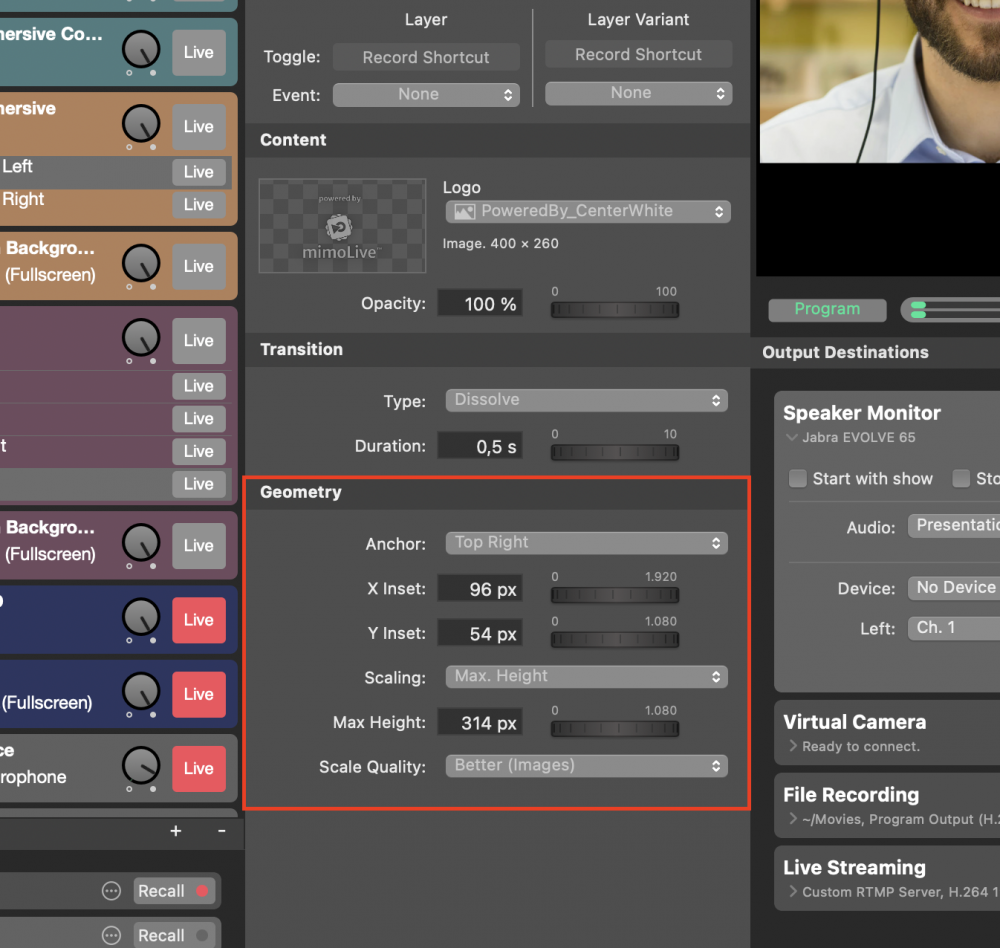
To fine tune the location and size of the logo, go to the Geometry section of the Layer Settings:
Creating a local recording
Creating a local recording is very helpful in many situations:
- The recording on the platform might be unusable because it is of low quality or the host of the meeting forgot to record.
- The meeting or stream isn‘t recorded by the host but you‘d like to have a private, high quality recording of your presentation for use in your marketing materials.
- You want to be able to see your performance and learn from it.
- Your host wants a high quality recording of your presentation for exampled when you‘re a guest in a talkshow or on a podcast.
In any case, the local recording is typically of much higher quality than a cloud recording. The Pro Speaker Presentation Template is pre-configured for a local recording.
You can easily start it by pressing the „Start Recording“ button on the Remote Control Surface, and stop it by pressing the „Stop Recording“. (See Remote Control Surface description above).
At the end of the recording, a window will pop up that shows you your most recent recordings and allows you to access them easily. Your recordings are set to be stored in your „Movies“ folder, but you can change this if you want.
By default, recordings are created in H.264 format with a decent quality but using relatively heavy compression leading to smaller files. You can change this to ProRes – which uses less compression, produces higher quality video but also much bigger files – by going to the Output Destination column and disclosing the settings portion of the pane:
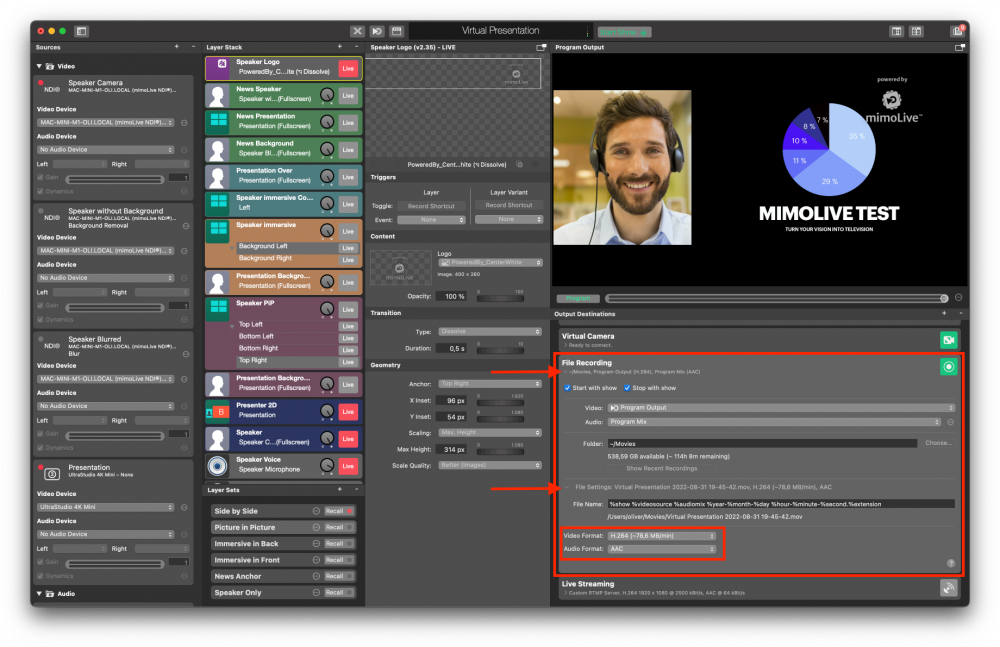
Choose ProRes 422 from the Video Format popup and Linear PCM from the Audio format popup if you want to use your recording in a video editor such as Final Cut Pro, DaVinci Resolve or Adobe Premiere for example to create a sizzle reel.
Preflight Check List – Avoiding and troubleshooting common problems
Restart your Mac before each presentation to make sure that the virtual camera driver is reset.
With so many components, there are some things that can go wrong. Following this pre-flight checklist will help you avoid the dreaded „Can you see me?“ and „Can you hear me and the presentation?“ moments that are part of so many online presentations.
Checking your camera
First step is to make sure that the camera you want to use is the one selected in mimoLive. If it is not, check the „Presenter Camera“ sources in the Sources column and make sure that the proper capture device or camera is selected in the „Device“ popup.
If the camera isn‘t showing up in the popup, make sure it is properly connected to your Mac and restart mimoLive.
Checking your microphone
To quickly check your microphone, lightly tap on it and check the „Speaker Microphone“ source in the Sources column. The green levels meter should react strongly to your taps.
Next, check if the mimoLive audio output is selected in the „Microphone“ popup of Zoom or any other platform you‘re presenting to. Make also sure to unselect any Noise/Echo cancellation for best audio quality. This, of course, requires you to use headphones so that your microphone can‘t pick up the audio from the other people on the call.
Checking presentation video and audio
If your presentation video or audio isn’t working, the most likely issue is that the computer running the presentation isn’t set up correctly. Check that the external display is recognised in the Display settings and that the HDMI is selected in the Audio output settings.
Where to go from here?
The Virtual Presentation template is a good starting point to create your very own online brand. Make a copy of the document and feel free to explore the Layer library, experiment with the Lower Third Playground and the Stingers and Outros templates.
If you want to jump ahead, Boinx Software offers two ways to get you to your goals faster:
One on One Coaching
One on One coaching gives you 45 min with an absolute mimoLive Pro who can help you overcome any challenges you might face with mimoLive and show you the best tips and tricks. Book here…
Customisation Service
You do have an idea about what you would look like on Zoom or your Live Stream and want to save time getting there? You can also book the Customisation Service, which includes creating your very own template that has exactly the features you want and is using your own design. Book here…
Get help from the community
If you want to dive deeper into mimoLive and the options you have as a speaker, you can join the community of passionate and very knowledgeable mimoLive users on Facebook or the Boinx Forum.