

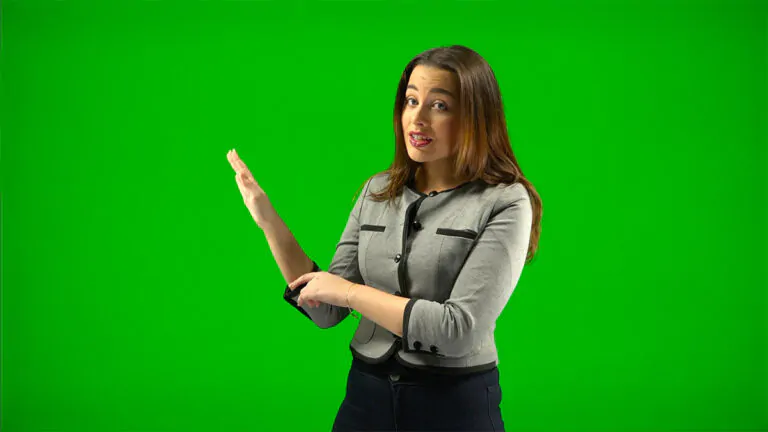
A green screen is used to film objects in front of a flat-screen of a single color. This screen is usually blue or green, hence the chroma key is often referred to as a ‘blue screen’ or ‘green screen’ effect. Real-time chroma keying enables you to turn certain colored areas into transparent. This allows you to layer video sources. It is a visual effects (VFX) technique where two images or video streams are layered—i.e. composited—together. Zoom call has one of its most popular features the Virtual Background, which allows you to display an image or video as your background during a meeting in a Zoom Room.
How does green screen work
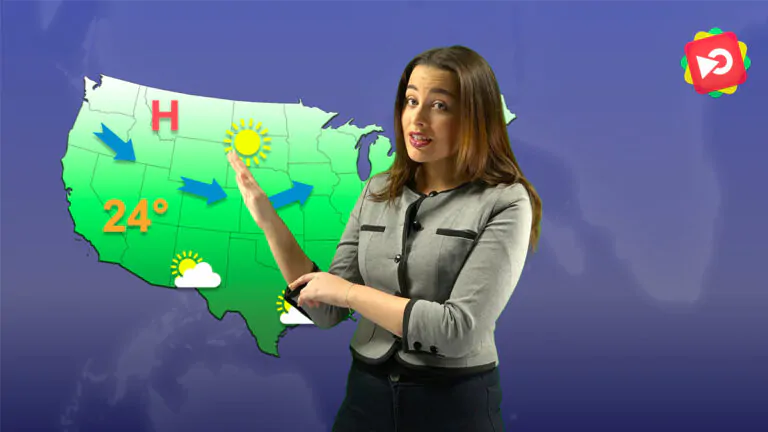
A green screen basically lets you drop in whatever background images you want behind the actors and/or foreground. It’s used in film production (also in news and weather reports) to simply place the desired background behind the subject, actor, or anchor. When a background isn’t available—like a fictional, alien, historic, futuristic, or even just hard-to-access location—the green screen comes to the rescue.
After the footage is shot, the compositors take over. The new background is composited (i.e. two images or video streams are layered together) into the shot. Then chroma key singles out the selected color (usually green) and digitally removes it by rendering it transparent. This lets the other image show through. When used with more sophisticated 3D techniques, this process can add any new element (smoke, fire, rain, etc.) to complex moving shots.
Why Green?
Green is used for the simple reason that it is the least likely color to be found in human skin tones. So, it can be easily removed in post-production, assuming it is going to be a human in front of the screen. It used to be an expensive process in the age of analog film. However, with the advent of digital cameras and video editing software that run on any home PC, almost anybody can use it without breaking the bank. All you need to do is replace the green screen with the background of your choice and presto, you are on Venice or the Martian surface.
But green doesn’t work for everything. You wouldn’t be able to film Kermit the Frog against a green screen—he’d disappear! In this case, you’d typically use a blue screen, the “second-in-line” color.
The key rule is no matching colors. The background has to be a completely different color from the subject. Otherwise, if let’s say your actor is wearing a bright green tie in front of a green screen, he’ll end up with a transparent strip down his chest where the tie is supposed to be!
Green vs blue screen
With the advent of high-definition digital cameras, chroma key is processed the cleanest with the highest luminance. As a result, you will be able to pull off a clean key without any noise, and often, without complicated lighting setups. On the other hand, green is also quite bright. This leads to more spills, and the color green might reflect and bleed over to the person in front of it. This can be quite tricky when you have to key it out in post-production. To avoid this problem, make sure that there is enough distance between the background and the person in front of it.
Green is also an excellent choice if you are compositing your video in a daytime background. The leftover greens blend much better with the daytime footage. However, it can be quite challenging if you want to blend green against darker backgrounds.
Blue screens need twice as much light as green screens, quite often one whole f-stop. The difference in luminosity also causes much less spillover of color. Blue screens are ideal for replicating nighttime or darker conditions. The color correction against blue screens is also much cleaner than their green counterparts. Green spills can lead to messy colorwork in post-production that can eat up a lot of your time in the editing bay. But remember, no matter what screen you use, make sure that you shoot in an uncompressed format. It will ensure that you have more data in your shot and will make it much easier when you have to key out the footage in post-production.
How to set up a Green Screen shot
No green or reflective surfaces: Avoid green like the plague. Don’t have the subject wear or hold anything green or else the areas will be transparent once chroma-keyed. Reflective materials are also a no-no. Shiny objects (e.g. glasses, large jewelry, props, etc.) will pick up the green from the screen and will also be rendered transparent. Very small jewelry is usually okay though.
Have makeup available: You might need some makeup adjustments because actors can look pale and sickly against a green background.
Allow Depth: For a full shot of your actor, you’ll need to back up the camera to allow the full figure shot. Also, it is recommended that you maintain good separation between the subject and the green screen, which is usually at least 6 feet to avoid “spill”. Depending on the lens, you’ll typically want 25-30 feet depth for a full-length shot that doesn’t shoot off the edges of the background.
Use a “coved” green screen for best results: To show your actor/subject from head to toe, the green screen has to continue down the wall and onto the floor under their feet. A cove (a curved corner where the wall meets the floor) will smooth out the transition from the wall to the floor. This is a great way to avoid shadows and hard lines that cause gradient changes in the green background.
Lighting Setup
While setting the lighting for green screens you need to look out for a few factors that can mess up your shot and give you a lot of trouble in post-production. The best way to avoid this is to light the setup properly and stick to it. Let us take a look at some basic lighting principles and the types of lights that are the best for green screens.
- Setup the green screen in such a way that it is as smooth as possible and stretch it out to get rid of any wrinkles. Alternatively, you can hang it up as high as possible so that the weight of the cloth pulls out all the wrinkles. Look out for any big marks or scuffs on the walls or the floor of the green screen studio.
- Create a soft and even light over your green screen (no shadows, no hot spots).
- Make sure that you light the green screen a couple of lighting stops below the subject. It is not a good idea to blast the screen with a lot of light, as it can cause the green light to bounce off the screen onto the subject. If you light the screen too dark, it will cast shadows on the screen. The best solution is to light your green screen slightly darker than the subject.
- Treat the subject and the green screen separately. Once you have an evenly lit screen, light the subject like you normally would.
- Avoid any shadows. The best way to do this is to make sure that there is enough distance between the subject and the green screen. This might be a bit difficult if you have a small room. Conversely, if the green screen is small and the cameraman wants a full body shot, you will have to move the subject nearer to the screen. You can cut down on the shadows by raising the lights and moving them out to the side. This will throw the shadows to the ground and the edges.
- Shoot at a wide aperture. Keeping the screen out of focus makes it easier for you to even out the inconsistencies on the screen.
Keep the camera still
For simple green screenshots, keep the camera completely static. Lockdown the camera so the subject doesn’t look like it’s vibrating or bouncing against the background when the camera moves even slightly. Zooms also look strange. Your subject will look like it’s shrinking or growing in relation to the background. You can use motion control and motion trackers for more sophisticated 3D shots, but it’s a lot more work for the VFX team.
This is pretty much all you need to know to get started. These tips will help your shoot go smoothly and avoid post-production hassles. With time and practice, filming with the green screen can open up an entirely new, almost unlimited, creative playground.
Original source from https://morningannouncement.com/how-to-green-screen/


