Twitch RTMP fallback

Table of Contents

In case the built-in Twitch streaming doesn’t work, there is always the option to use an RTMP fallback.

How to configure RTMP for Twitch

  1. Add a Live Streaming output destination to your mimoLive document.
  2. Select “Custom RTMP Server”.
  3. Set the “Ingest Server” field to rtmp://live.twitch.tv/app/.
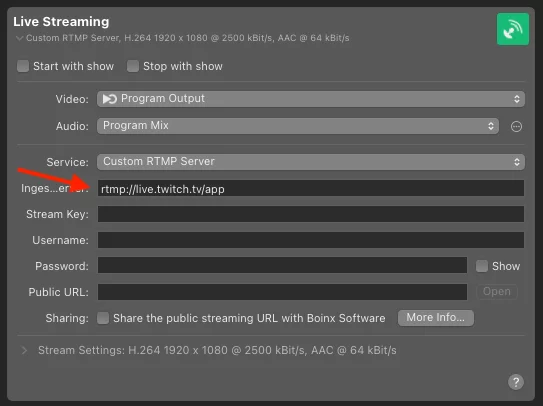
c283c077 8466 4496 8ad1 72b4e765a4f2
  1. Log on to the Twitch web site and navigate to the “Creator Dashboard” using your personal menu on the right hand side.
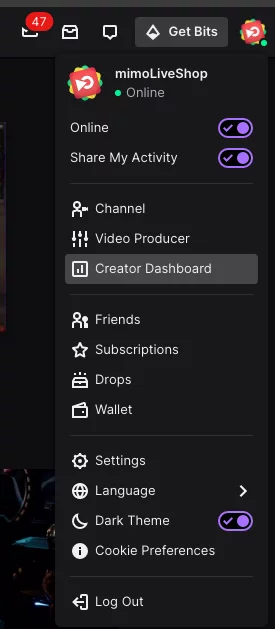
81da5912 a179 4d35 a35f c581e1e094c2
  1. In the Creator Dashboard, select “Settings” and then “Stream”. This brings you to the page with your “Primary Stream Key”.
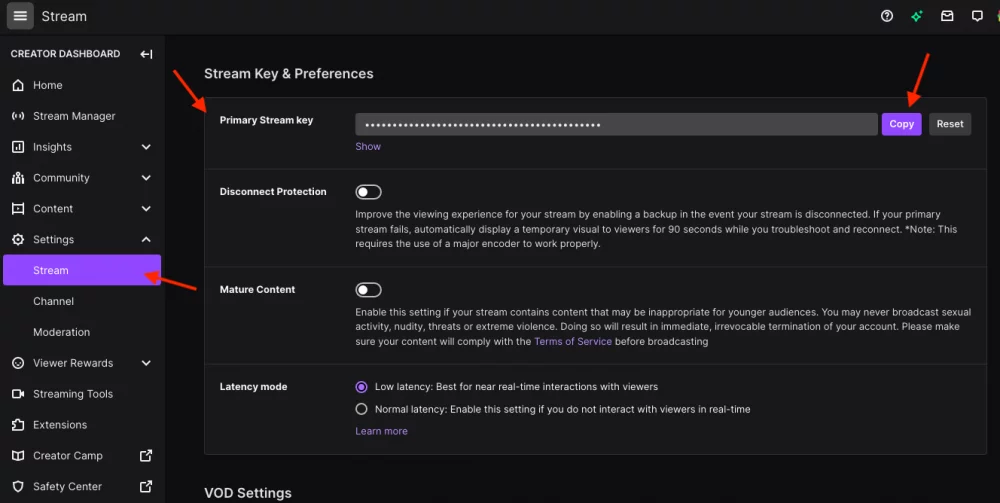
43377c2a 0300 410d b843 9dd584a33d50
  1. Copy the Primary Stream Key and paste it into the Stream Key field in mimoLive. The Live Streaming Output Destination should now show the green state.
  2. Press the Live button of the Output Destination to start the stream. The Twitch stream will be online immediately.

Your Feedback

How would you rate your experience with this feature of mimoLive®?

User Manual: Recent Updates

mimoLive Installation Guide

Learn how to download, install, and activate mimoLive on your Mac. This guide walks you through unzipping the application, moving it to your Applications folder, and entering your license key. It also reminds you about connecting accounts. Once set up, you’re ready to explore mimoLive’s powerful live video production features.

Read More »

Introduction

mimoLive is a versatile live video production software tailored for Mac users, enabling the creation of professional-quality live streams, broadcasts, and presentations. This manual provides comprehensive guidance, offering step-by-step instructions and insights to help users—whether beginners or experienced professionals—maximize their experience with the software. It covers system requirements, installation procedures, and navigation tips to ensure a smooth setup and operation.

Read More »

Choose Language

[language-switcher]