This Step-by-Step guide will show you how to use your own lower third animations from Adobe After Effects in mimoLive. This will allow you to conveniently change title, subtitle and logo of your lower third in mimoLive, without the need to render it every time in Adobe After Effects.
Your animation should have a fixed length and the beginning and ending should allow the text to be either dissolved or pushed in and out. The timing and styling of title and subtitle will be customisable in mimoLive.
You are currently viewing a placeholder content from YouTube. To access the actual content, click the button below. Please note that doing so will share data with third-party providers.
More InformationStep 1: Hiding text layers in your After Effects Composition
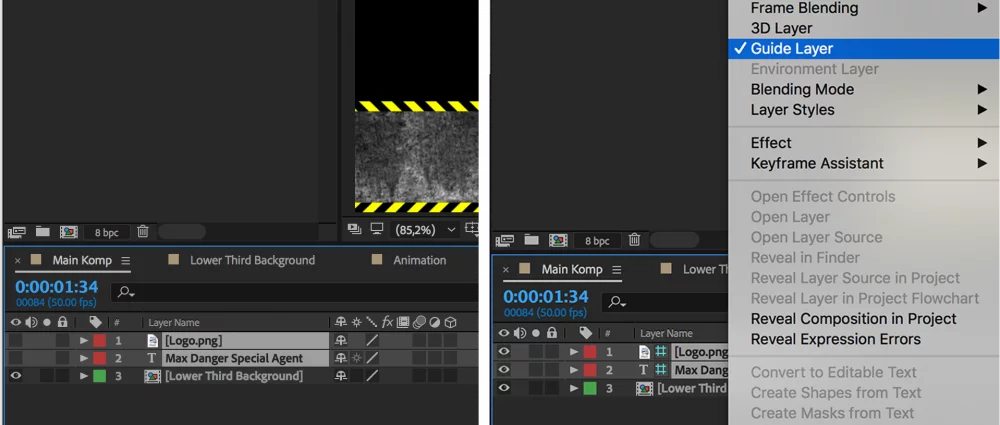
In order to make the text exchangeable in mimoLive, you have to make the text layers invisible before exporting your background animation.
Alternatively you can check the “guide layer” option, to ensure those layers won’t be exported.
Step 2: Export the animation in ProRes 4444 with Alpha Channel
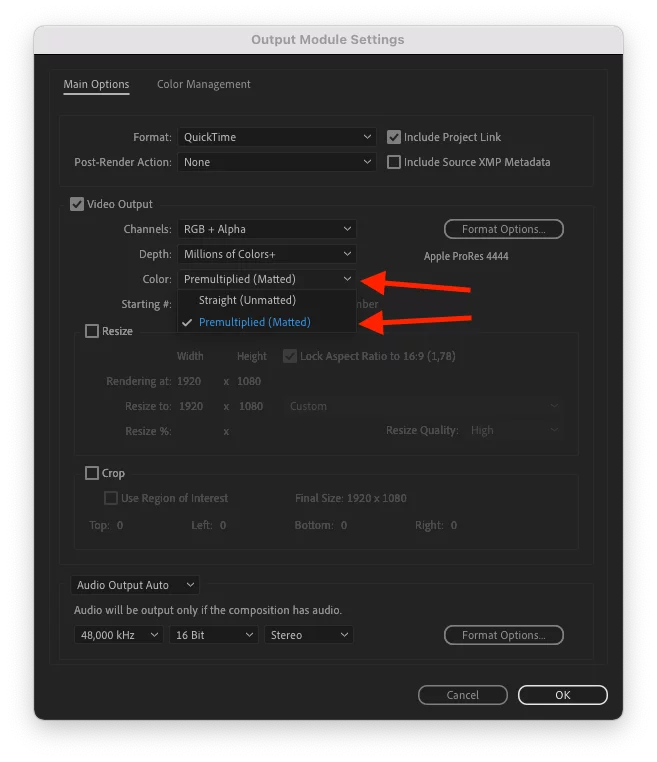
!It is recommended to use “premultiplied” alpha mode instead of “straight” alpha mode.
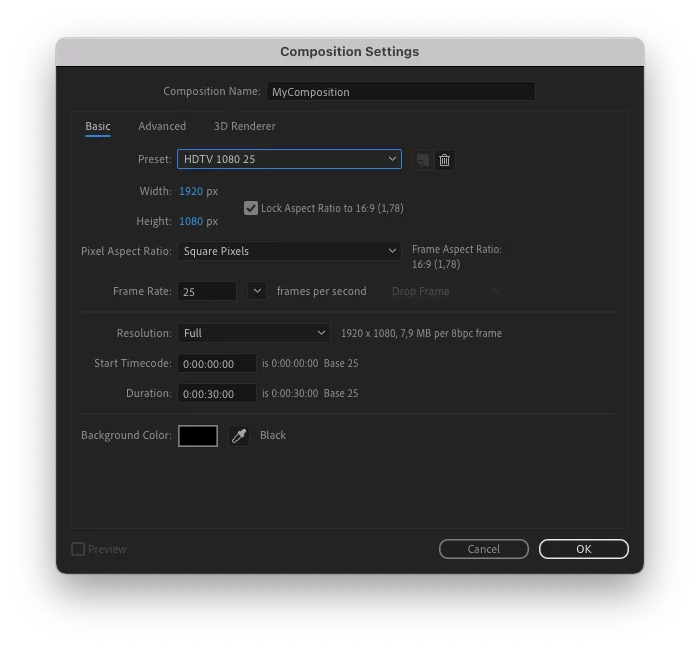
!The background color of the Composition needs to be “Black”. Go to Composition -> Composition Settings to set the Background Color.
1. Click on File -> Export -> Add to Render Queue

2. In Render Queue, click on “High Quality” to get to the “Output Module Settings”

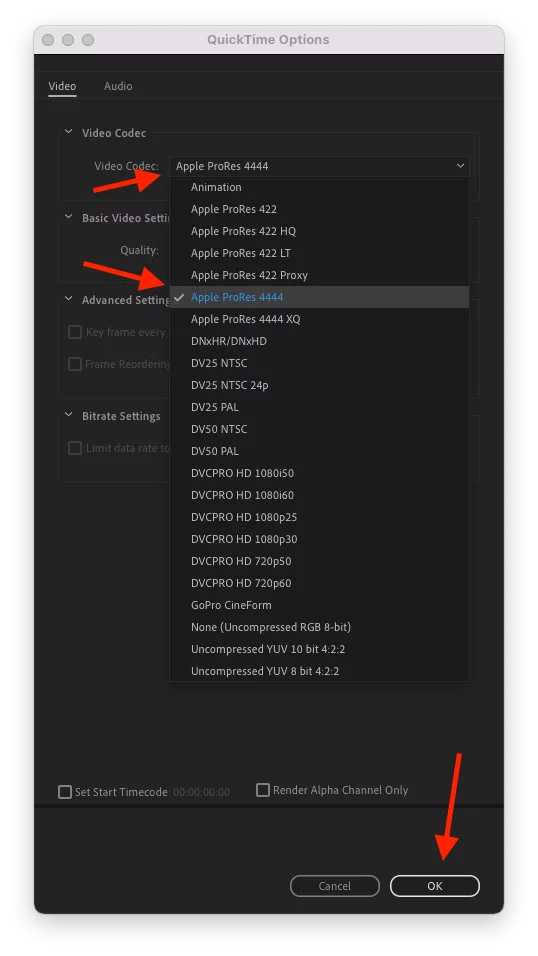
3 Click on “Format Options”
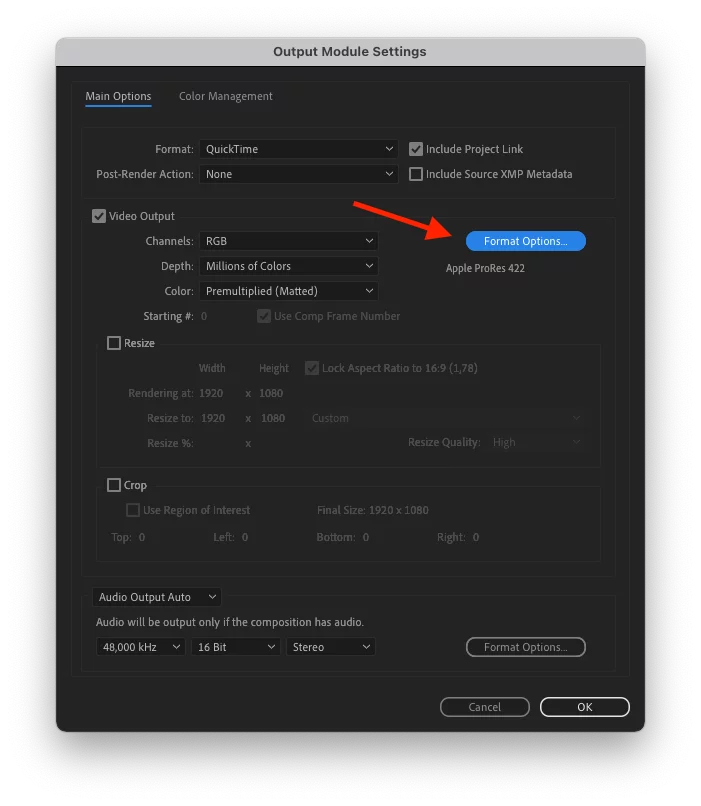
4. Select “Apple ProRes 4444” from the popup menu and click OK.
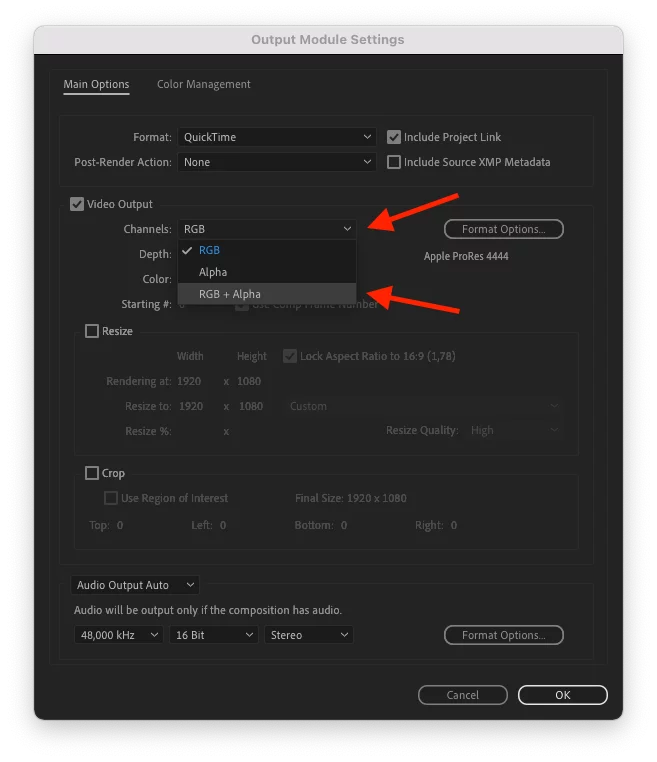
5. Select “RGB + Alpha” from the “Channels” popup
6. Make sure that “Premultiplied (Matted) is selected in the “Color” popup
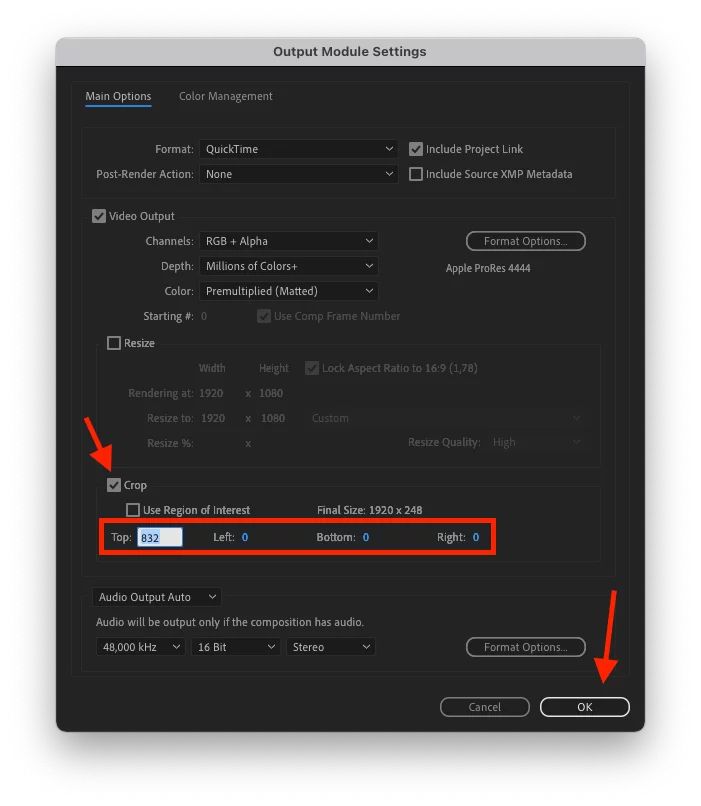
7. Click the “Crop” checkmark, enter the appropriate values to make sure that you’re rendering all relevant content but not more and click OK.
8. Click on “Not yet specified” to set the output file name.

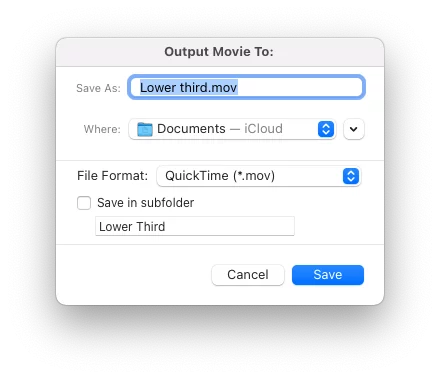
9. Start the export by clicking on “Render” at the top right corner.

Step 3: Setting up the mimoLive document
*Download Demo Files
Download the mimoLive demo document with the lower third as described below.
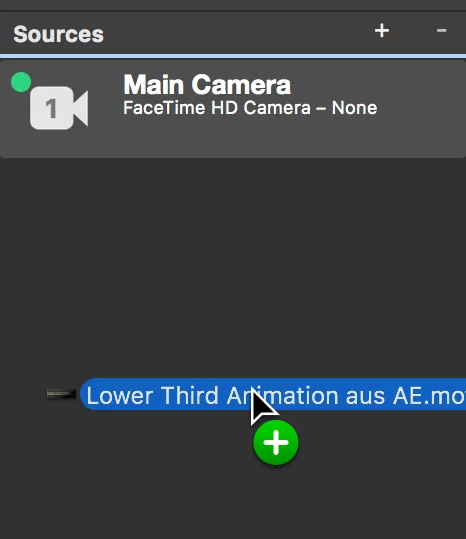
1. Drag your exported animation from the finder into the sources panel.
You may also want to add a logo in PNG format with alpha channel.
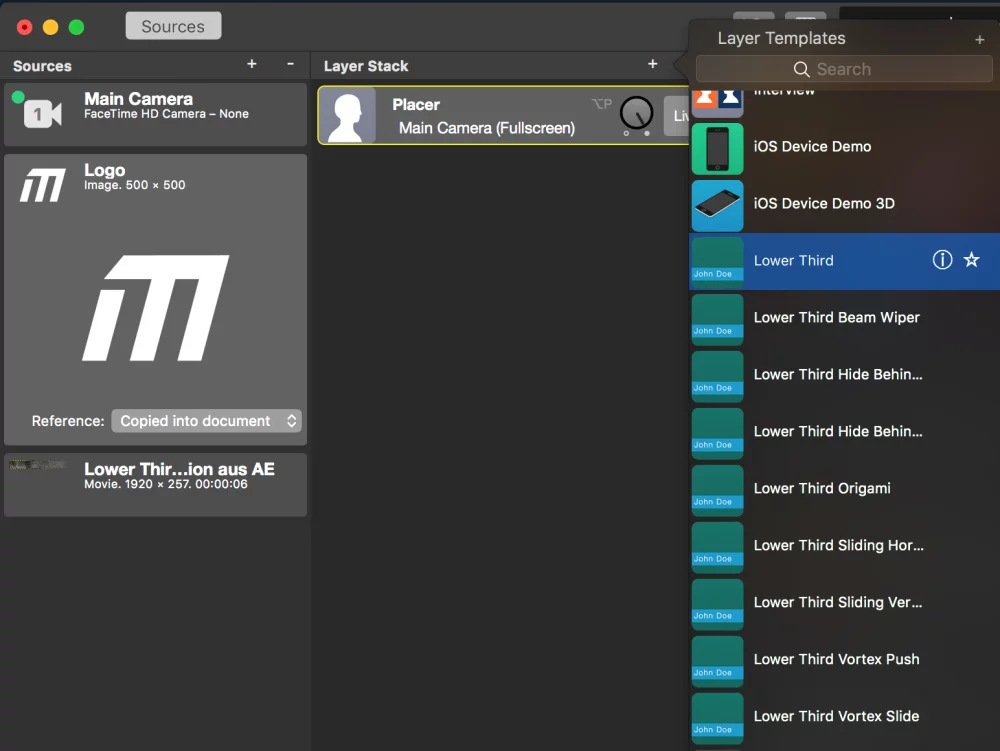
2. Layer Stack:
Add a Lower Third layer.
There are also other customizable lower third animations available, but in order to work with your own animation you have to choose the first one.
3. Content:
Enter Title and Subtitle. You can leave the subtitle blank if you so desire.

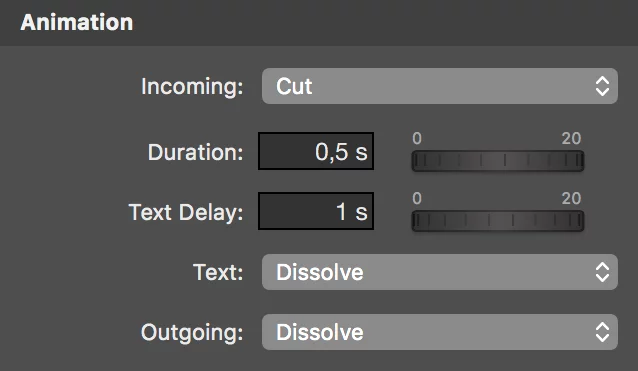
4. Animation:
Set Incoming to “Cut”, so the background animation starts right away.
Set Text to “Dissolve” or „Push“
.
Text Delay starts the text fade-in delayed, so your „in-animation“ can finish before the text appears.
“Duration” sets the length of the text fade.
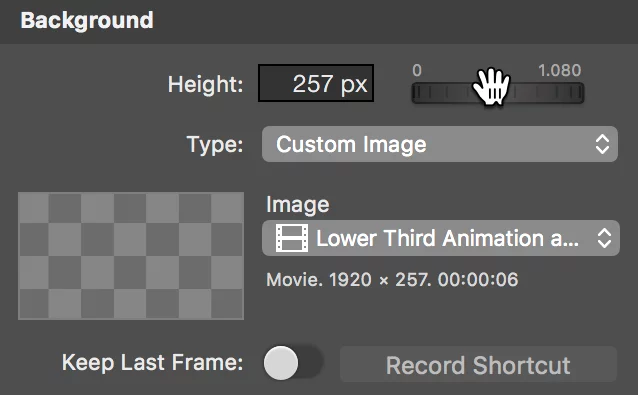
5. Background:
Select Type: “Custom Image”.
Image: Set your own Lower Third Animation.
Set Height to your animations height (257px).
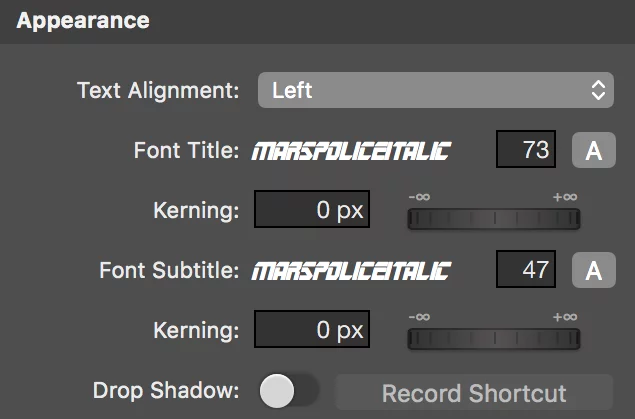
6. Appearance:
Customize your text style and layout.
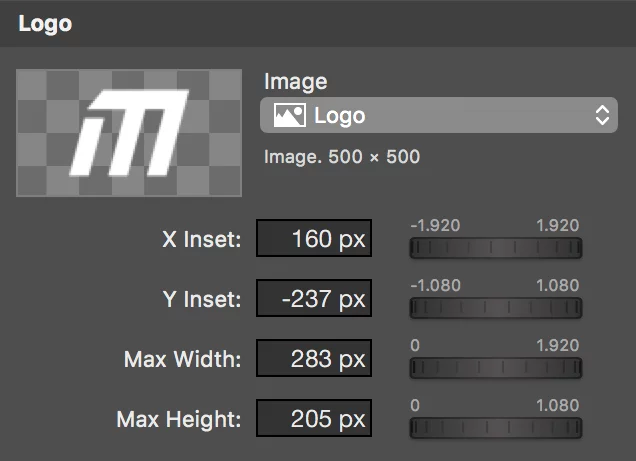
7. Logo:
You can add your Logo in PNG format with alpha channel.
