
The Virtual Audio Device allows you to route audio between mimoLive and other applications. You can use it to send audio from mimoLive to external tools for mixing, processing, or applying effects. Conversely, it can also be used to route audio into mimoLive from sources like YouTube videos in Safari, PowerPoint or Keynote presentations, or other apps that output audio.
How does the virtual audio device work in mimoLive?
Think of the Virtual Audio Device as a virtual audio cable specifically for mimoLive. It lets you route audio from mimoLive to other applications (like recording software, streaming tools, or audio processors), or into mimoLive from sources such as a web browser, YouTube video, or presentation software. mimoLive treats this device like a standard audio input or output, enabling seamless audio integration across your workflow.
Installing the Virtual Audio Device
The Virtual Audo Device is available in mimoLive 6.6 and newer.
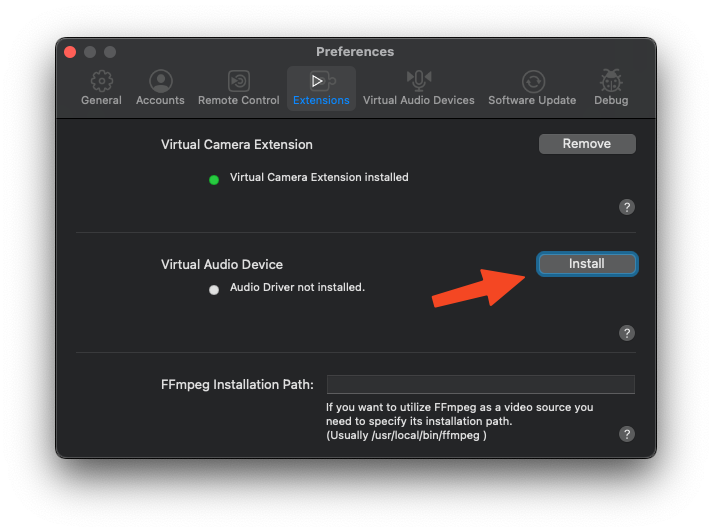
To install the Virtual Audio Device, open Settings in mimoLive and navigate to the Extensions tab. Click the Installbutton next to “Virtual Audio Device.”
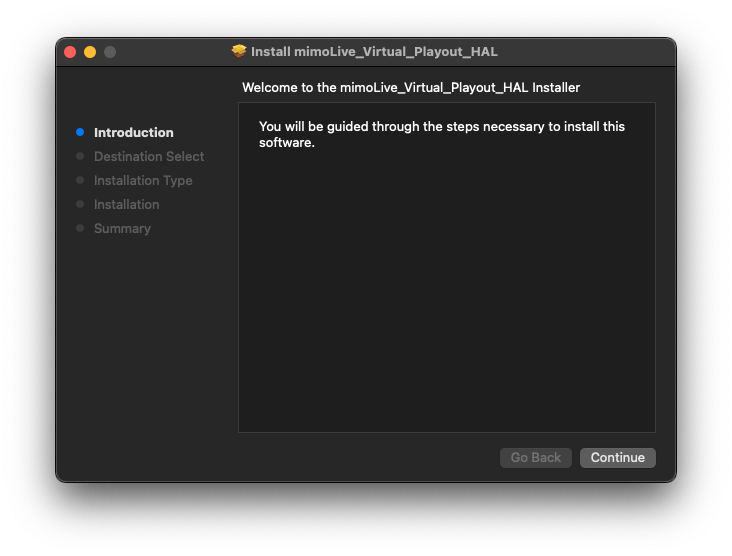
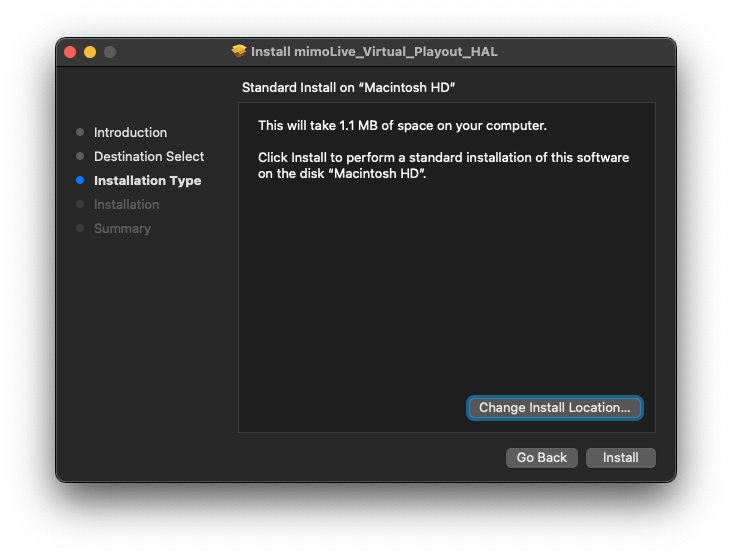
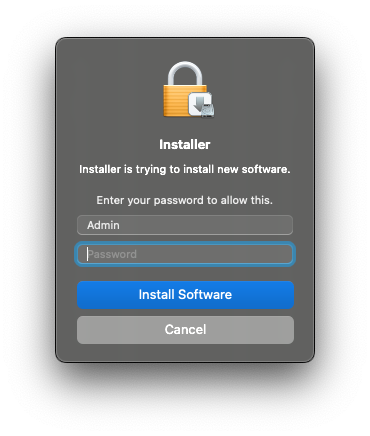
Because this component requires additional system files, mimoLive will launch an external installer. Follow the standard installation steps provided by the installer to complete the setup.
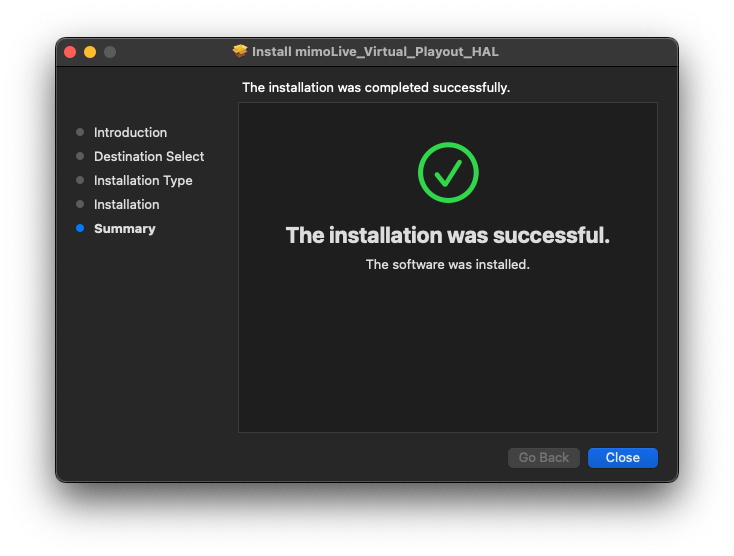
After the installation is complete, restart your Mac to activate the Virtual Audio Device and make it available system-wide.
Managing Virtual Audio Devices
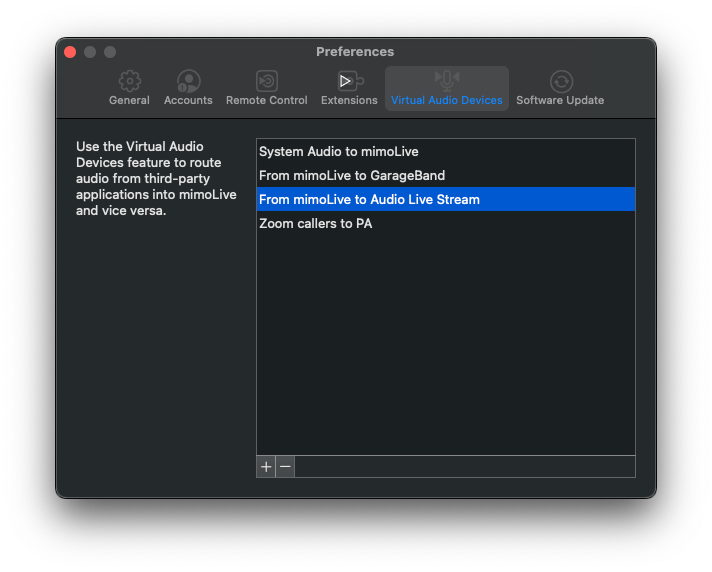
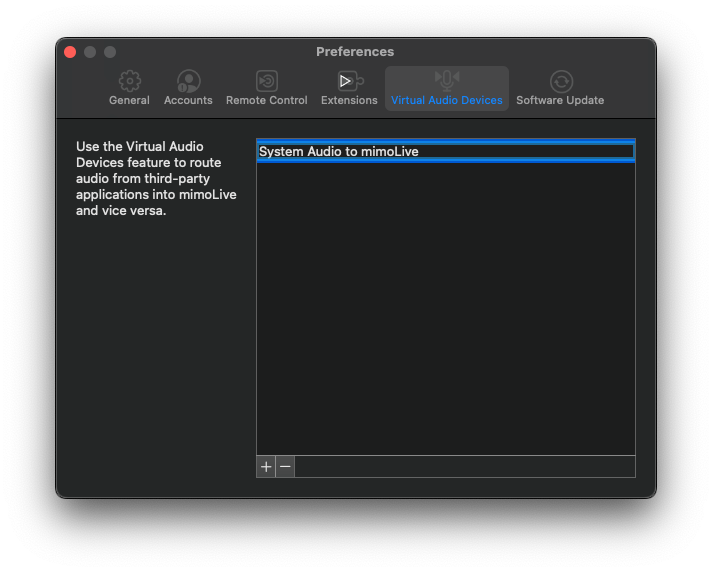
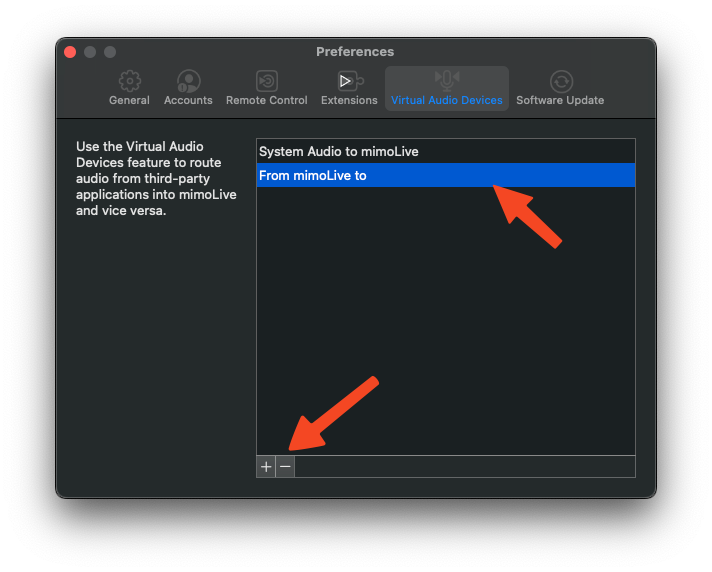
mimoLive allows you to use and manage multiple Virtual Audio Devices simultaneously. To view, add, or remove devices, go to mimoLive > Settings, then select the Virtual Audio Devices tab. This lets you tailor audio routing setups for different production needs—whether you’re sending audio to external tools or capturing sound from various sources.
Adding a Virtual Audio Device
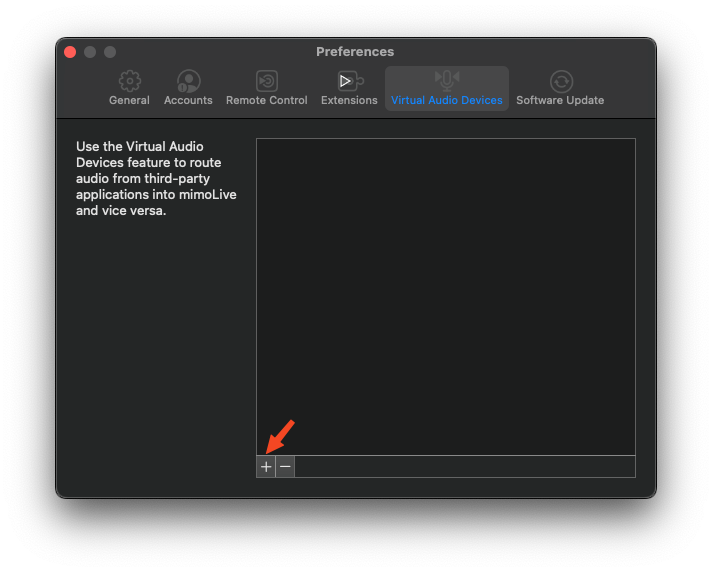
To add a new Virtual Audio Device, click the “+” button located at the bottom left of the Virtual Audio Devices list. This will create an additional virtual device that you can configure and route independently for advanced audio workflows.
Renaming a Virtual Audio Device
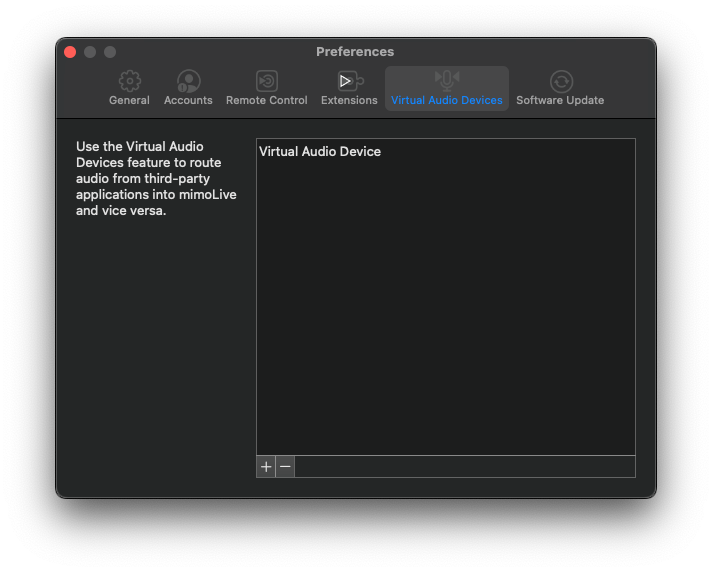
For better organization, it’s recommended to give each Virtual Audio Device a name that reflects its specific purpose—this makes it easier to track your audio routing later.
To rename a device, simply double-click its current name in the list and start typing a new one.
Using the Virtual Audio Device
Once you’ve created a Virtual Audio Device, it becomes available system-wide on your Mac, enabling flexible audio routing in and out of mimoLive.
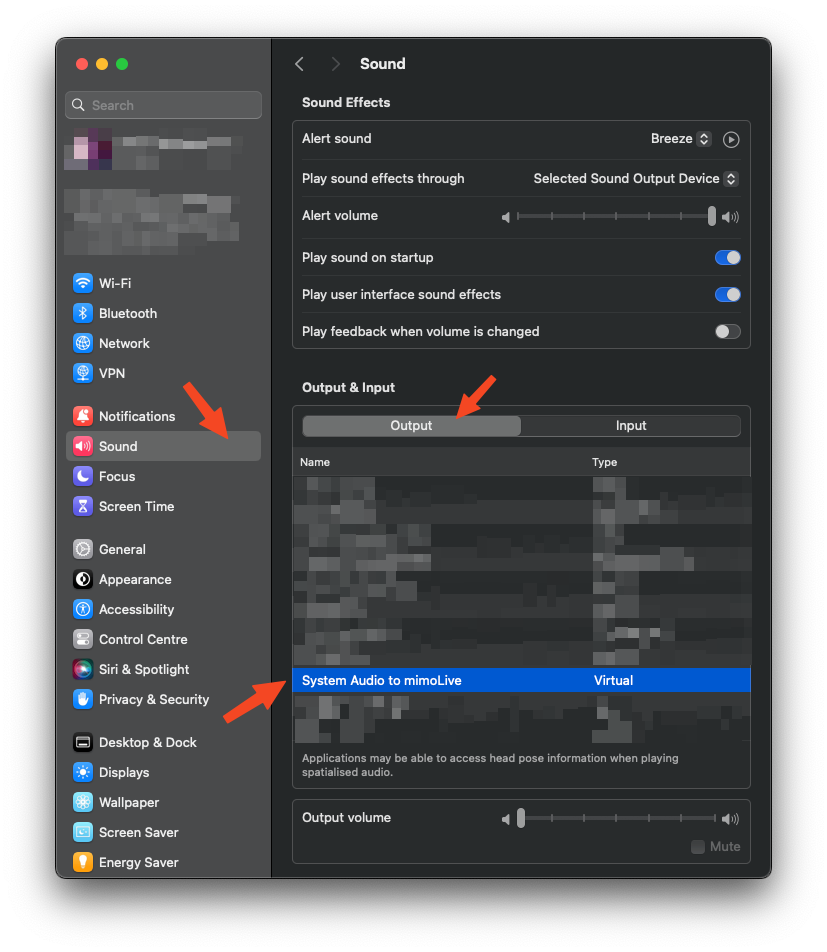
Routing System Audio to mimoLive
For example, you can route your System Output to a Virtual Audio Device, allowing mimoLive to receive audio from any app (e.g., a browser, Keynote, or video player).
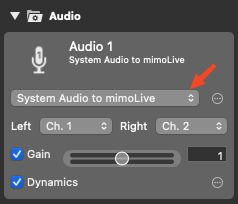
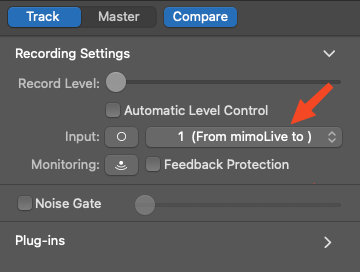
In mimoLive, add an Audio Source in the Sources panel, then select the corresponding Virtual Audio Device to start capturing that audio.
Sending Audio from mimoLive to Other Apps
You can also use the Virtual Audio Device to send audio out of mimoLive. To do this, add an Audio Aux output in the Output Destinations section, and choose the Virtual Audio Device as the target.
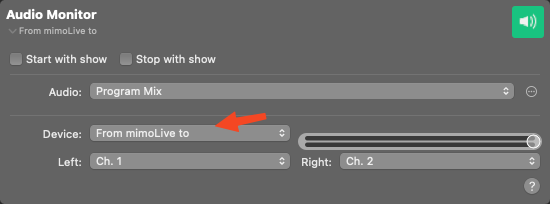
This setup allows other applications—such as GarageBand, OBS, or Zoom—to receive live audio from mimoLive, expanding your production capabilities.
Removing a Virtual Audio Device
To remove a Virtual Audio Device:
- Go to mimoLive > Settings, then select the Virtual Audio Devices tab.
- Click to select the device you want to remove.
- Click the “–” button at the bottom left corner of the list.
Uninstalling the Virtual Audio Device Driver
To completely remove the Virtual Audio Device driver from your system:
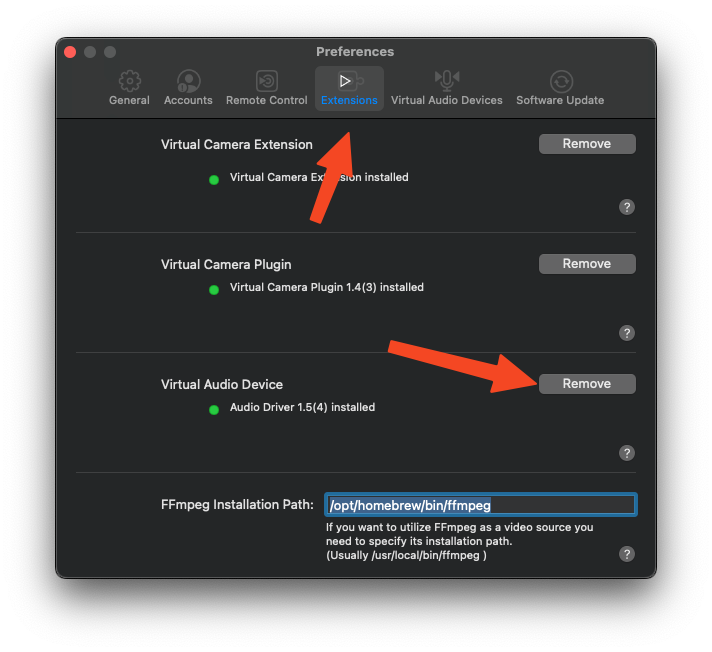
- Open Settings in mimoLive and go to the Extensions tab.
- Click the “Remove” button next to Virtual Audio Device.
A dialog will appear, informing you that manual deletion is required. Click “Open Finder” to be taken directly to the file location.
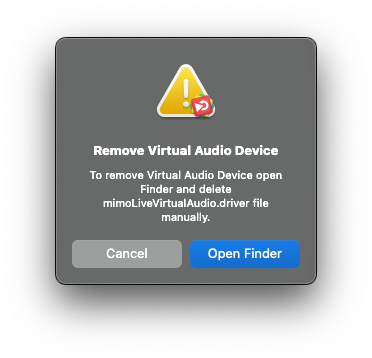
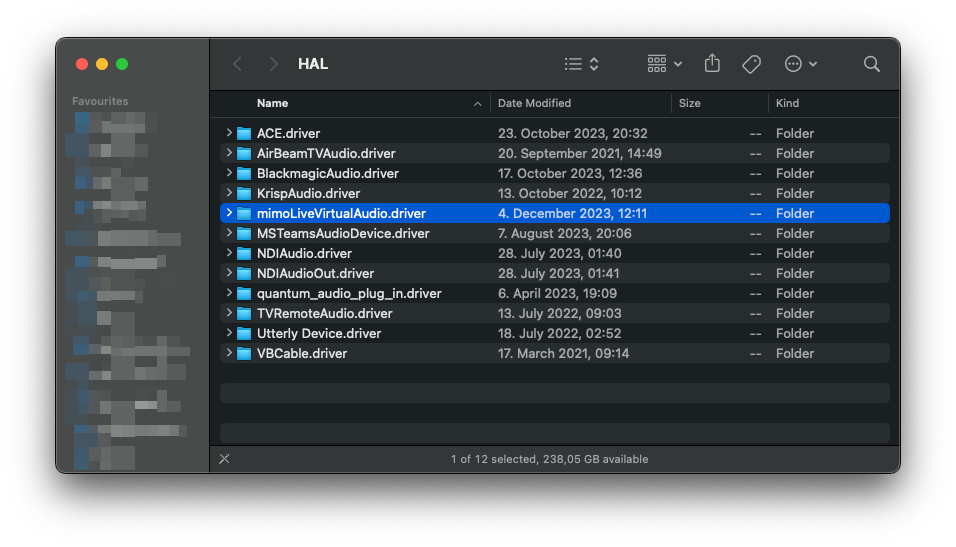
Once Finder opens, locate the mimoLiveVirtualAudio.driver folder.
Drag this folder to the Trash to delete it.
Finally, restart your Mac to fully remove the driver from the system and ensure all changes take effect.