
This page explains how to combine a video and background by adding transparency to the video using the Chroma Keying Pro Filter of mimoLive™ also known as “green screening” or “blue screen”.
To learn more about how to work and set up a Green Screen including correct lighting refer to Chroma Keying.

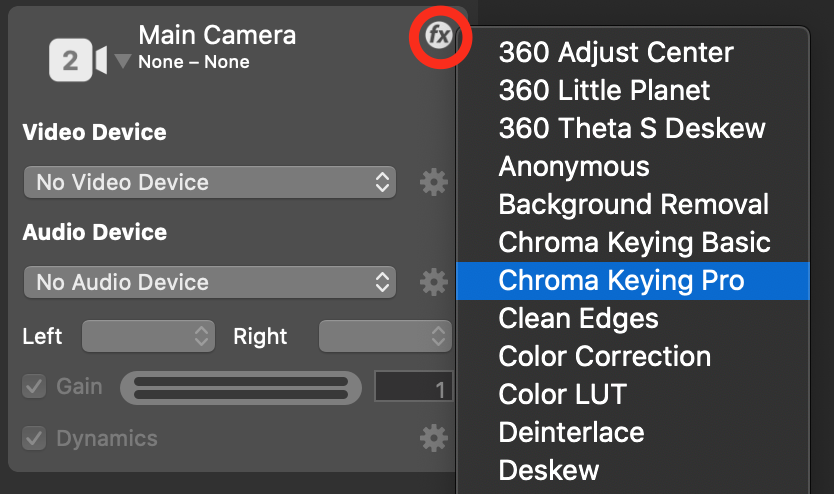
Activate the Chroma Keying Pro
Navigate to the fx dropdown menu and activate the Chroma Keying Pro filter.
Set Up
This is a step by step procedure on how to setup the Chroma Keying Pro Filter:
1. Switch to the “Hue Setup” view by selecting it in the “Mode” popup menu. A rainbow bar with a histogram should appear at the bottom of the filter preview area. The histogram tells you how much of a certain color is seen in the video. The maximum peak should be your backdrop color.

2. Now you can either click with the mouse cursor into the filter preview and select the backdrop color you want to key directly in the video or adjust the “Key Color Hue” value in the parameter list to select the backdrop color. You can also use the white line to fine adjust the color at the bottom.
3. After you selected the hue of your backdrop color you need to specify the cut off. Please use the “Mode” popup menu to switch to the “Cut Off Setup” view.
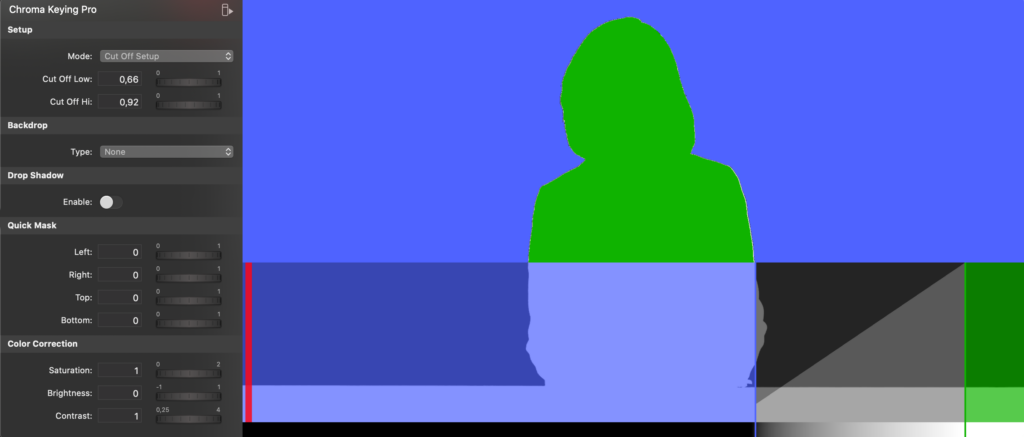
4. Use the “Cut Off Low” and “Cut Off Hi” parameters to narrow down the selection of your color range. You can do so either by adjusting the parameters or by dragging the left and right edges of the ramp in the histogram. Set the left end as close as possible to the brightness of the backdrop so that the background appears blue in the preview window. With the right end, you can cut off highlights. Keep in mind that the closer the left and right ends are together, the less feathering effect you will get (which is important for hair).
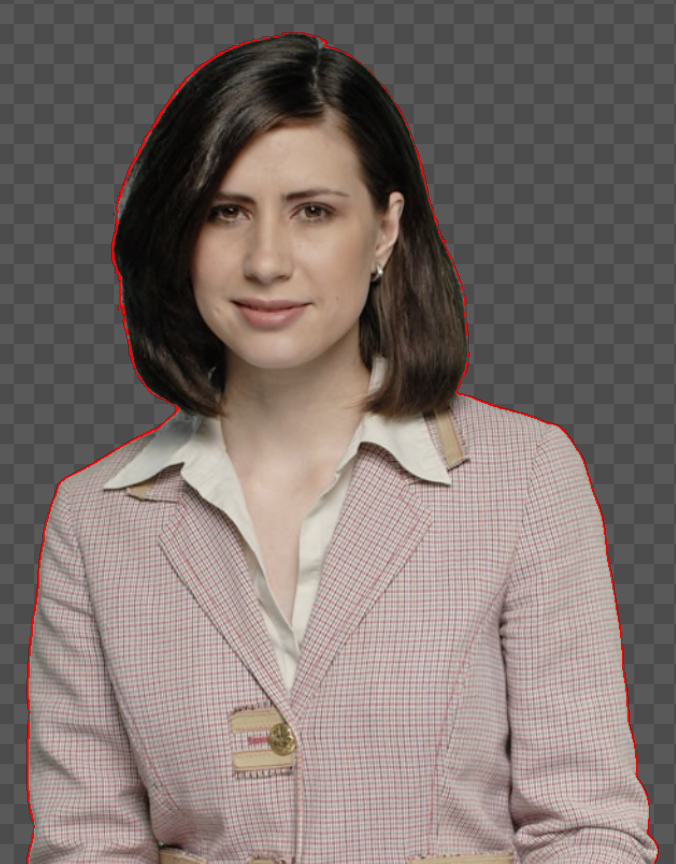
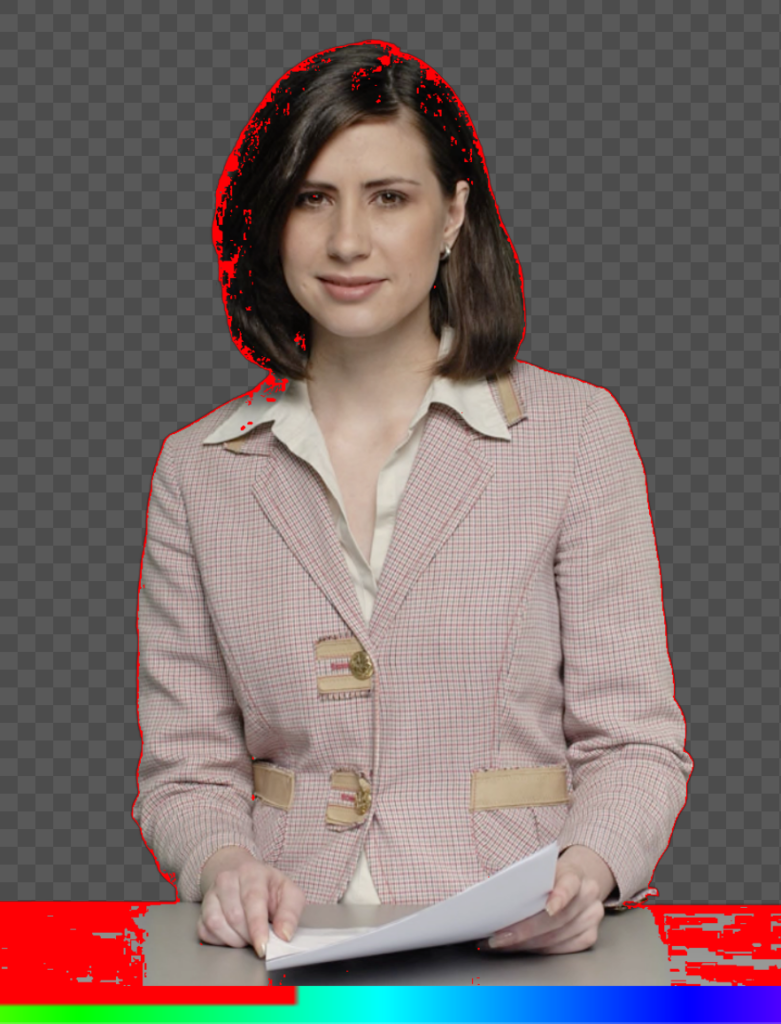
5. If you switch to the “Feather Check” view with the “Mode” popup you can see wether your key is good or has still pixels that aren’t keyed out correctly. The blinking red dots tells you that this particular pixel has some transparency with it. This may not be a bad thing because this is exactly what is desirable for hairs. If there are unwanted artefacts you need to go back to step 2 and refine your settings. The “Feather” value let you widen or shrink the feather area.
6. Finally you may switch to the “Despill Check” view with the “Mode” popup. This view shows you in a blinking manner where the backdrop spilled onto the actor and what the despill feature will change. You can setup the “Despill Amount” (how much the backdrop color should be changed) and the “Despill Color” (the color which is used to replace the spilled backdrop color). It makes sense to set the Despill Color to the same tone that the inserted background will look like in the final production.
Adding A Drop Shadow To Create Illusion Of Depth
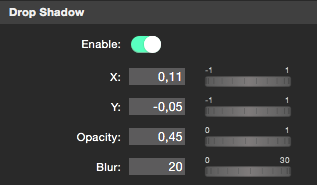
If your final background will be a wall of any kind (e.g. a weather map) you may want to have a drop shadow on this wall to create the illusion of depth. The “Drop Shadow” option will allow you to control the offset of the drop shadow in “X” and “Y” direction as well as the “Opacity” and the “Blur”.

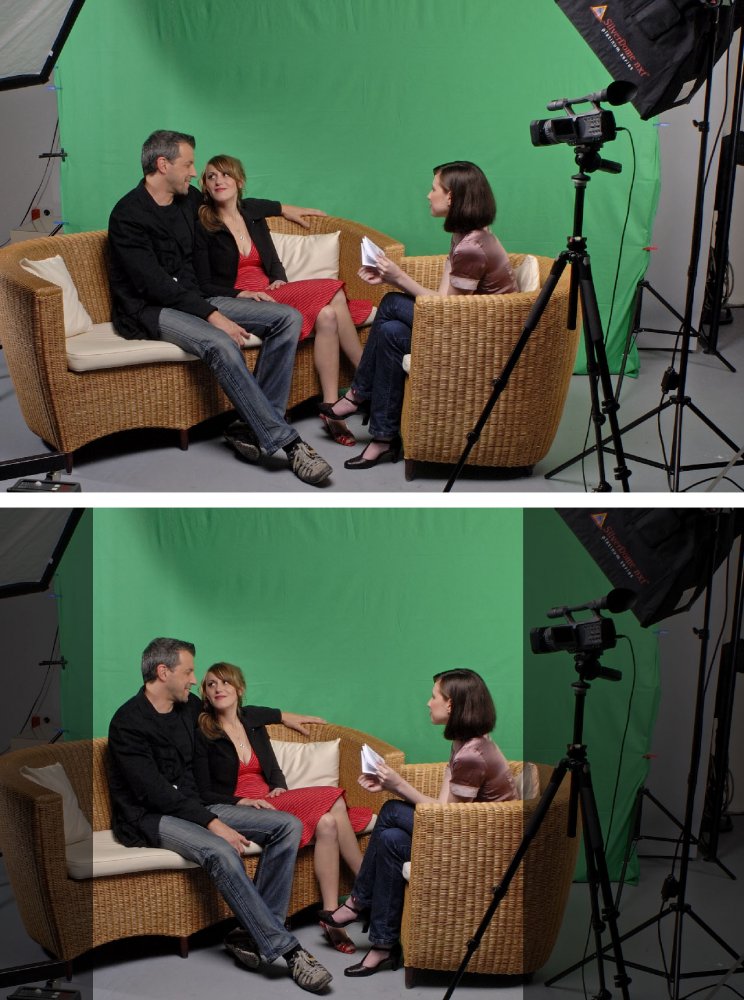
Applying A Quick Mask To Cover Unwanted Content
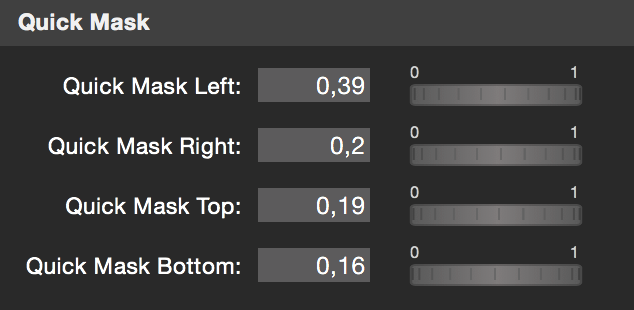
If your video image shows some unwanted pixels at the edges you can crop them away with the “Quick Mask” option. E.g. this is helpful if your chroma key backdrop is not wide enough to fill the complete video frame.
Checking The Result On A Sample Background
In the filter setup you have the option to add a sample background to check if your chromakey works well. Make sure to choose a background that matches the final background of your video production the most. You have the options to have
- No Background
- Custom Image
- White
- Black
- Custom Solid Color
Adjust the Color Of The Video Frame
Sometimes it may be necessary to apply some color corrections before the chroma keyer can do a proper job. In the “Color Correction” section you can adjust “Saturation”, “Brightness” and “Contrast”. However we recommend to fix the backdrop and your camera settings before using this option.