
The Virtual Camera output destination makes video from mimoLive available as a camera to other apps on the same Mac, for example Zoom, Microsoft Teams, FaceTime, Webex, Slack or video calls in a web browser. You can send the program output or any single video source. The sound goes out through a matching virtual microphone.
The virtual camera is a macOS Camera Extension that comes with mimoLive. There is no separate download. You install it once, and macOS asks you to allow it.
Requirements
- macOS 12.3 or later.
- mimoLive is in the Applications folder. macOS only installs extensions from apps in
/Applications. - An administrator account, or its password, to allow the extension.
- For audio: the Virtual Audio Device.
Installing the Virtual Camera Extension
Installing has two parts: mimoLive hands the extension to macOS, and then you allow it in System Settings. You only need to do this once. The steps below show macOS 15 Sequoia and later. For older versions, see macOS 12.3 to macOS 14 Sonoma.
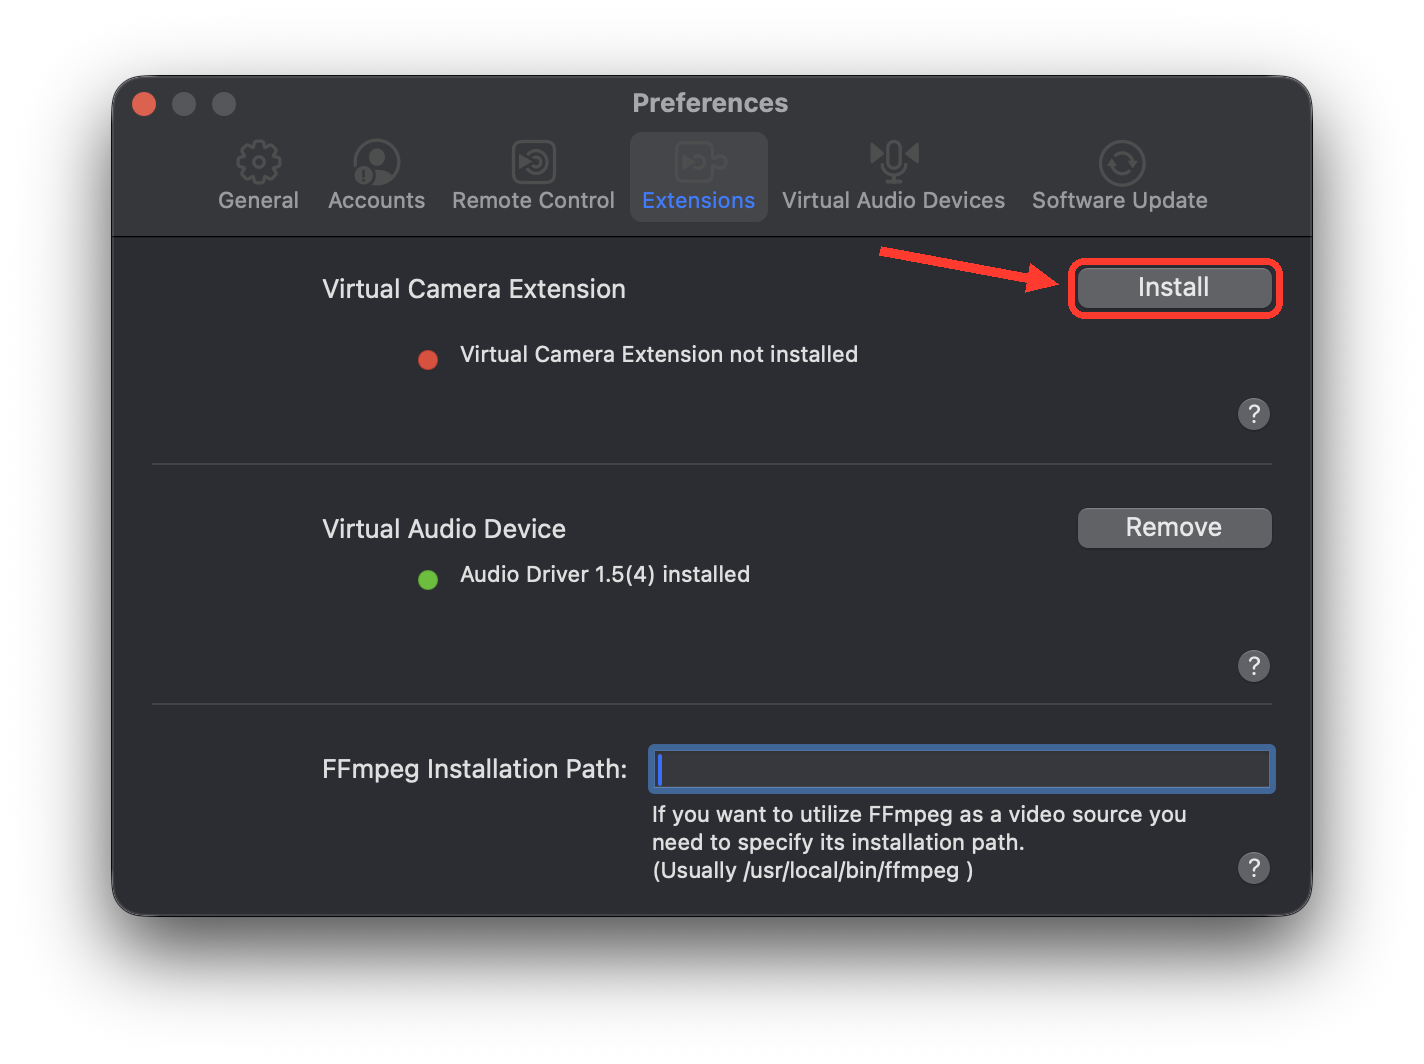
Step 1: Click Install in mimoLive
Choose mimoLive > Settings… and click Extensions. Next to Virtual Camera Extension, click Install.
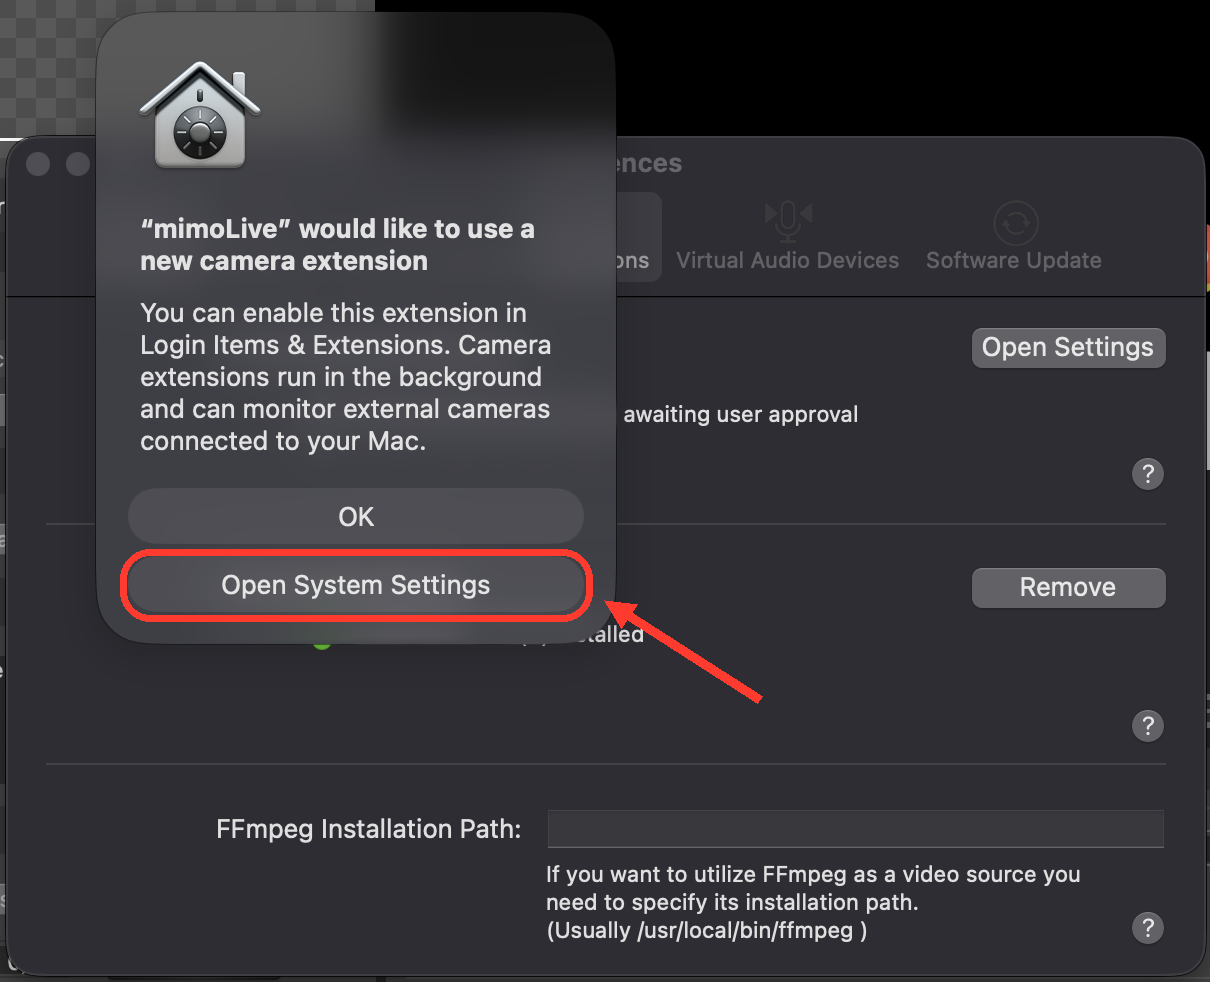
Step 2: Click Open System Settings
macOS shows the message ““mimoLive” would like to use a new camera extension”. Click Open System Settings.
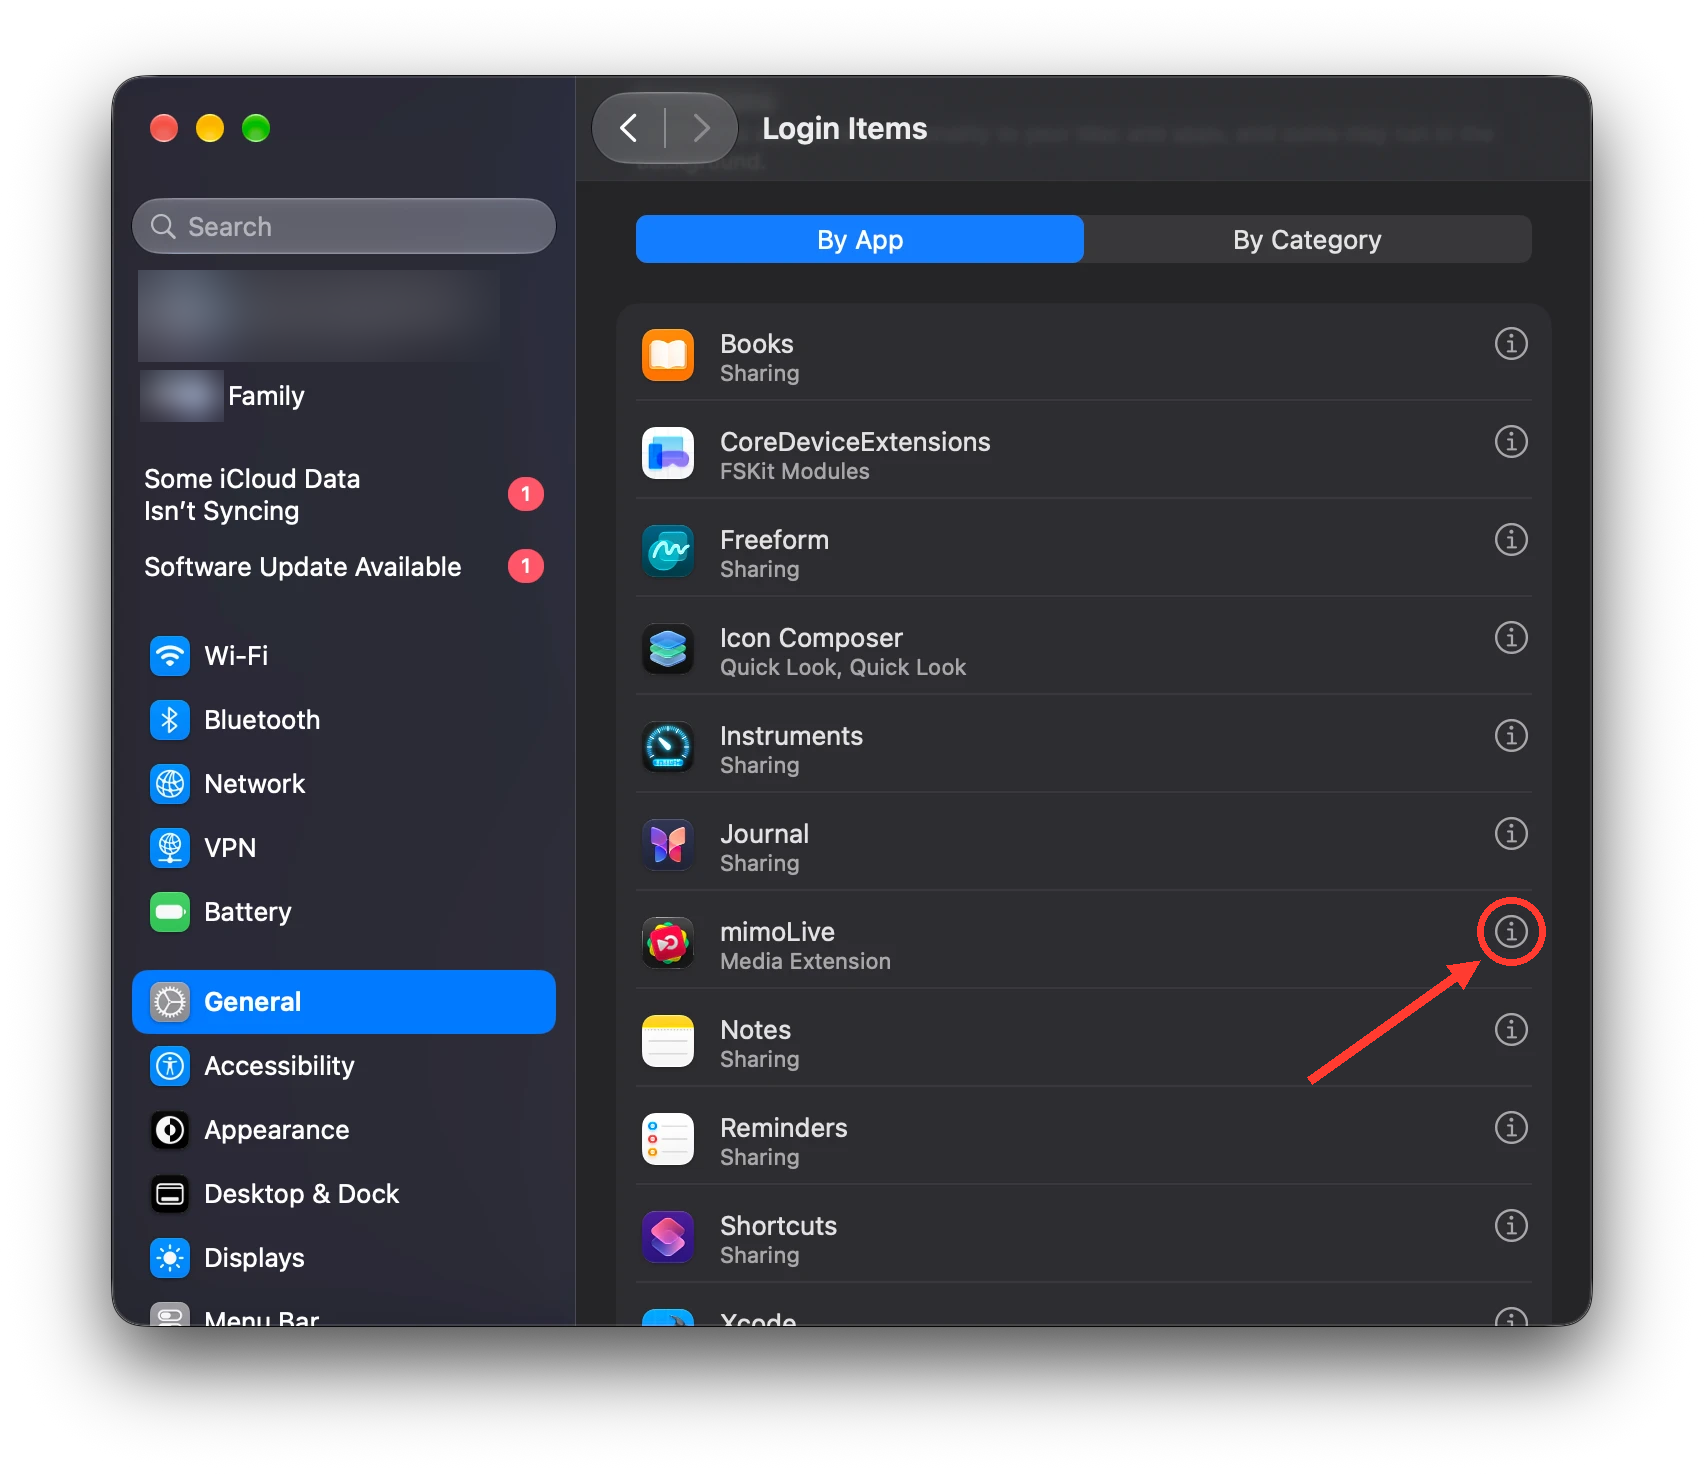
Step 3: Click the ⓘ button next to mimoLive
System Settings opens General > Login Items & Extensions. Scroll down to Extensions and make sure By App is selected. Find mimoLive in the list (“Media Extension” is written below the name) and click the ⓘ button at the right end of its row.
The list itself has no switch. The setting you need is behind the ⓘ button.
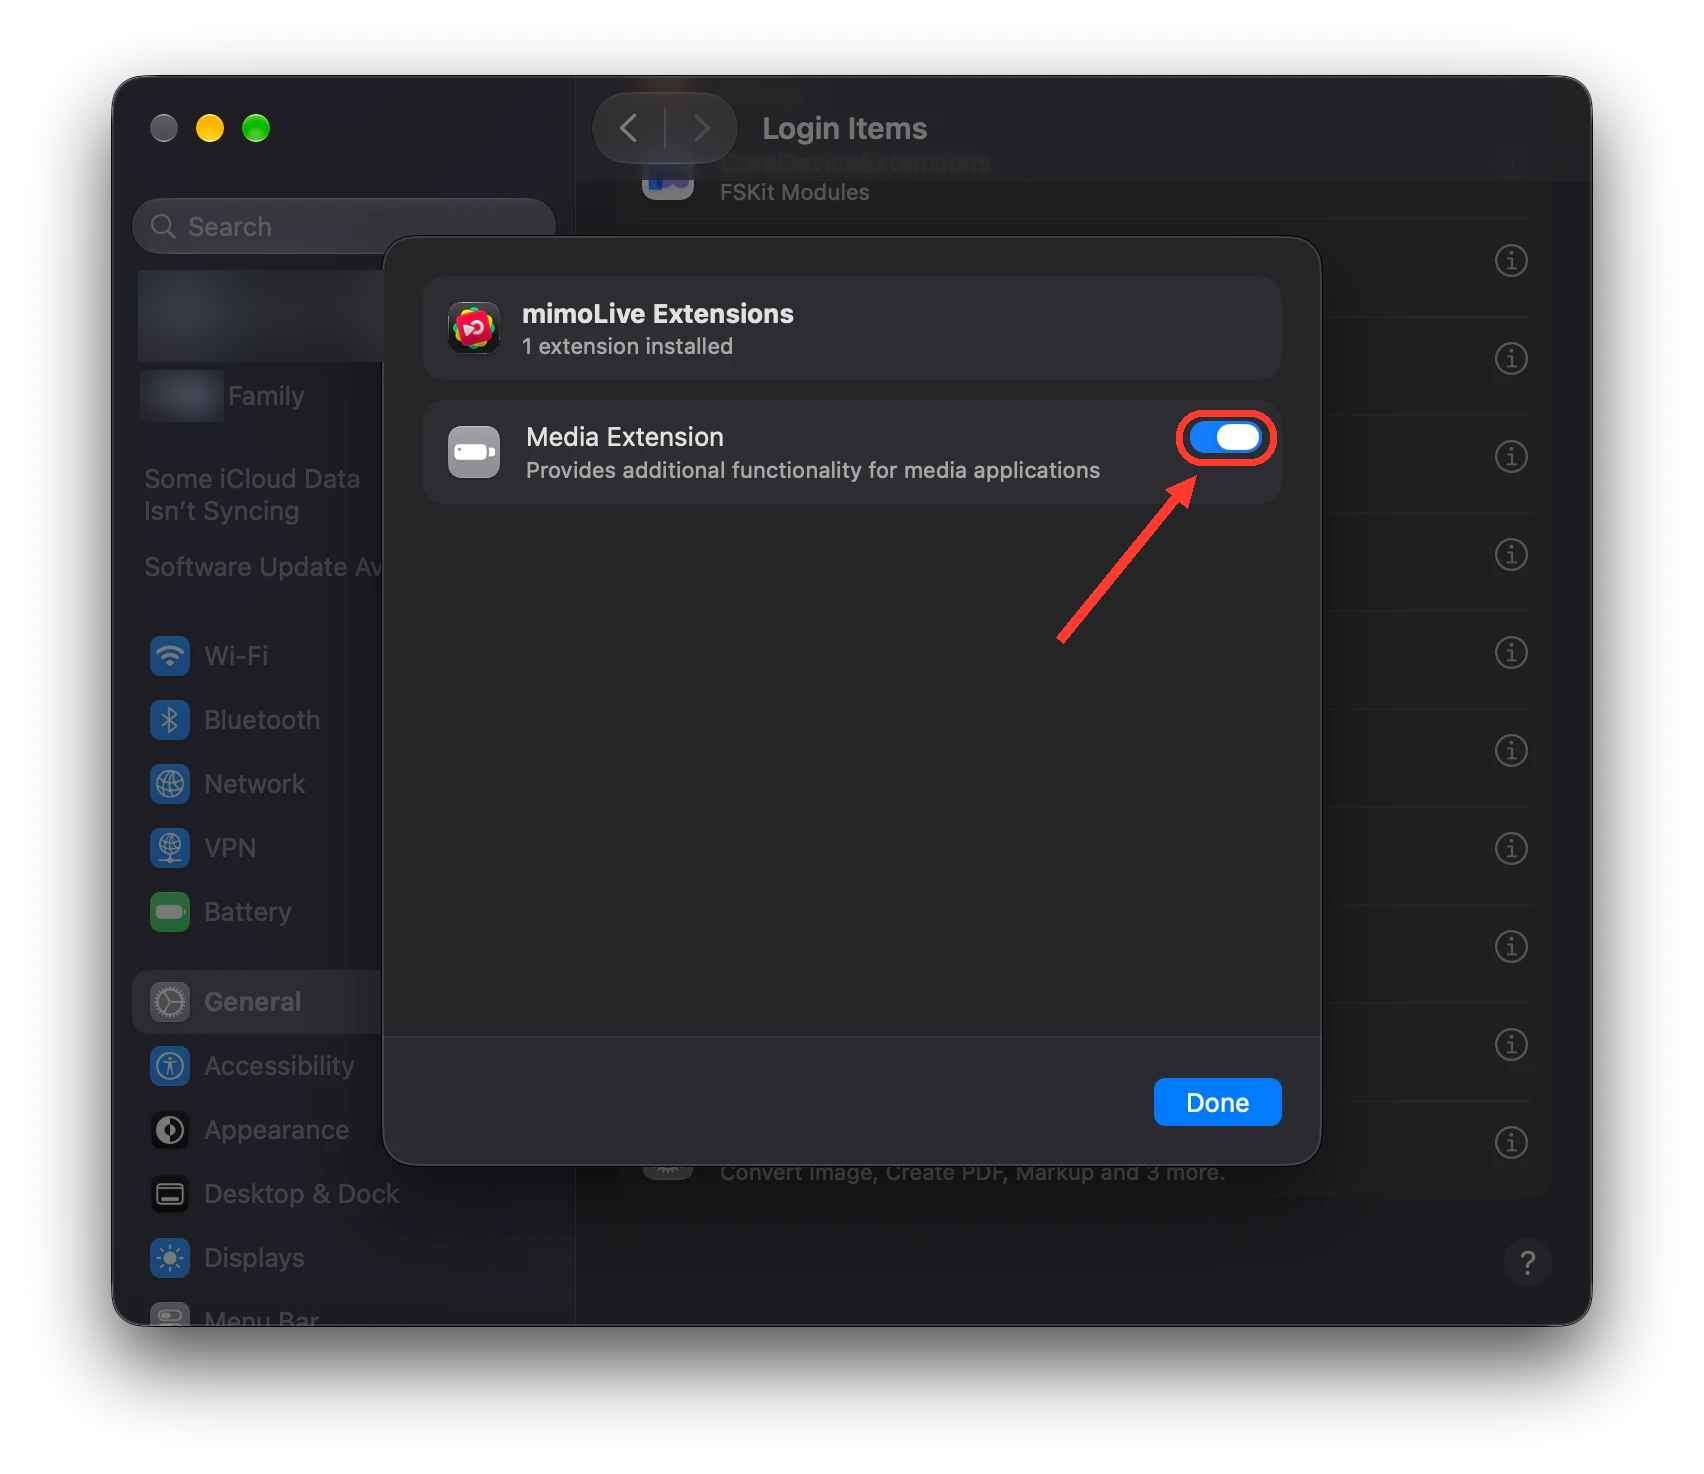
Step 4: Turn on the Media Extension
In the mimoLive Extensions panel, turn on the switch next to Media Extension. If macOS asks, enter an administrator name and password. Then click Done.
macOS 12.3 to macOS 14 Sonoma
On older macOS versions, step 1 is the same, but you allow the extension in a different place:
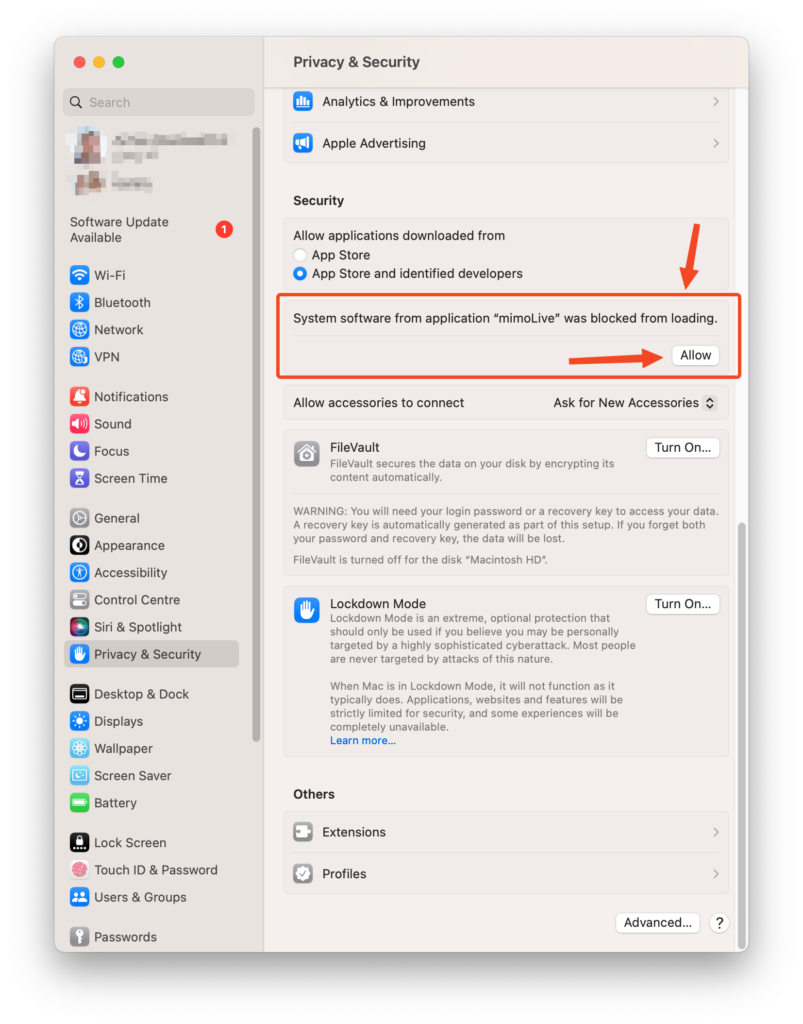
- In mimoLive’s Extensions settings, click Open Settings. This opens System Settings > Privacy & Security (System Preferences > Security & Privacy on macOS 12).
- Scroll down to the Security section. You see a message that system software from mimoLive was blocked from loading.
- Click Allow and enter an administrator name and password.
Checking the installation
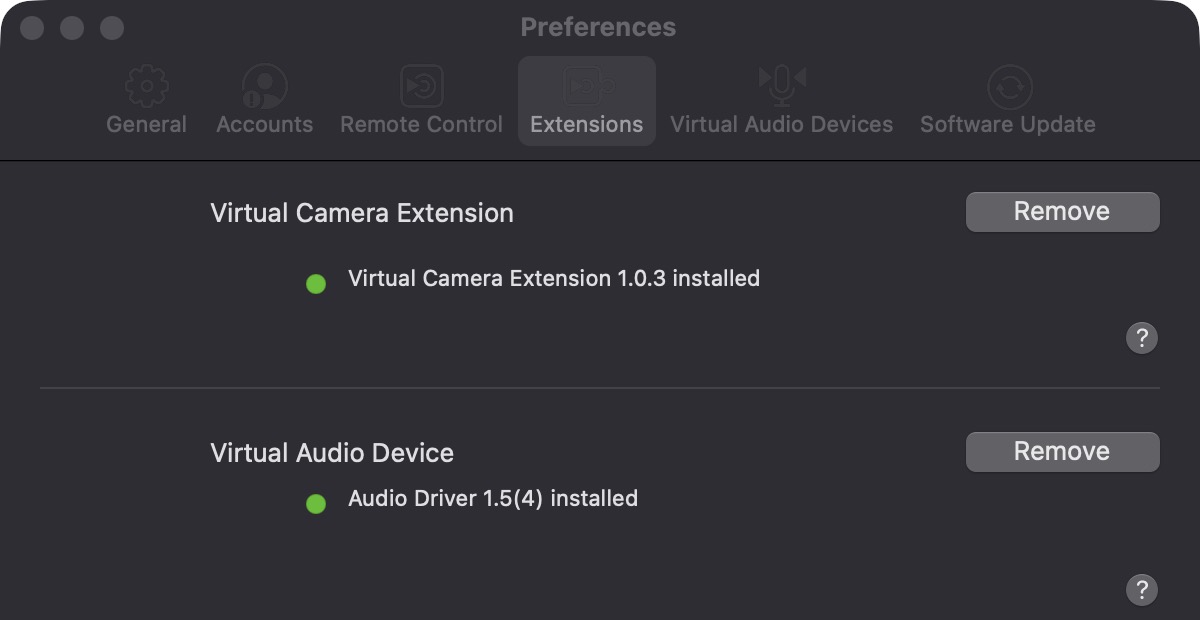
Go back to mimoLive > Settings… > Extensions. A green dot and “Virtual Camera Extension … installed” mean the extension is ready. You don’t need to restart your Mac. Apps that were already open may only see the new camera after you quit and reopen them.
Adding a Virtual Camera Output Destination
- Click the + button above the Output Destinations list in the right column of your document.
- Double-click Virtual Camera. The new destination appears in the list.
- Choose what to send in the Video and Audio Mix menus (see below).
Other apps see each Virtual Camera destination as a camera of its own, named after the destination. The default name is mimoLive Virtual Camera. To offer several cameras, for example a horizontal and a vertical one, add several destinations and give each a clear name. After you rename a destination, select the camera again in the other app.
Settings
- Video: Program Output, or any video source from the Sources Repository. If your document has several program outputs, each one is listed, for example “Program Output – Vertical (1080×1920)”. The camera uses the size and frame rate of the selected video. There are no separate resolution settings.
- Audio Mix: the audio mix sent to the virtual microphone. See Audio Mix Panel to set up audio mixes.
- Preferences button: opens the Extensions settings. The text above it tells you if the Virtual Camera Extension or the Virtual Audio Device is missing or needs an update.
Using the Virtual Camera in Another App
- Open the mimoLive document that contains the Virtual Camera destination. The camera only exists while mimoLive runs with this document open.
- In the other app’s video settings, select mimoLive Virtual Camera (or the name you gave the destination) as the camera.
- For sound, select the microphone mimoLive: mimoLive Virtual Camera. It is only available if the Virtual Audio Device is installed.
For a complete setup with Zoom, Teams and similar apps, see Video Conferencing Software.
Troubleshooting
- The destination says “Extension not installed”: install the extension and allow it in System Settings, as described above. The same message appears while macOS is still waiting for your approval.
- The camera doesn’t appear in the other app: make sure mimoLive is running with the document open. Then quit and reopen the other app. In a web browser, reload the page and check that the website may use the camera.
- The other app shows the mimoLive logo instead of your video: mimoLive isn’t sending video to this camera. Check that a source is selected in the destination’s Video menu.
- There is no sound: install the Virtual Audio Device, select an audio mix in the destination, and select the “mimoLive: …” microphone in the other app.
- “Virtual Camera Extension couldn’t be installed”: mimoLive is most likely not in the Applications folder. The message also shows the reason macOS gives.
Removing the Virtual Camera Extension
Choose mimoLive > Settings…, click Extensions, and click Remove next to Virtual Camera Extension. When you delete mimoLive from the Applications folder, macOS removes the extension as well.
Removing the legacy Virtual Camera Plugin
mimoLive 6.5 and earlier used a separately installed Virtual Camera Plugin. The Camera Extension replaces it since mimoLive 6.6. If the old plugin is still on your Mac, the Extensions settings show a Virtual Camera Plugin section. To remove it:
- Click Remove next to Virtual Camera Plugin, then click Open Finder.
- Move mimoLive Virtual Camera.plugin to the Trash and enter an administrator password. The file is in
/Library/CoreMediaIO/Plug-Ins/DAL/. - Restart your Mac.
The old plugin also installed an audio driver, /Library/Audio/Plug-Ins/HAL/mimoLiveVirtualAudio.driver. Current mimoLive versions use this driver for the Virtual Audio Device, so keep it if you want sound from the virtual camera.