
What are Multiviews in mimoLive?
The Multiview feature provides a comprehensive overview of your video sources and layers. Each mimoLive project includes two independent Multiviews:
- One is located in the middle column of the main document window.
- The other appears as a floating window, which can be repositioned freely.
The floating Multiview is particularly useful for external monitors, allowing you to optimize your workspace by dedicating a separate screen to monitoring sources and outputs.
Enabling The Multiviews
If you prefer to keep everything within a single window, you can enable the Multiview panel in the mimoLive document window:

- Click the left Multiview button located in the upper-right corner of the window toolbar.
- This action opens a new column between the Layer Stack and the Program Out, displaying the Multiview.
The Program Out will be hidden automatically to make space for the Multiview because the Program Out is part of the multiview by default.
Alternatively, you can open a separate floating window with an independent Multiview:

- Click the right Multiview button in the window toolbar.
This floating window can be moved to a second screen, offering a flexible way to monitor video sources and outputs independently.
Use the Floating Multiview Window in Full-Screen Mode on a Secondary Monitor
You can move this window to a secondary display and switch it to full-screen mode by clicking the green full-screen button in the upper-left corner of the window (macOS standard) to maximize visibility and focus. This is especially useful in control room environments or live productions, where monitoring multiple sources clearly and without distraction is critical.
Setting Up The Multiviews
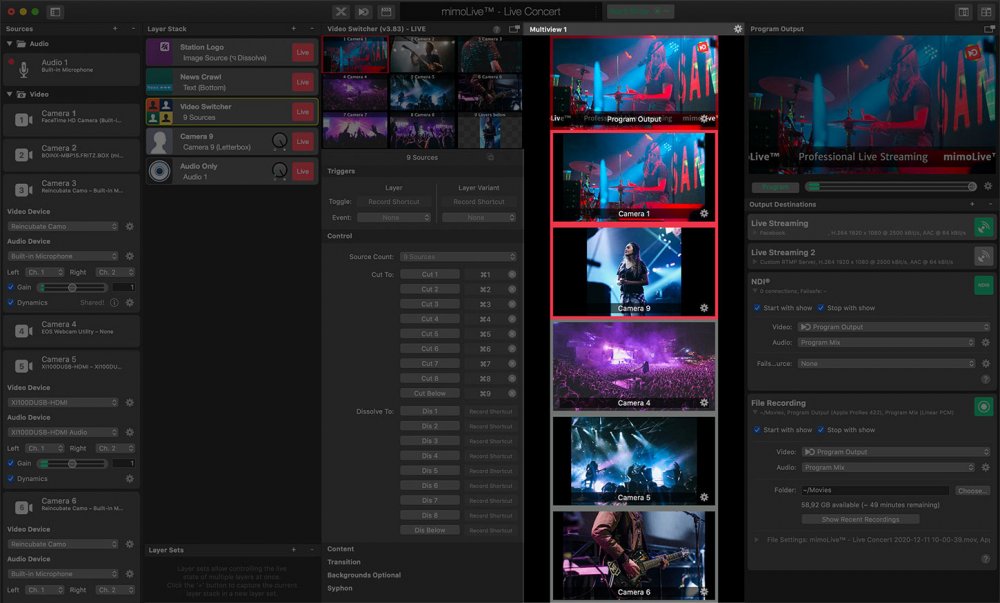
By default, the Multiview displays four video sources, including the Program Out. You can customize the number of views and their layout using the action gear icon located in the upper-right corner of the Multiview panel.
Automatic Layout
When the Multiview Layout is set to Automatic, mimoLive dynamically calculates the size and position of each view to make optimal use of the available space. This mode ensures that all sources are clearly visible, regardless of the number of views selected.
In the Screen Count pop-up menu, select the number of views you want to display in the Multiview.
Enabling the First Screen Exposed option gives priority to the first view. This view will always occupy the top portion of the Multiview, making it larger and more prominent than the others. This is ideal for highlighting the Program Out or another critical source.

Using A Multiview Preset
mimoLive provides several predefined Multiview layouts commonly used in the broadcast industry. These presets offer quick and convenient ways to arrange your video sources for optimal monitoring.
To select a preset:
- Click the action gear icon in the upper-right corner of the Multiview panel.
- Choose a layout from the Multiview Layout menu.
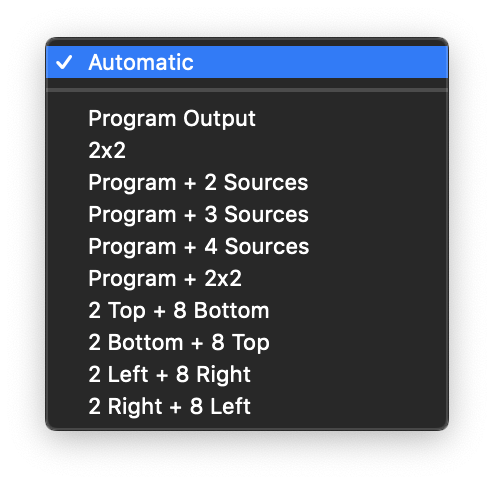
- Program Output
- 2×2
- Program + 2 Sources at the bottom
- Program + 3 Sources at the bottom
- Program + 4 sources at the bottom
- Program + 2×2
- 2 Top + 8 Bottom
- 2 Bottom + 8 Top
- 2 Left + 8 Right
- 2 Right + 8 Left
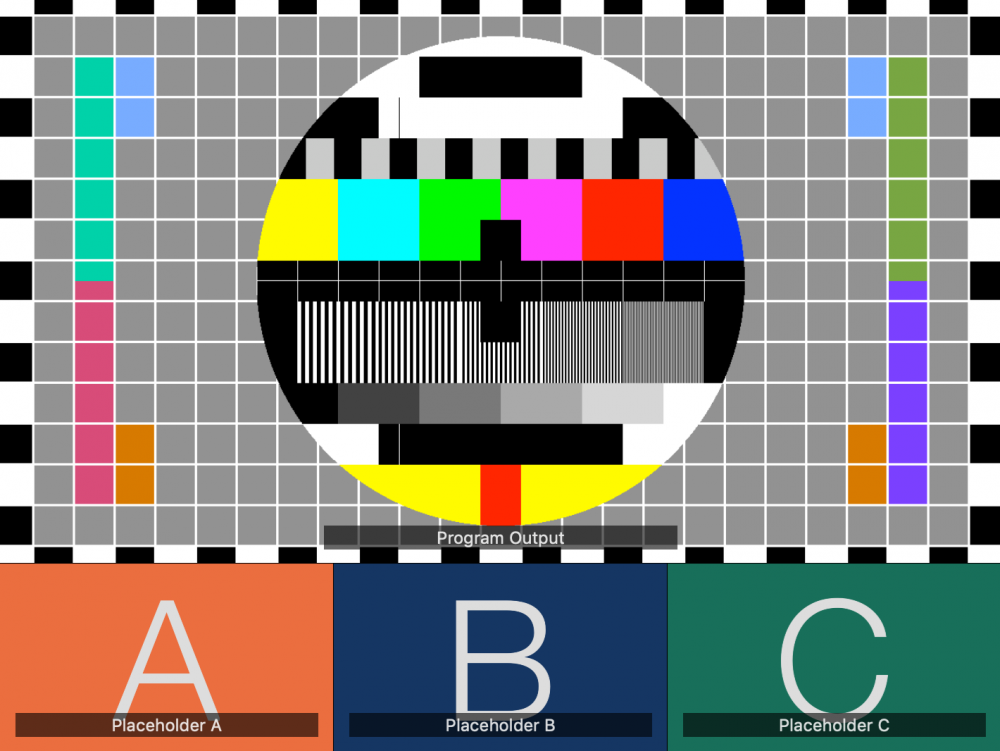
Examples:

Changing The Video Sources In The Multiview
You can easily assign specific video sources or output destinations to each view in the Multiview.
There are two ways to do this:
- Drag and Drop
Simply drag a source from the Source Repository and drop it onto the desired view in the Multiview. Alternatively you can drag & drop Output Destinations from the Output Destination List. - Use the View Popup Menu
Click on the name tag located at the bottom of a Multiview panel. A popup menu will appear, allowing you to select from all available video sources or output destinations.
This flexible assignment method allows you to customize your Multiview layout to suit your live production needs.
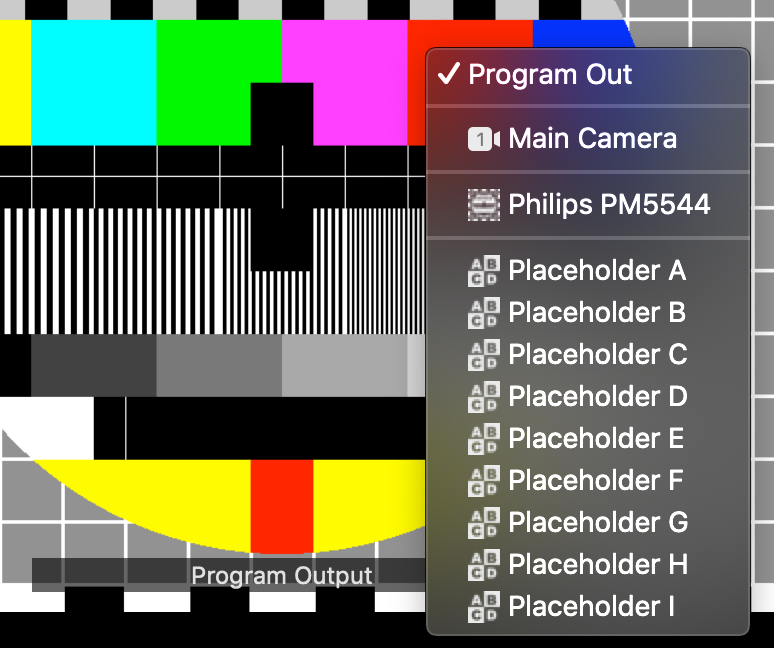
Program Out can only be assigned via the name tag in the Multiview.
Because the Program Out can’t be dragged from anywhere, it must be assigned by clicking on the name tag in the Multiview and selecting it from the popup menu.
Switch Video Sources Without Selecting the Video Switcher Layer
With this setup, you can switch video sources in the Video Switcher layer directly from the Multiview, even if the layer is not currently selected in the Layer Stack.
Optional Overlays in the Multiview
The Multiview can display additional information and controls, depending on the capabilities of each video source:
Audio Meter
The Audio Meter displays real-time audio levels for a video source—but only if that video source has an audio device assigned directly to it. This provides a quick visual reference for monitoring embedded or attached audio from cameras or other sources.
Tally State
The Tally State indicator as a ribbon around the view shows whether a video source is currently live (red) or in preview (yellow). This is useful for production workflows where clear visual feedback helps avoid switching mistakes.
PTZ Controls
If a video source supports PTZ (Pan-Tilt-Zoom) functionality via NDI®, PTZ controls can be enabled in the Multiview. These allow you to adjust the camera position and zoom directly from within mimoLive, offering fast and precise framing during live operations.
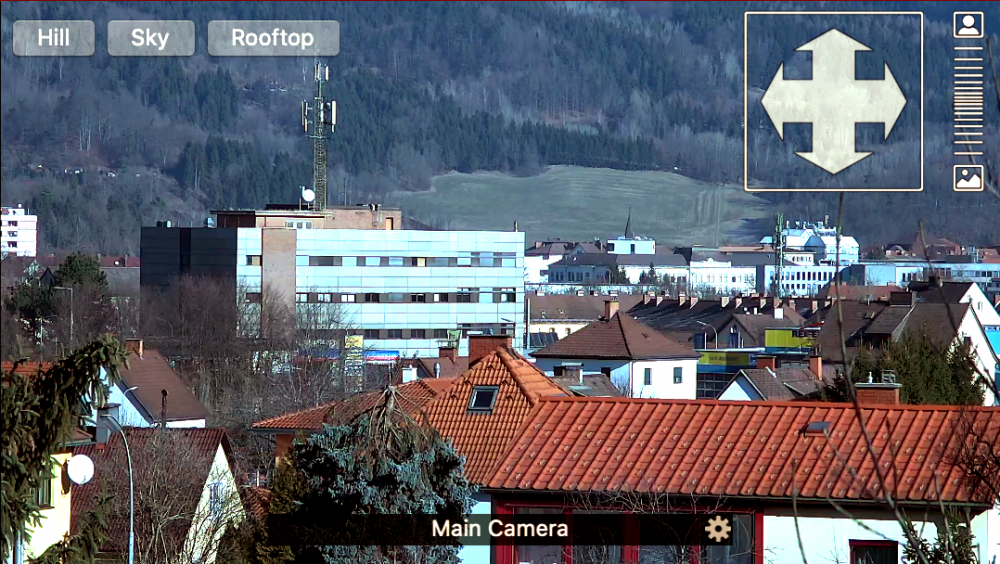
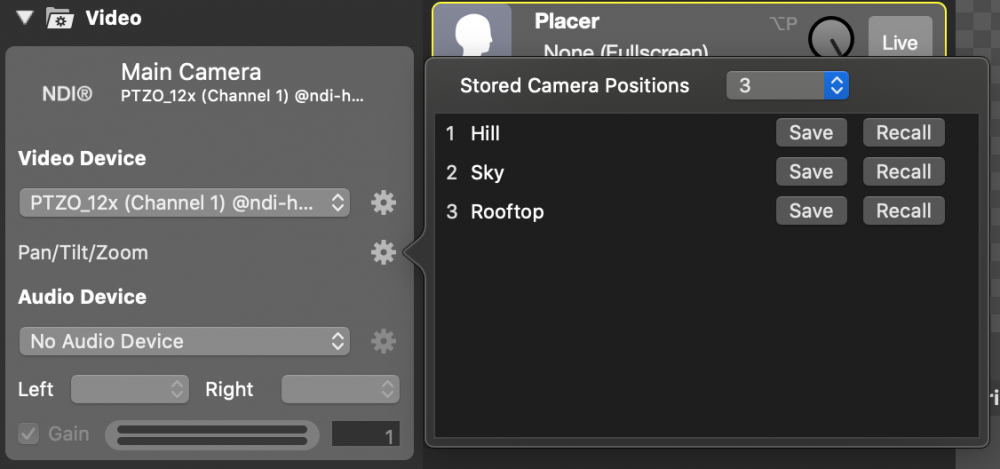
Preset Positions
In the upper left corner, you can access buttons to recall preset positions for pan, tilt, and zoom. You can pre-configure these positions, specifying how many preset buttons should appear in the Video Source itself.
In the video device settings from the Sources panel, you can further adjust the “Pan/Tilt/Zoom” positions, rename the positions to your needs, save the current position, or press recall to move the camera into the saved position. The save command will overwrite the last saved position.
Pan And Tilt Controls
In the upper right corner of the video source, you’ll find crossed arrows. Clicking and dragging in this area allows you to pan (move horizontally) or tilt (move vertically) the camera in any direction.
Zoom Control
To zoom in or out, simply drag the striped bar in the upper left corner of the view.
Combine Multiview and Video Switcher
To trigger sources in a Video Switcher layer by clicking on views in the Multiview, you must ensure that the Multiview displays the same Video Sources that are configured in the Video Switcher layer.
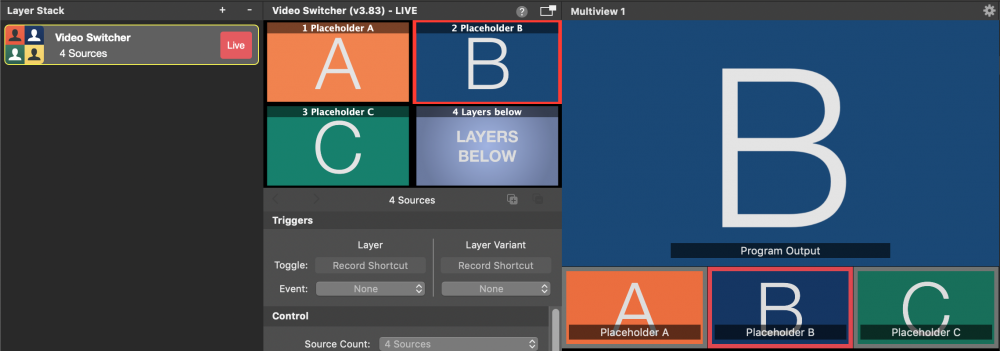
A red ribbon in the Multiview indicates which source is currently active in the Program Out.