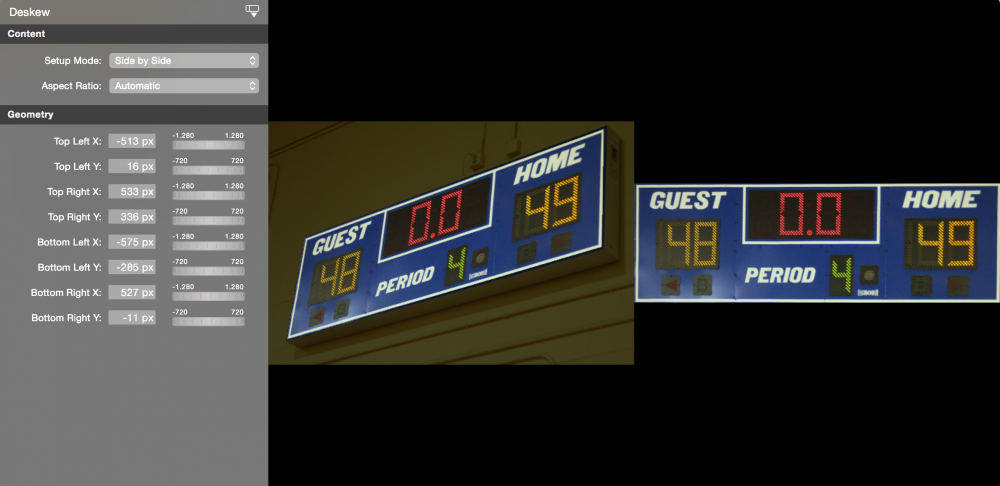
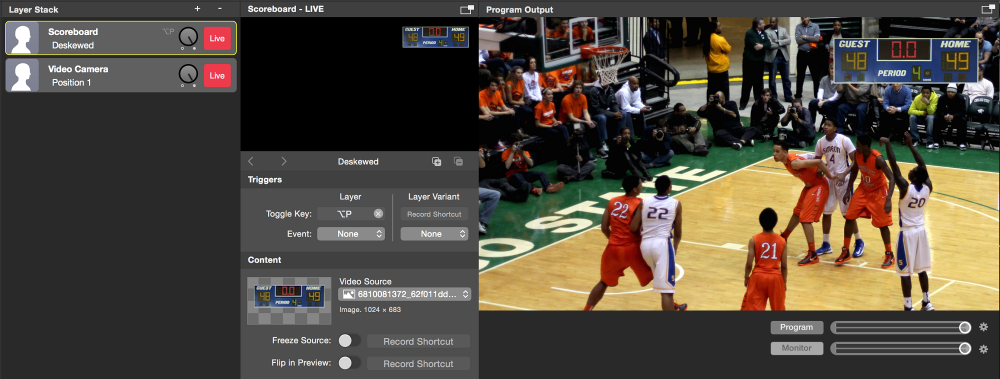
The Deskew filter could be used to straighten out an image when you are not able to place your camera exactly in front of the object. The best example is a scoreboard in a gym: You want to put the scoreboard into your video production but can’t bring the camera in a good position to capture it from the front. You apply the Deskew filter to the video source, move the 4 crosshairs to the corners of the scoreboard and you have a perfect straight view of it. Now you can put this video with a “Placer” layer anywhere on the screen.

(Photo by Ryan Johnson via Flickr.com )

| Filter Setup Modes | |
|---|---|
| Side by Side | The original and the deskewed image are displayed side by side in order to show you the result of your settings immediately while you are dragging the crosshairs. |
| Original | In this mode, you have the full size of the original image so that you are able to position the crosshairs very accurately |
| Deskewed | This mode shows you the result of the filter. You can check on the transparent areas and the correct alignment in detail. |
| Aspect Ratio Modes | |
|---|---|
| Custom | If the automatically calculated aspect ratio of the result is not correct, you can enter your own aspect ratio here. if the resulting image isn’t in the same aspect ratio than the original one then the resulting image is scaled “fit to screen” giving transparent areas around it. |
| Automatic | mimoLive will calculate the aspect ratio of the deskewed area based on the positions of the cross hairs. This may fail if the perspective is too extreme. |
| 4:3 | Convenience Preset |
| 16:9 | Convenience Preset |
Avoid Extrem Perspectives When Capturing
Even though the Deskew filter does a pretty good job of straightening out the image it can’t magically create missing image information. This means that if you capture the object from an extreme perspective the deskewed image may look blurry because there is information missing.

