
Although mimoLive includes great technology for conducting interviews or hosting discussion panels over the Internet with mimoCall, sometimes it is desired to get audio and video from Zoom (or other video conferencing solutions) into mimoLive, for example for recording, live streaming to other platforms or for a hybrid event.
mimoLive now includes direct Zoom integration.
If you have a mimoLive Studio license, you can now join a Zoom Meeting with mimoLive and receive audio and video (up to 1080p) for individual meeting participants as separate sources.This document is left here because its principles apply to other video conferencing solutions.
It is also possible to run Zoom on a separate computer. For the sake of simplicity, in this example, mimoLive and Zoom will run on the same computer.
Getting Video from Zoom into mimoLive
The way video is transmitted from Zoom to mimoLive is via recording the screen contents. You can use either a Screen Capture Source or a Window Capture Source.
Important: Due to the way macOS handles those differently, the advantage of the Window Capture Source is that it works even if you move the Window around or resize it, while the Screen Capture Source captures the entire screen or a fixed section of it, it will not follow the Zoom window around. The downside of the Window Capture Source is that it requires more system resources and may have a slower frame rate. We recommend using the Screen Capture source whenever possible, preferably on an external display.
To capture the Zoom video, add a Screen Capture Source to your document. Set it to “Document Size” so that it is always capturing the correct aspect ratio and in full resolution. If you click on “Show Capture Area”, a frame appears on your screen that you can position over the Zoom app window.
You can now use the video in many Layers. You can also create multiple smaller Screen Capture Sources to capture individual Zoom participants.
Getting Audio from Zoom into mimoLive
Loopback by Rogue Amoeba is the best tool for A/V professionals on the Mac. It allows you to route audio from anywhere to anywhere in macOS, for example, capturing audio from your presentation and sending it into mimoLive. You can also use Loopback to add audio effects to your microphone, capture sound from YouTube videos in Safari, route the audio from Zoom into mimoLive (more about this further down) and much more. It is well worth the money. A free alternative is open source project Blackhole but it is much more limited in functionality.
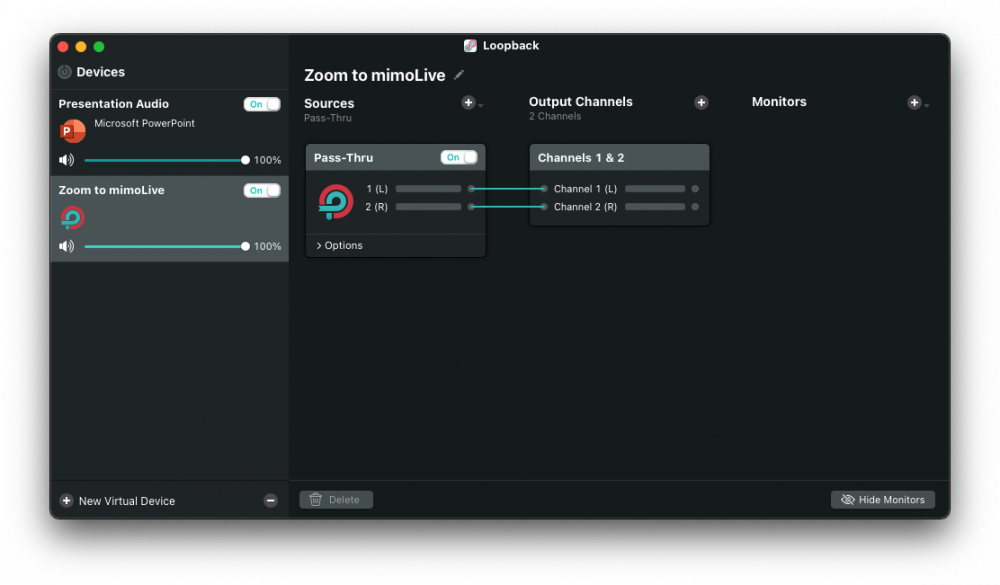
In this example, we’re using Loopback. In Loopback, create a new Virtual Device and name it “Zoom to mimoLive”:
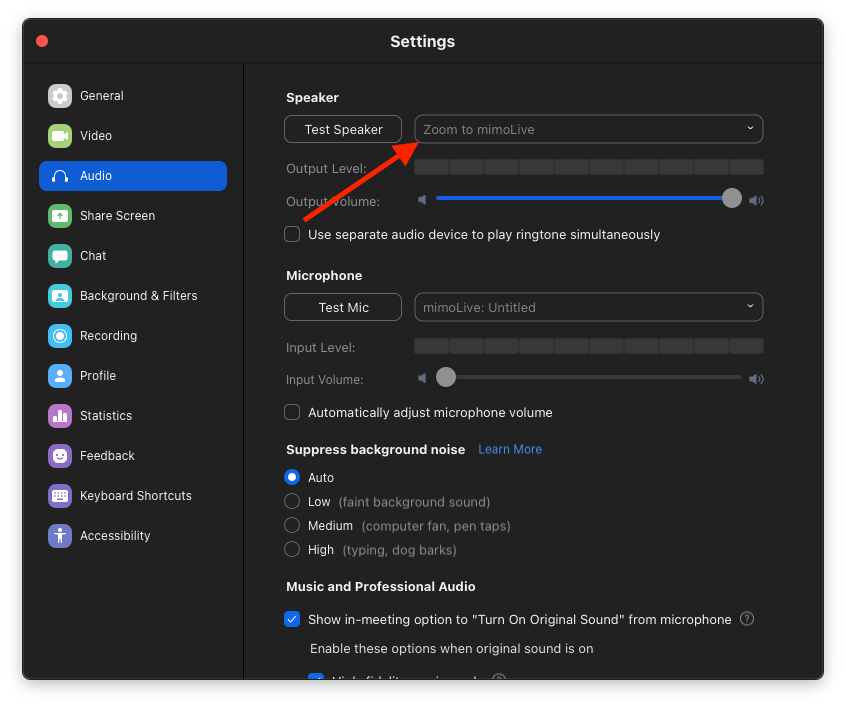
In Zoom, go to the Preferences -> Audio and select the Zoom to mimoLive as the “Speaker”:
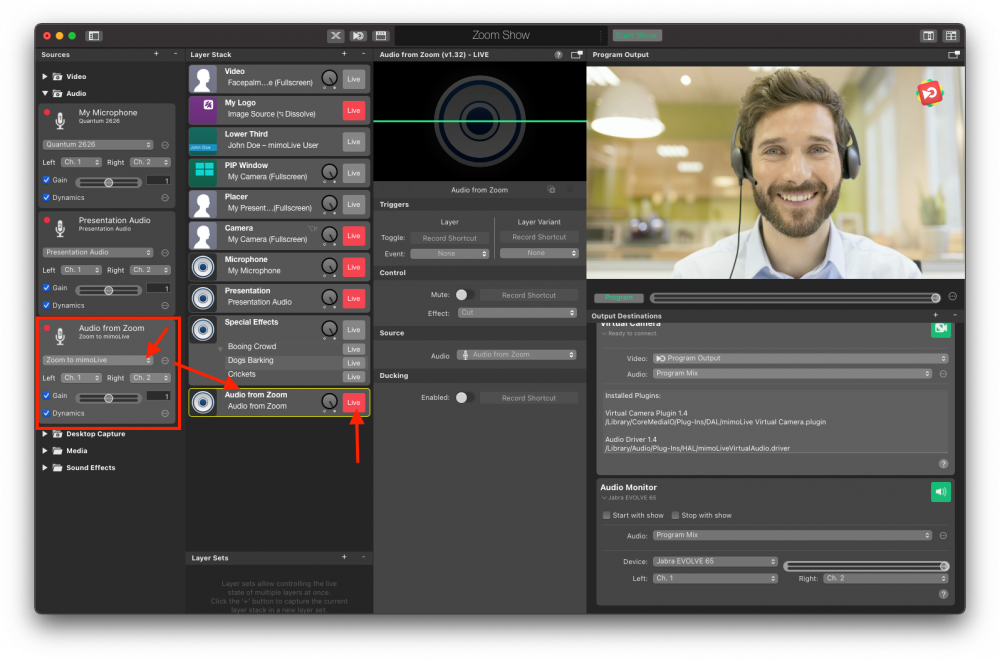
In mimoLive, add a new Audio Source, name it “Audio from Zoom”, select the “Zoom to mimoLive” as the device and add it to the Layer Stack by dragging it over. Rename the Layer that is created to “Audio from Zoom” and switch it live:
Avoiding Echo in Zoom
!So far, the setup is sufficient if you only want to record audio and video from Zoom but if you want to send Audio and Video back to Zoom. Since you’re sending the audio you’re receiving from Zoom back to Zoom via the Program Mix, people on Zoom will get an echo of themselves.
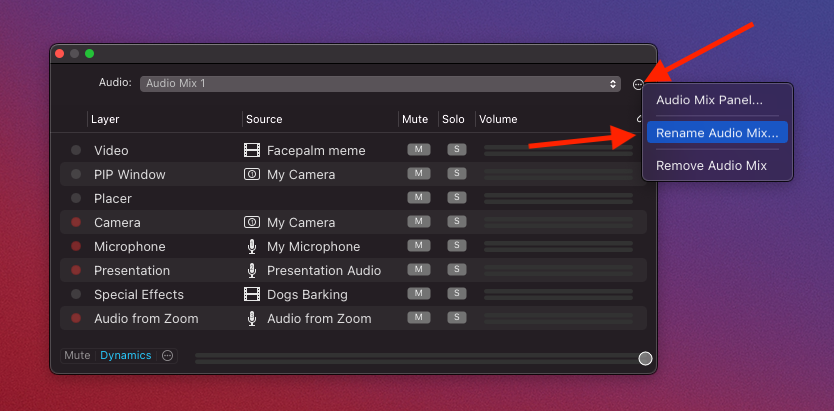
To avoid this, create a new Audio Mix by clicking on the “Audio” popup menu and selecting the command:
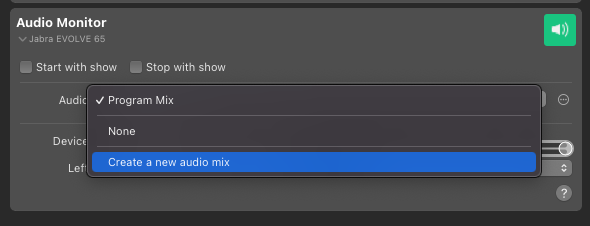
This will bring up the Audio Mix panel. To rename the Audio mix, click on the action menu button next to the popup menu. Name it “Zoom mix minus”, which is the technical term for this kind of audio mix:
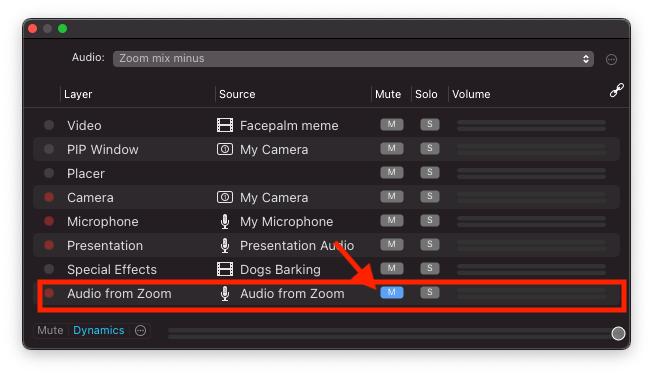
Find the entry for the “Audio from Zoom” layer and click on the “M” to “Mute” it. Now, the Audio Mix will no longer contain the audio from Zoom, so people will not hear an echo:
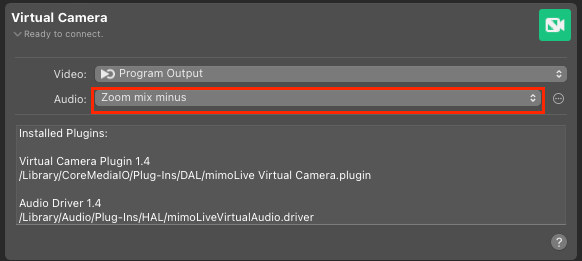
Make sure that the “Zoom mix minus” audio mix is selected in the Virtual Camera Audio popup:
All set! You can now speak with the people on Zoom without echo and the Program Mix will contain both the Zoom callers and yourself.