
With the Recording to Disk feature, you can easily record your mimoLive productions to your local disk. This is especially useful for users who want to have a backup of their live streams, or for those who want to edit their videos later. You can choose between various output codecs such as h.264, multiple Apple ProRes variants and HEVC to adjust the quality settings to suit your needs. The feature allows you to start and stop recording at any time, making it easy to create clips for any purposes. Whether you’re a professional broadcaster, a YouTuber, or just starting out, Recording to Disk gives you the flexibility you need to produce high-quality content and share it with your audience.

Recording the program out
mimoLive can be used to record the program output to disk. This is useful for example in the following use cases:
- Handing off to post production
- Re-encoding for upload to YouTube, Facebook or any other video platform
- Archiving a live stream in high quality
- Record clean video streams of your cameras
Recording various sources simultaneously (ISO Recording)
By enabling ISO Recording in mimoLive, you can capture each input source individually in its original quality. This feature allows you to record multiple sources at the same time, providing numerous benefits such as:
- Convenience: Recording multiple sources simultaneously saves time and eliminates the need to record each source separately.
- Increased flexibility: Recording multiple sources provides greater flexibility during post-production, as you have more options to choose from when editing the footage.
- Better quality: Recording multiple sources can lead to better overall quality, as you can capture different angles, perspectives, and sound sources simultaneously.
- Cost-effective: Recording multiple sources simultaneously can be cost-effective, as it reduces the need for additional equipment and crew to capture each source separately.
- Improved workflow: Recording multiple sources simultaneously can streamline your workflow, as you can quickly review and edit footage from multiple sources at once.
Working with File Recording Output Destinations
Add a new File Recording Output Destination to your Output Destination list by clicking the + button on top of the list in the right most column of your mimoLive document. A popover window will appear with all the Output Destination options available. After double clicking the File Recording Output Destination icon a new instance will appear in the Output Destination list.

Setting up the File Recording Output Destination
The Start with show and Stop with show options control if the Output Destination should start and stop together with the Start/Stop Show Button. Just remember that the Output Destination may always be activated and deactivated manually by clicking its activation button.
In the Video popup you can select wether you want to record the Program Output or a specific Video Source from the Sources Repository. By adding multiple File Recording output destinations you can record multiple cameras and the Program Output simultaneously.
ISO recording with mimoLive
You can have multiple File Recording Output Destinations in mimoLive each of them recording a different video source. This way you can do ISO Recording (isolated recordings) of each input source in mimoLive.
In the Audio drop down menu you can select which audio will be will be recorded with your file: Either the Program Out Audio Mix, a specific custom Audio Mix or any audio source that has an associated audio source with it. Please refer to Audio Mix Panel to learn more about setting up audio mixes.
The Folder text field specifies where a new file recording will be saved. For your convenience you can select the Choose… button to select a folder from a file dialog window.
Clicking the Show Recent Recordings button brings up the Recent Recordings window.
Advanced Settings
Clicking the File Settings button reveals the Advanced Settings section.
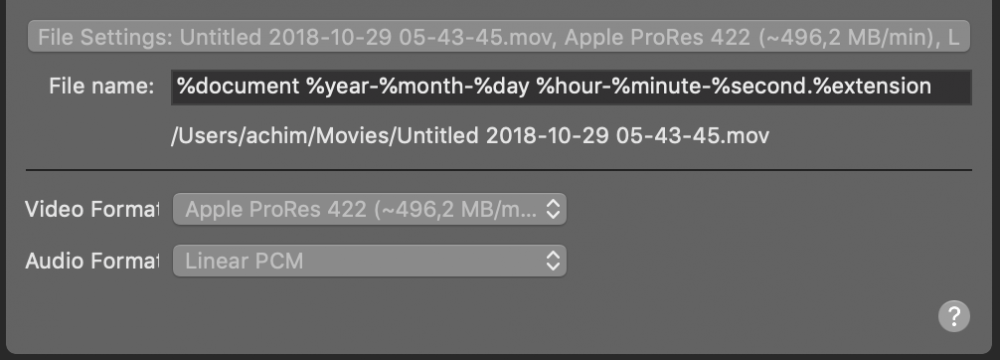
The File Name field defines the naming format for the automatically created recording files. The final path name with all tokens resolved is displayed below. The following values are available:
- %document
- %year
- %month
- %day
- %hour
- %minute
- %second
- %extension
Force the movie container format by specifying the extension!
By default mimoLive will write a QuickTime file with .mov extension. You can force this file format by exchanging the %extension token by the hardcoded extension .mp4 . You also can use the file format M4V by using .m4v as the file extension.
The Video Format menu allows the selection of a video format for the file recording. The following formats are available:
- Apple ProRes 422
- Apple ProRes 4444 (includes alpha channel for transparency)
- Apple ProRes 422 HQ
- Apple ProRes 422 LT
- H.264
- HEVC (macOS 10.13 and newer)
The Audio Format menu allows the selection of an audio format for the file recording. The following formats are available:
- Linear PCM
- ACC
Monitoring File Recording Performance
Once the Output Destination was toggled live its settings view is replaced by a status view displaying performance data in realtime. Refer to Monitoring Performance for details on performance monitoring in mimoLive.
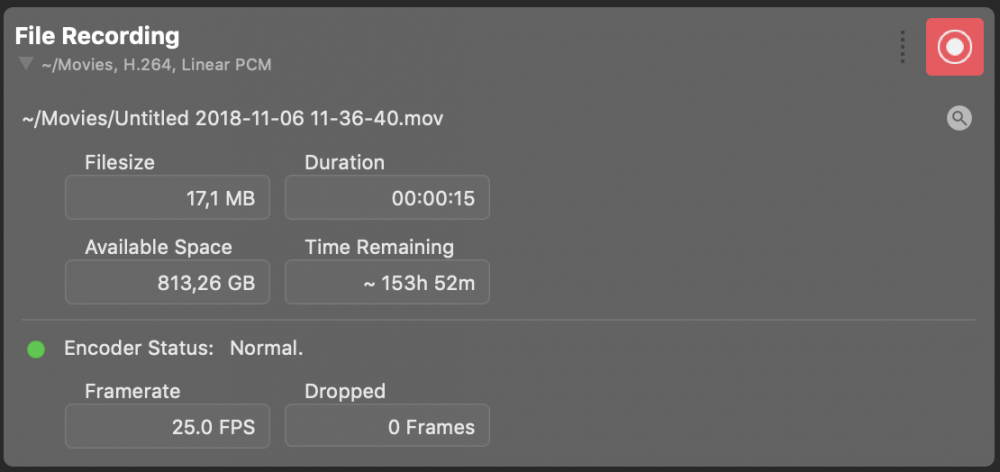
Revealing the Recorded File in Finder
Clicking the magnifier button in the upper right corner reveals the currently recorded file in the Finder.