
Taking your studio on the road
Now that offline events are back, you will want to use the time between gigs to create content, participate in a video conference or do a live stream for your fans, without losing the high quality that you have worked so hard to achieve over the past years. This means taking your studio on the road. With this setup, you can create high-quality video and deliver a dazzling virtual presentation on the go, while keeping your equipment light. It solves many of the problems of working from a hotel or meeting room and fits into a small backpack.
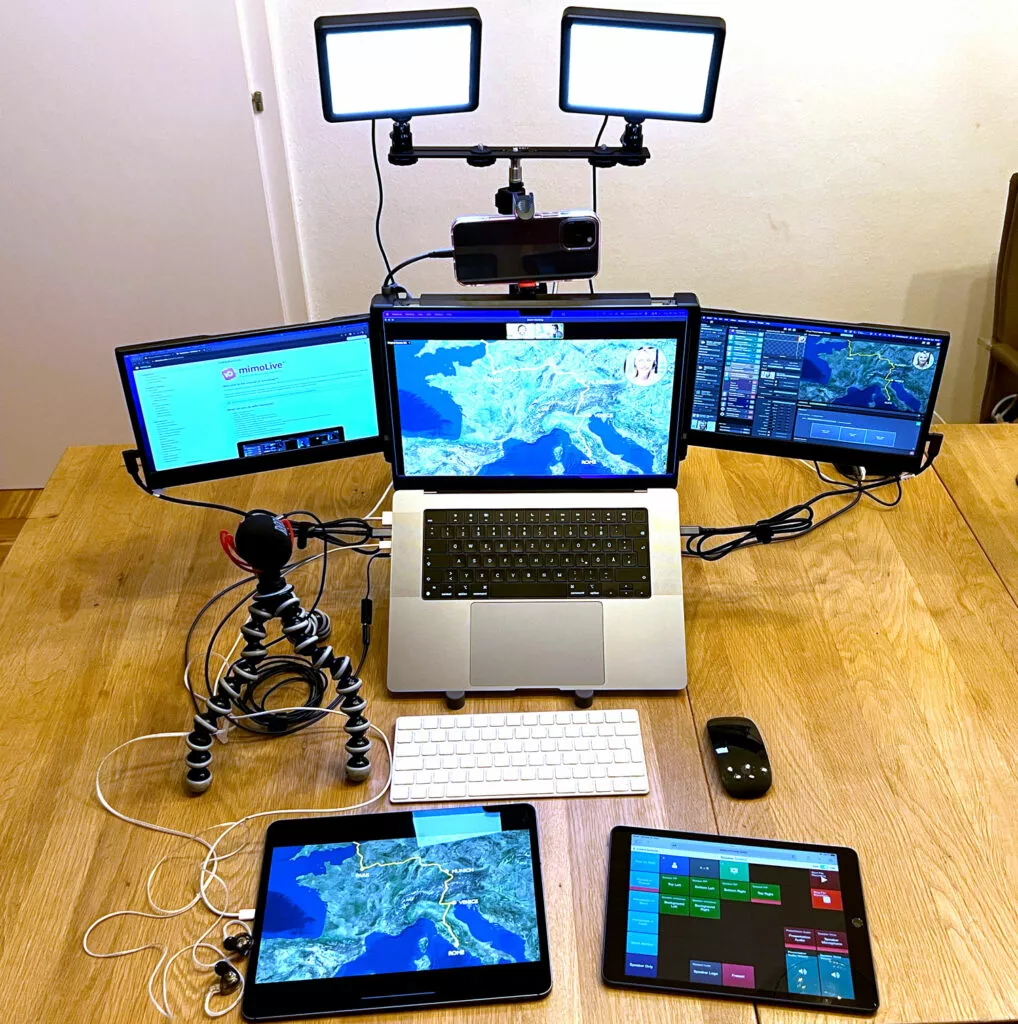
The design is based around a single, lightweight tripod that can carry both the lights and the camera.
The MacBook (Pro or Air M2) with mimoLive sits on a very light stand that elevates it so that the camera is at the right height for a Zoom call or a MS Teams Meeting. You can extend the tripod to get to a standing position if you like.
Use the blackout curtains in your hotel room to help make the scene look less like a hotel room.
You use your iPad to run your PowerPoint or Keynote presentation or as a notepad. This iPad is connected to the Mac via a USB-C cable. A second iPad is used to control mimoLive via the Remote Control Surface. That iPad can be used wirelessly.
The iPhone serves as a great camera and, using the new Continuity Camera feature of MacOS Ventura, doesn’t require a port to connect to the MacBook.
The individual power supplies are replaced with a single power supply with 4 USB C and 2 USB A ports. This saves you from bringing an extension cord.
In-ear headphones ensure top sound quality as they prevent the noise and echo cancellation of your meeting platform to have to go into effect.
You can use the built-in microphone, but to get a little better sound, the Mobile Virtual Presentation Studio includes an external microphone. Microphone and headphones are connected to the MacBook through a TRRS Audio Adapter.
There are two external Full HD Monitors which allows you to use the center screen for your meeting platform so you can see your audience, one screen for the mimoLive document and one screen for your notes or a browser or any other information you might want to display.
Parts List
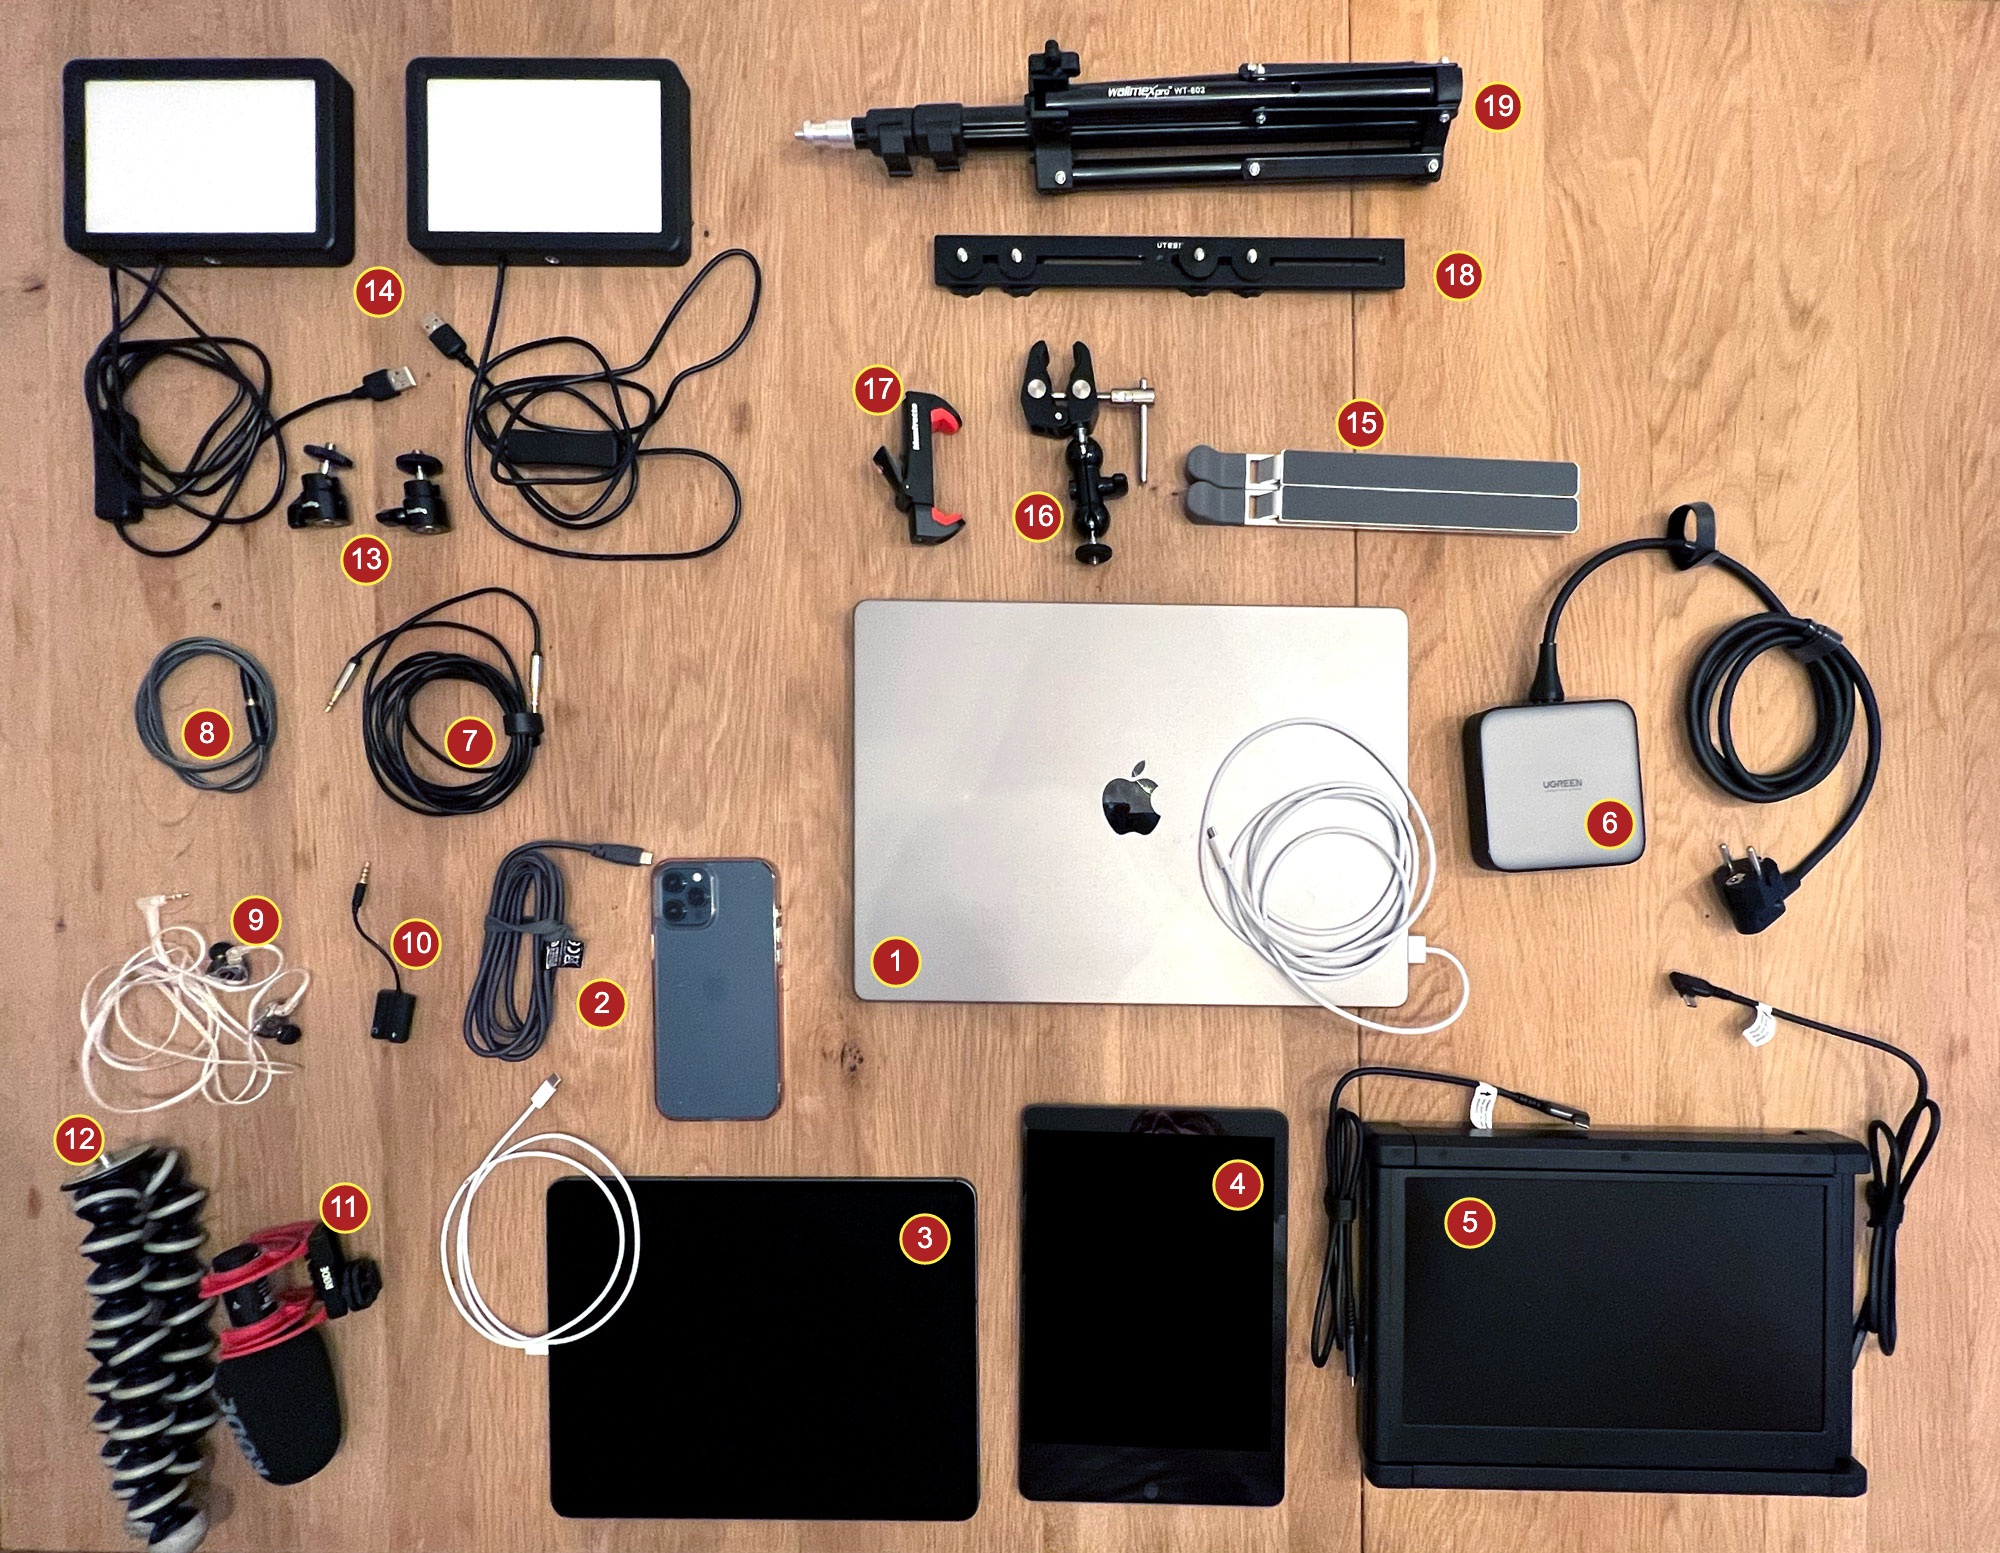
- MacBook for mimoLive. Requirements: 3 USB-C Ports, 1 TRRS Audio Jack, either Magsafe or another USB-C Port for power.
- iPhone with Continuity Camera support (iPhone XR or newer, list from Apple forthcoming)
- iPad for PowerPoint/Keynote/FotoMagico. This will be connected via USB cable (USB-C or USB-C-Lightning) so that mimoLive will pick it up as a camera source.
- Second iPad for Remote Control Surface. This can also be any other device with a modern web browser.
- TeamGee 12” Portable Monitor with two USB-C cables
- UGREEN Nexode 200W USB-C Desktop Charger
- Audio Cable for microphone, 3.5mm male to male
- Audio 3.5mm extension cable for in-ear headphones
- Linsoul KZ ZS10 Pro in-ear headphones
- Headphone/Microphone TRRS splitter
- Rode VideoMic GO II
- Joby GorillaPod for mounting the microphone
- SmallRig Mini Ball Head for mounting the lights
- Rollei Lumis Key Light – The included stands are too heavy and will not be used. The lights are USB powered, which makes them ideal for use with the UGREEN Nexode charger.
- Ultralight foldable laptop stand
- SmallRig Super Camera Clamp Mount
- Manfrotto Smartphone Clamp
- UTEBIT Flash Light Bracket for holding the lights
- Walimex WT-802 Lamp Tripod
- (Not pictured) LTE travel router – Provides independence from bad hotel internet connections and a local WIFI network for the Remote Control Surface.
Keep the parts organized
Use mesh bags to keep components organised and protected, and to avoid tangled cables.
How to tie it all together
To make the most out of this professional Mobile Virtual Presentation Studio, use the Virtual Presentation template.
Credits
Many thanks to Joachim Simon for the inspiration for this Mobile Virtual Presentation Studio.