
mimoLive offers unparalleled flexibility and control through its browser-based Remote Control feature. This powerful tool allows you to manage your live broadcasts from any device, anywhere in the world, using a web browser.
Key Benefits and Capabilities
With mimoLive’s browser-based Remote Control, you gain the flexibility and power to direct high-quality live video productions from anywhere, enhancing your broadcasting capabilities and efficiency.
Versatile Control Options: mimoLive can be operated via mouse cursor, customized keystrokes, automation scripts, and, most conveniently, through browser-based Remote Control. Buttons from mimoLive Remote Control Surfaces can indicate the status of a layer, show a video feed, or display the state of animations.
Customizable Remote Control Surfaces: Create multiple Remote Control Surfaces tailored to different roles and tasks. For instance, set up a surface for the editor in the studio to switch video sources and another for the social media manager to add news headlines remotely. This ensures maximum freedom and efficiency in directing your live video production.
Multi-User Accessibility: Each Remote Control Surface can be used simultaneously by different team members, enhancing collaboration and workflow. Whether you’re in the studio or on a workation, everyone can contribute seamlessly.
Global Access: Access your Remote Control Surfaces from any device within your local network. With the help of a secure network tunnel, you can also control your broadcasts from your home office or any remote location worldwide.
Comprehensive Control: Manage every aspect of your mimoLive project remotely, including camera switching, operating lower thirds, and keeping scores in sports live streams. Everything you need is at your fingertips.
Real-Time Feedback: Receive visual feedback on the status of layers and even monitor the final program output directly on your Remote Control Surface. This ensures you have complete oversight and control over your live broadcast at all times.
mimoLive Tutorial: Remote Control Surfaces
Watch this tutorial to learn how to use it:
Getting Started
Setup mimoLive for Remote Control
To use a Remote Control Surface with mimoLive, you first need to enable the feature. This activates a built-in web server that serves control interfaces exclusively for mimoLive.
Follow these steps to get started:
- Open mimoLive and go to the main menu.
- Choose “Settings…” to open the Settings window.
- Switch to the Remote Control tab.
- Enable the option “Allow Remote Control Access.”
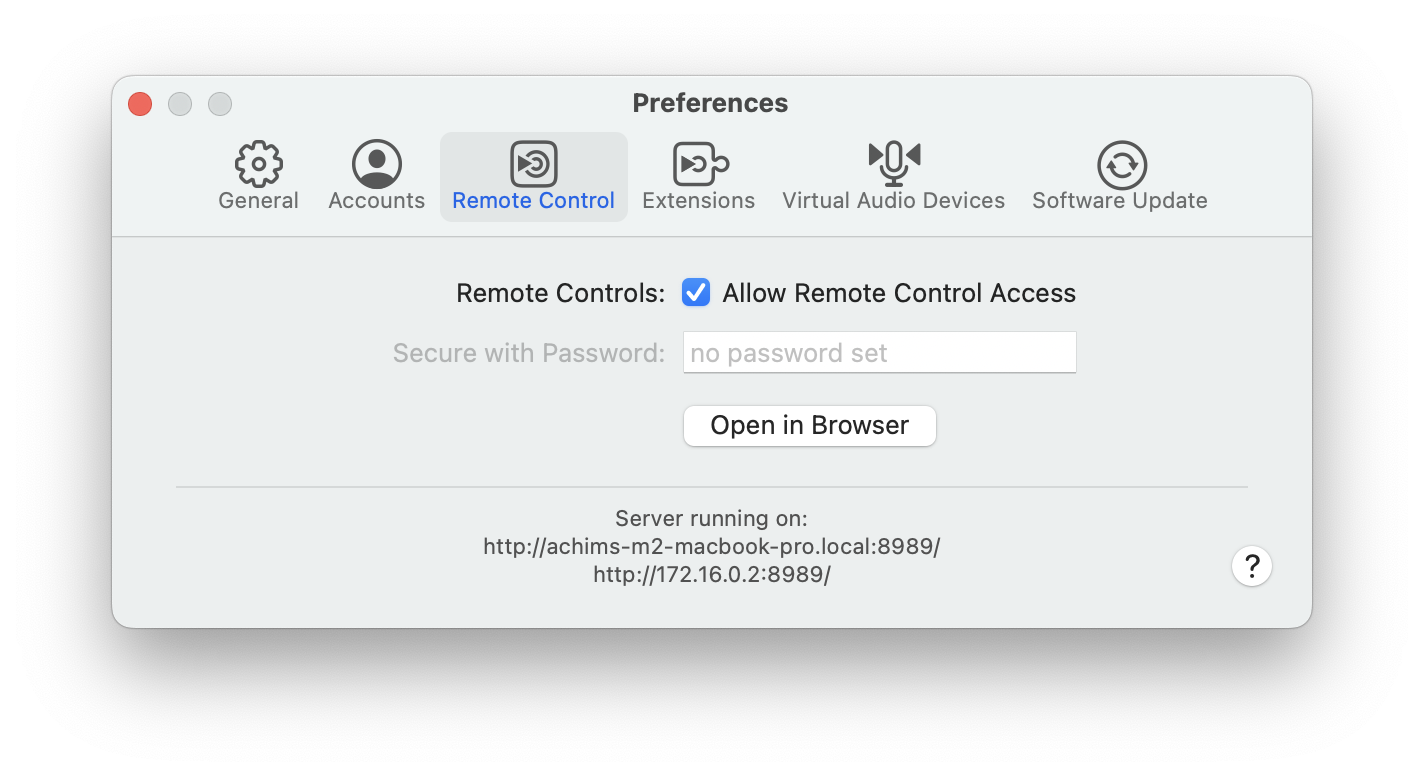
Once enabled, mimoLive is ready to be controlled remotely.
You can now proceed to create your first Remote Control Surface via a web browser.
Accessing the mimoLive Remote Control Surface
To access the mimoLive Remote Control Surface on the same machine:
- Click “Open in Browser” in the Remote Control tab of the Preferences window, or
- Click the Remote Control toolbar button in the window of the mimoLive document you want to control.

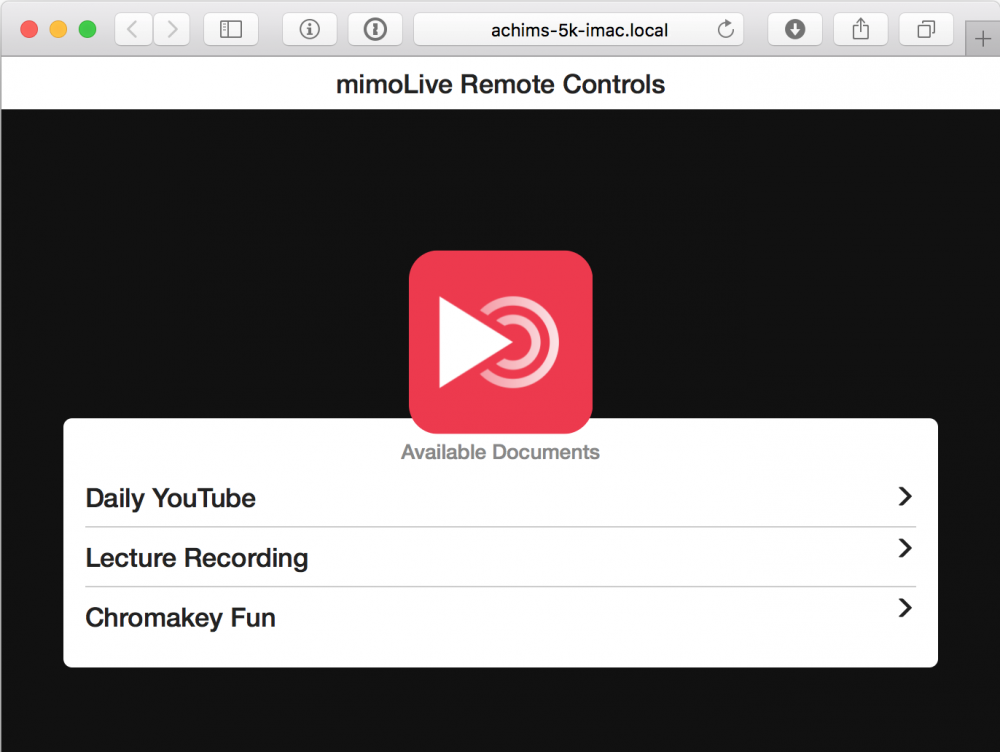
After the Remote Control Surface opens in your preferred web browser, you’ll be prompted to select which mimoLive document you wish to control.
Creating a new Remote Control Surface
When you open the Remote Control Interface for a specific mimoLive document for the first time, you’ll be prompted to create a new control surface.
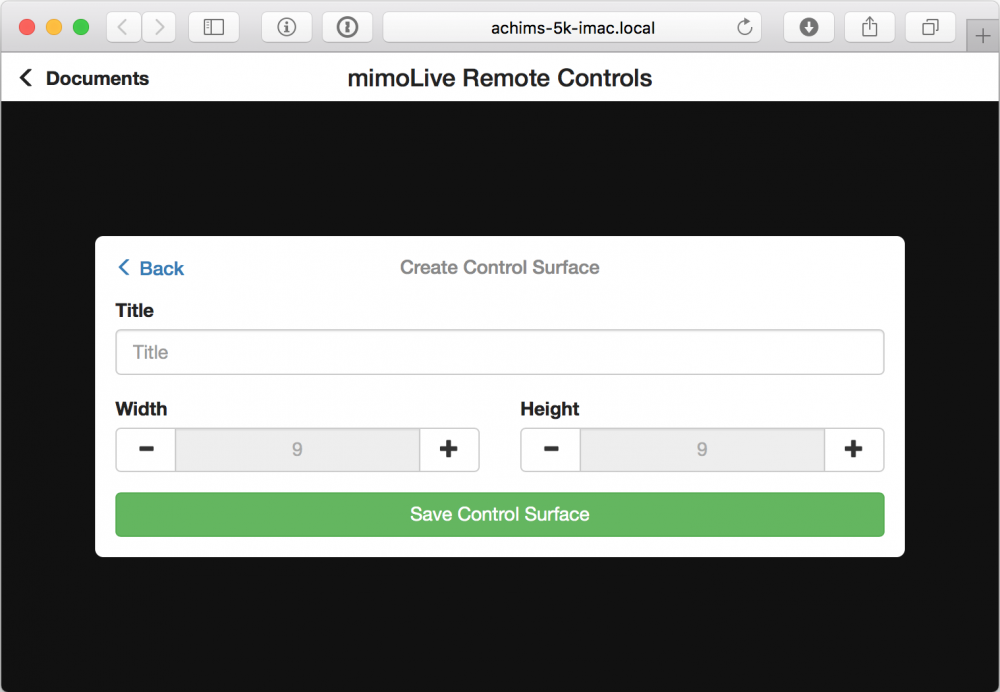
Customizing Grid Size
When creating a new surface, mimoLive suggests a button grid size based on your device. You can adjust this immediately or modify it later in the Remote Control Surface settings.
You can create multiple Remote Control Surfaces for the same mimoLive document. This allows you to design different layouts tailored to specific roles or tasks—such as one surface for switching cameras, another for controlling audio, and a third for managing graphics. Each surface can be opened independently in a web browser, making it ideal for collaborative productions or multi-device setups.
After the creation of a control surface, you are presented with an empty grid which you can use to create your personal layout of buttons:
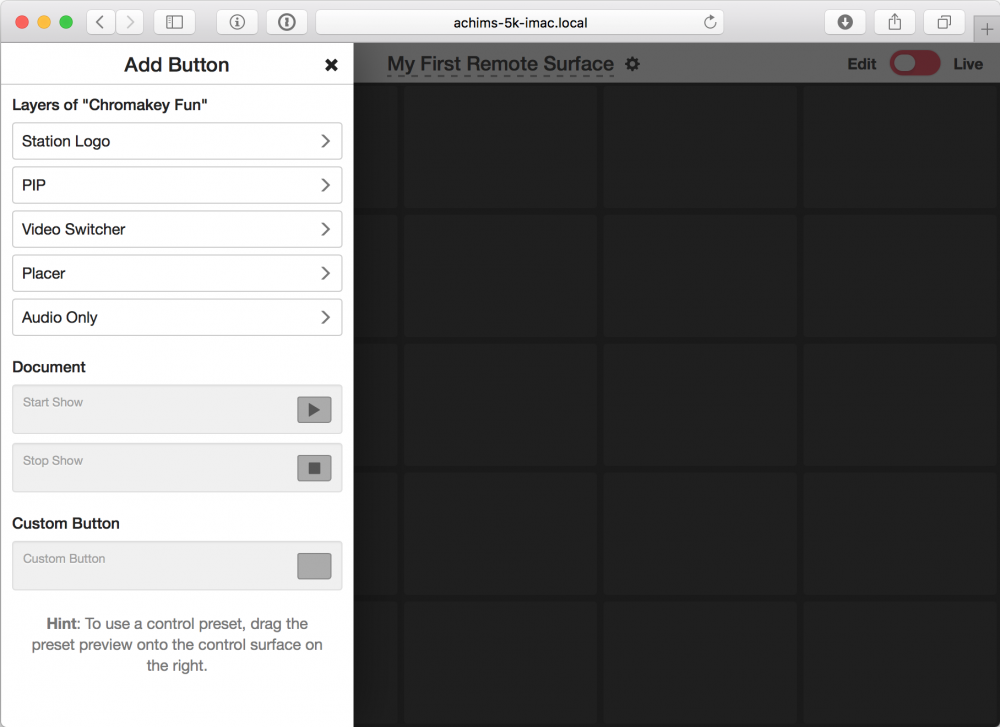
Adding a Button
In the Add Button column on the left, choose a layer from your document for which you want to add control buttons to your Remote Control Surface. As an example, we chose the Video Switcher Layer. Now you will see different layouts this specific layer provides:
The suggested layouts for each layer may vary depending on the settings you made in the mimoLive document. It is important to finalise the mimoLive document before you design the Remote Control surface.
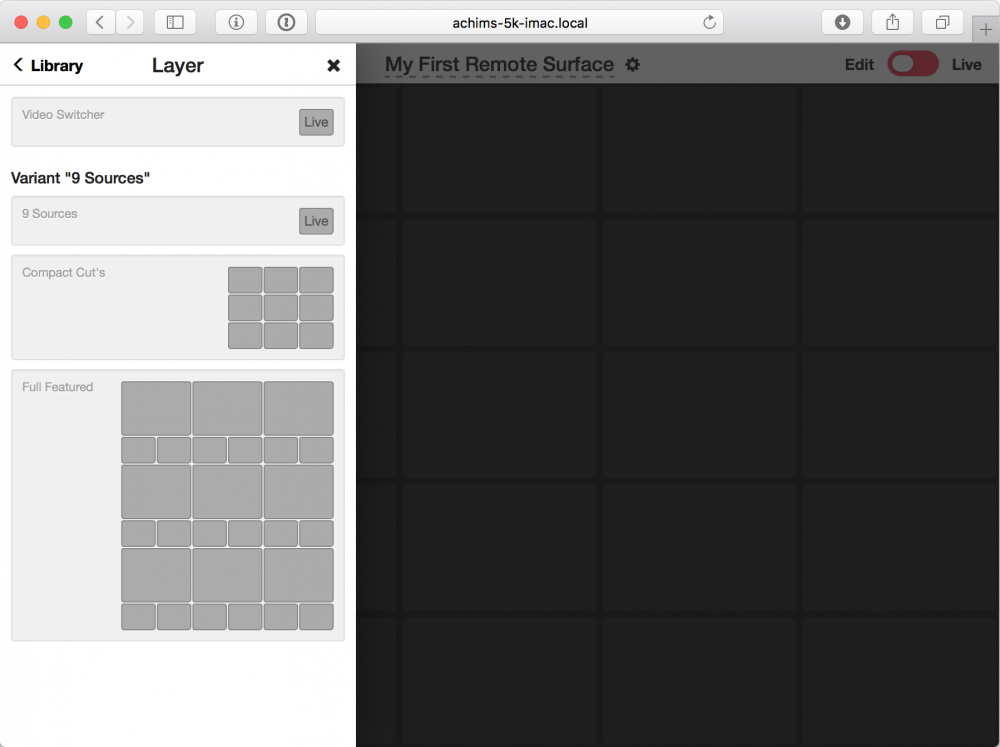
Drag a layout of your choice from left to right onto the Remote Control Surface:
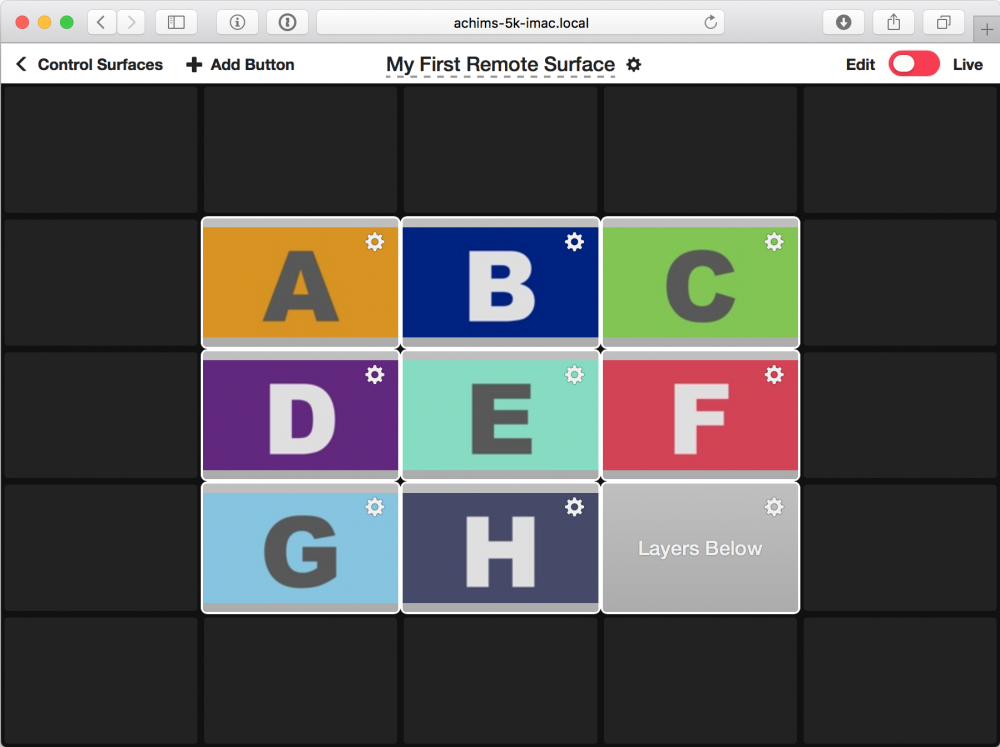
You can add more buttons to the surface with the “+ Add Button” menu in the top left corner.
Don’t Forget to Save!
The configuration of your Remote Control Surfaces is stored inside the mimoLive document. To ensure your surfaces and any changes you’ve made are preserved, always save the document after creating or editing a control surface—otherwise, your changes will be lost.
Editing a Button
To change properties of each button you need to switch to the edit mode in the upper right corner first. Now your can select the action gear icon on that specific button to bring up the Edit Action Button panel:
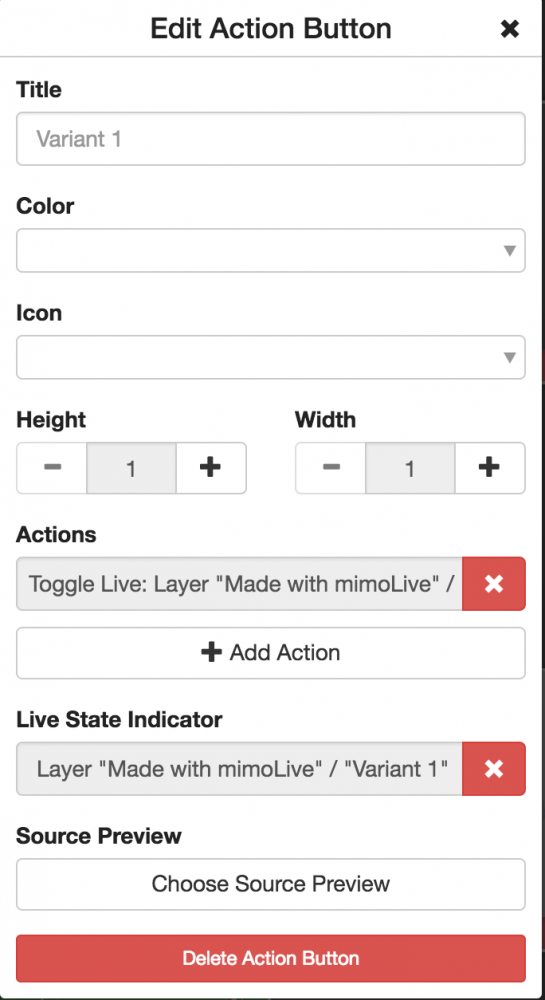
To make the button easier to recognise, you can now give it a title, choose the background color and add an icon.
If you want to make it bigger, you can set the Height and Width of the button.
The Actions list lets you choose the actions the button will perform when pressed.
The Live State Indicator let you select a layer or video source to show the live state.
With Source Preview, you can select a video source of the mimoLive document to display a thumbnail from. Please note that this option affects the overall performance of mimoLive!
Setting up a Button to Trigger Multiple Actions
The most powerful feature of the Remote Control Surface is the ability to have a button trigger multiple actions, for example, to turn on a specific lower third each time you switch to a certain camera in the switcher or to turn off several layers and turn on other layers when ending a show.
To add an additional action, click on Add Action in the Edit Action Button panel seen above. To remove an action you no longer need, press the “x” next to it.
Deleting a Button
To delete a button you need to click the action gear icon of that button to reveal the Edit Button Action panel. At the bottom of this panel, you’ll find the delete button. To keep you from accidentally deleting a button, you have to confirm the deletion a second time.
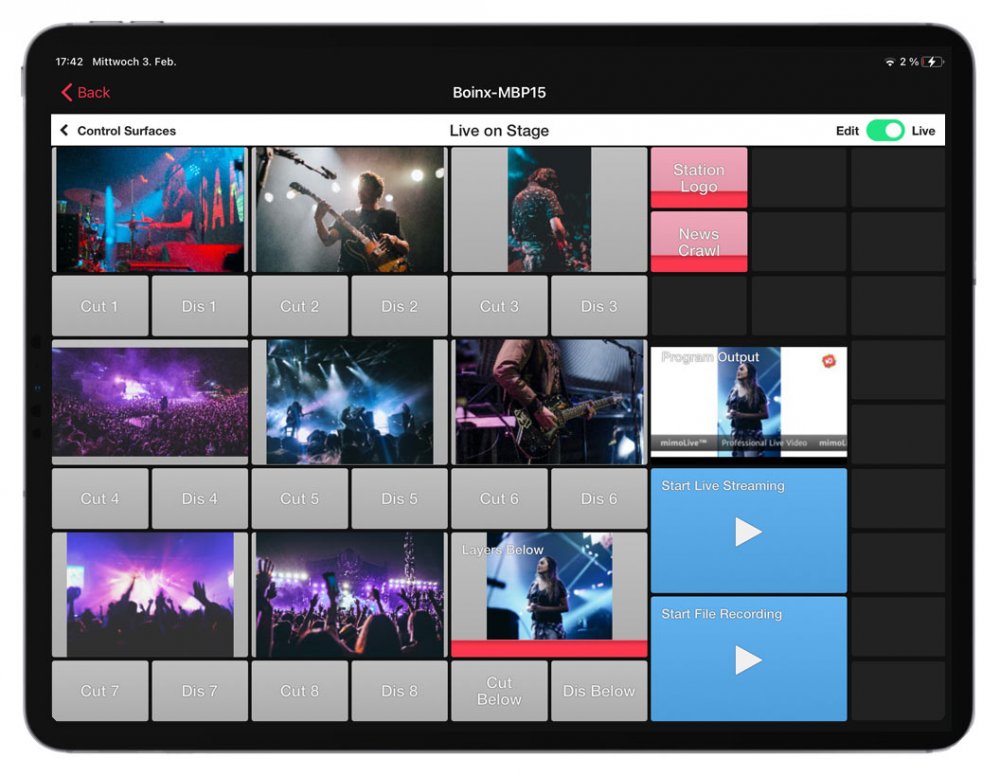
Using the Remote Control Surface
After you have modified the control surface to your convenience, you can enter Live Mode on the top right of the screen.
Performance Tip for Source Previews
Some layers — like the Video Switcher — display live source previews directly in your browser. While useful, these previews can place a significant load on your remote control device and on the Mac running mimoLive. If you experience performance issues, consider reducing the number of buttons that show live previews.
Using Multiple Remote Control Surfaces
You can use more than one Remote Control Surface at the same time for one document. This allows you to distribute tasks among a team of editors. In a school, for example, you could have one student control the switcher, one the audio, one the graphics and lower thirds.
You can also use the same Remote Control Surface on multiple devices at the same time. Changes to one instance of the Remote Control Surfaces will automatically and instantly be propagated over all instances. This is especially useful for updating the Remote Control Surface when the layer stack in the mimoLive document is changed.
Adjusting the Remote Control Surface
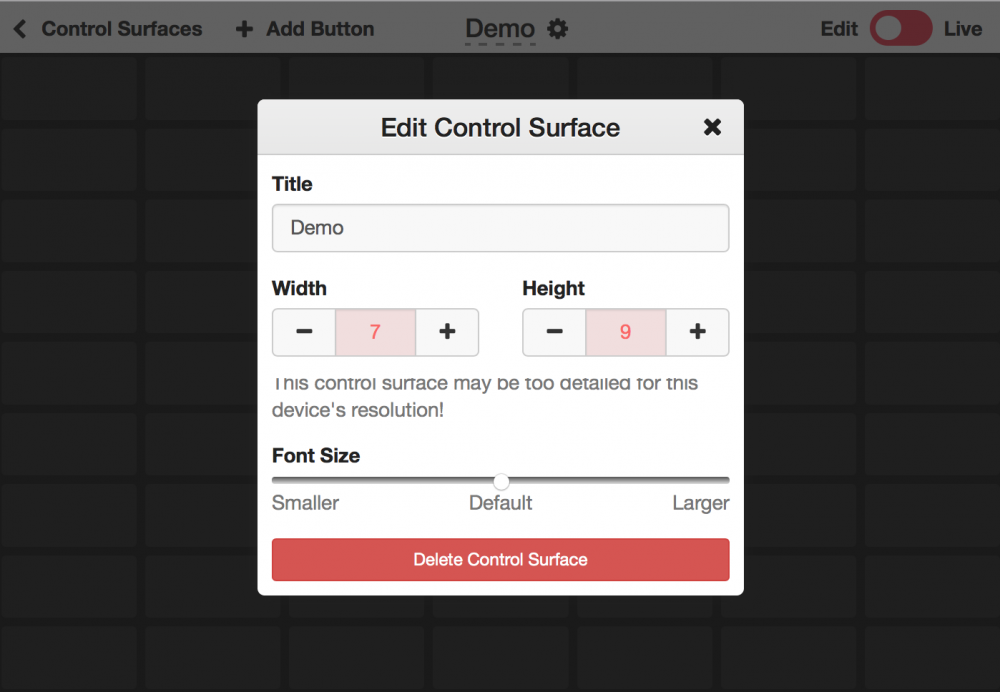
If you want to change the appearance of the Remote Control Surface you need to switch to edit mode and click on the action gear next to the title of it at the top. You will get an overlay window with several options to adjust the title, size and font size of the Remote Control Surface.
Renaming a Remote Control Surface
If you want to have a nice name for your Remote Control Surface you can rename it in edit mode by clicking on the action gear next to the title at the top. You will get an overlay window where you can change the title.
Changing the Size of a Remote Control Surface
If you need more space for even more buttons on your Remote Control Surface you can change the size of it by clicking on the action gear next to the title of your surface on top (please make sure you are in edit mode). You will get an overlay window which gives you the option to resize the Remote Control Surface by clicking on the + and – buttons. Please note that you can’t make it smaller if there is a button in the area. Please delete those buttons first.
Deleting a Remote Control Surface
To delete a Remote Control Surface you need to switch into edit mode, click on the action gear next to the title at the top and click twice on “Delete Control Surface” in the appearing window.
Remote Control App on iOS
If you want to use the Remote Control Surfaces on iOS devices, there are two ways:
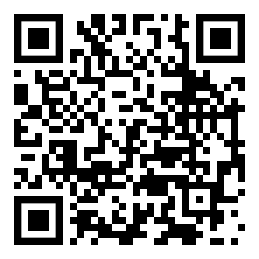
1. Open the URL in Safari or Chrome as described above (this will work for Android based mobile devices as well)
2. Use the mimoLive Remote App from the App Store
mimoLive Remote App for iOS
![]()
Download the mimoLive Remote App from the App Store.
Using the mimoLive Remote App
When you start the mimoLive Remote App, it will look for running instances of mimoLive on the same network as your iOS device:

Select the mimoLive instance you want to control. After that, the app behaves just like the web-based remote control app.

Remote Access via Internet
As the Remote Control Surfaces are enabled by a webserver built into mimoLive, remote access to mimoLive from anywhere on the Internet could be enabled by giving the mimoLive computer a public IP number. For security reasons, however, this is a very bad idea. A better way to use the Remote Control Surface via public network is to establish a secure tunnel to your mimoLive host computer using ngrok.