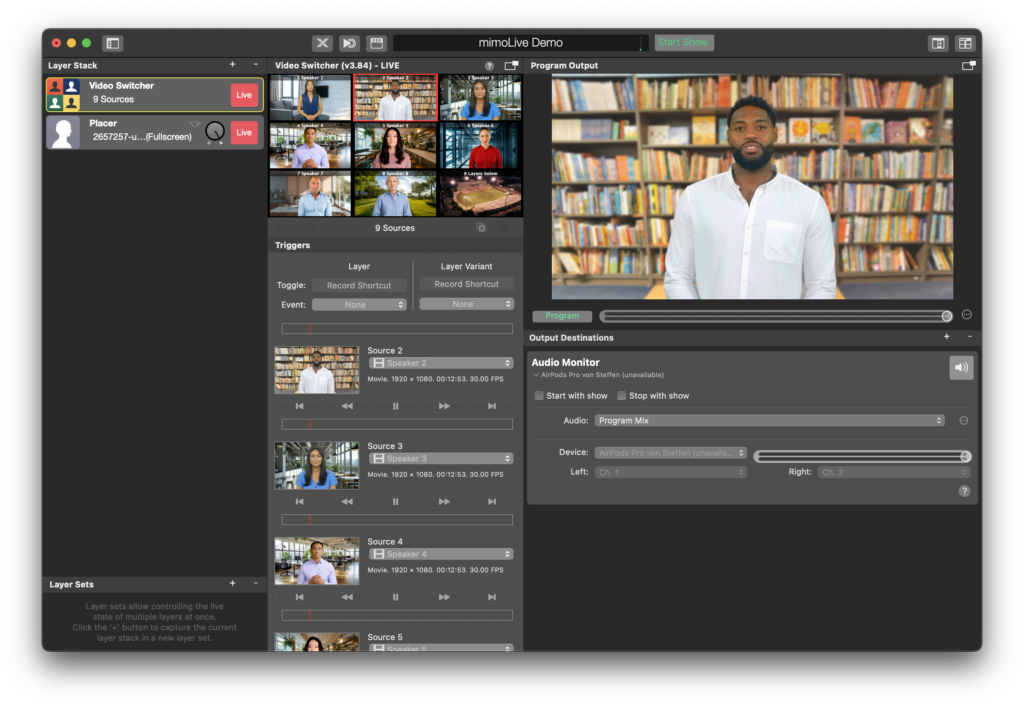
The Video Switcher layer in mimoLive is a powerful tool that allows you to easily switch between up to 9 different video sources with smooth cut or dissolve transitions. One of the great benefits of this layer is that it can seamlessly transition between sources with different pixel resolutions or frames per second, thanks to mimoLive’s ability to independently manage input sources and program output. This makes it easy to integrate a variety of video sources into your production, creating a more dynamic and engaging experience for your audience.

Setting Up The Video Switcher Layer
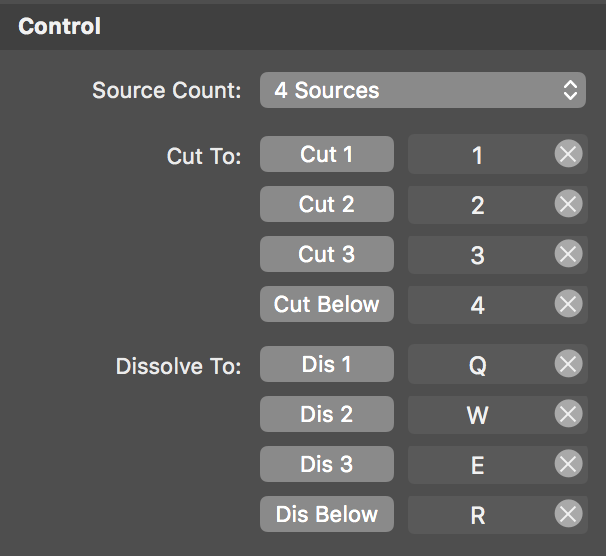
First of all, you should set up the Source Count in the Control section of the layer settings. If you are using fewer cameras this will help to reduce the controls and buttons in the user interface.
Then you can assign the video sources by dragging them onto the layer in the Layer Stack or selecting them in the Content section of the layers settings.
By default, the preview of the layer shows the names of each source for better orientation. You can override the names with the “Source Name“s text input fields.

A Transition Duration input field lets you control the time it takes to perform the dissolve transition.
There are optional Background image inputs that are needed when running a Virtual 3D Studio.
Controlling The Video Switcher By Buttons Or Keyboard

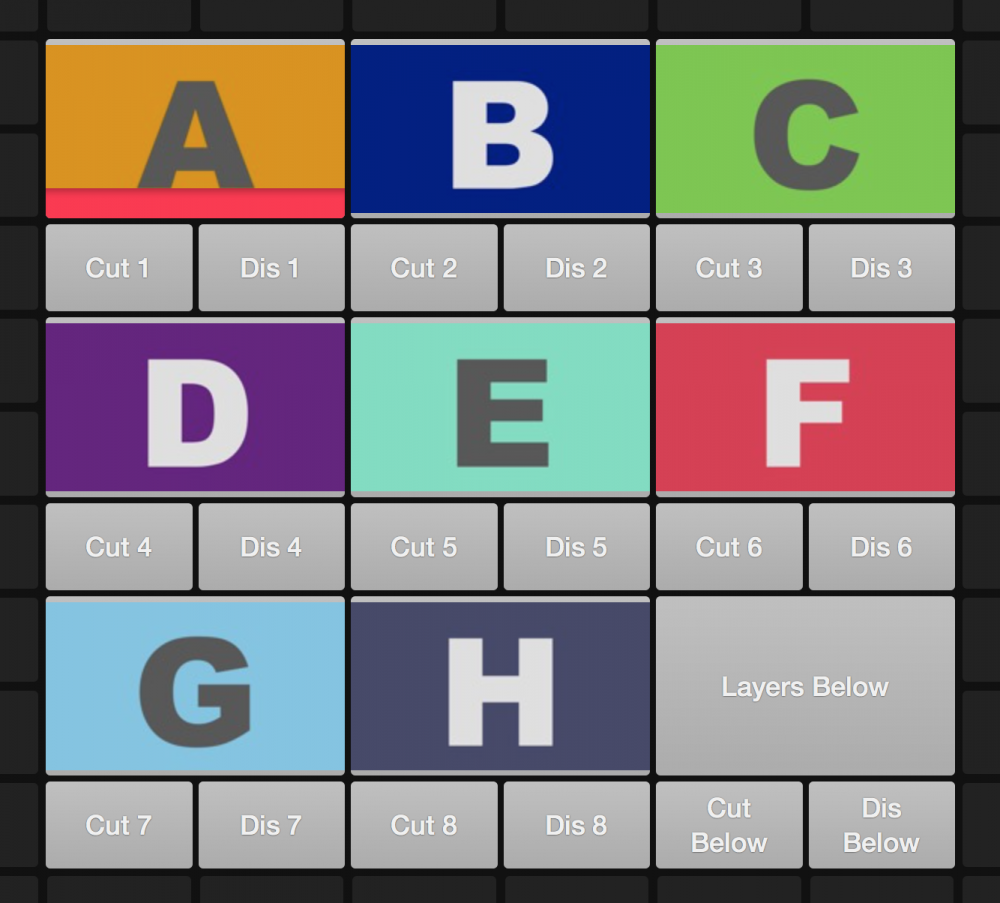
The Video Switcher layer has a bunch of buttons that will control the output. The first ones do a Cut to the specific camera whereas the following will do a dissolve transition. It is helpful to assign Keyboard Shortcuts for each button you need so you can access this feature anytime.
Controlling The Video Switcher By Mouse Action
You can use the mouse to click on the multiview preview to switch to a certain source. If you do a single click the video switcher will do cut to the new source. If you do a long press (keep your mouse button down) then a dissolve transition will be performed.
Remote Controlling The Video Switcher

Because the Video Switcher is a very intensive task and should be performed separately from controlling mimoLive in general we implemented rich Remote Control Surfaces for it. There are basically two options for the standard layouts in the Remote Control:
- Compact Cuts: This option lets give you just the cut buttons.
- Full-Featured: Gives you full control by showing the video previews and having cut and dissolve buttons available.
Video previews in the remote control cost render performance
The little video previews for the remote control surface need to be compressed on the host computer in order to transmit them to the remote control surface. This task costs render performance on the host computer and should only be used if the machine can handle it. If you don’t need the video previews in the remote control you should remove them from there.
Controlling the Video Switcher By The Multiview
If you enable the Multiview in the mimoLive document window or detach the Multiview in another window you can click on the Multiviews views to control the Video Switcher Layer. Please read how to setup the Multiview for more information.
Using Syphon to transmit the Preview
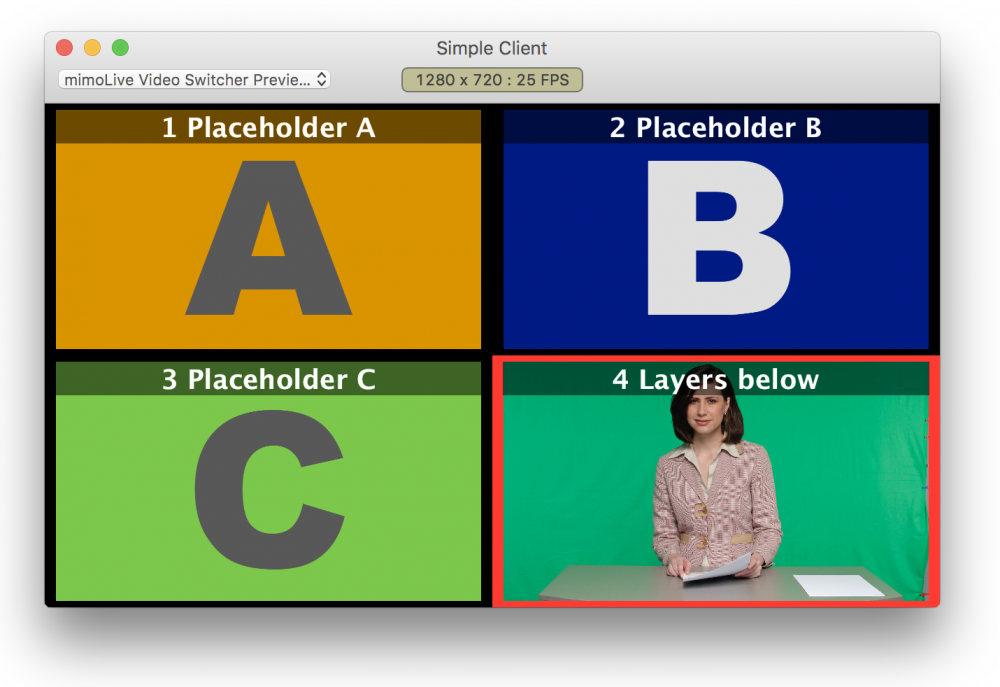
Currently, in mimoLive, the multiview preview of the Video Switcher layer with all your assigned sources will be replaced if you select a different layer. Then you won’t see your sources anymore and can’t keep track of the content. With the “Transmit Preview” in the Syphon section of the layer settings you can get the preview with the multiview into another app via Syphon. In this 3rd party app, you can constantly display the multiview of the Video Switcher layer regardless of its selection state in mimoLive.

Download the Simple Client.app by Syphon.

Controlling multiple AXIS IP Cameras
If your sources are AXIS IP cameras you can use the AXIS Control section to configure the IP Numbers for them and enable remote control for them in the multiview preview. There are two modes available:
- Click To Center: If you shift-click on an image the associated AXIS camera will recenter itself to the clicked point.
- Drag To Move: You need to shift-click and hold down the mouse button to drag the AXIS camera to a new position. Please take into account that there may be a delay and you won’t see the movement of the camera in real time.
By holding down the alt key you can switch to the opposing mode. Eg. if you have set up the Mode to “Click To Center” then the alt key will change the mode to “Drag To Move” temporarily.
In any case you need either shift or alt keys to control the AXIS cameras because, without the modifier keys, the control would get in conflict with the general mouse control of the Video Switcher layer.

