
The Audio Mix Panel allows you to create and configure audio mixes for use in Output Destinations.
Audio Mixes
Every mimoLive document includes a default Program Mix, which reflects the audio levels as set by the audio volume dial knobs in certain layers the Layer Stack. The Program Mix represents the primary audio output of the layer stack and, as such, cannot be renamed or removed.
In some scenarios, it’s beneficial to create additional audio mixes within a document. Here are a few common use cases:
- Production Monitoring: During production, you might need to monitor all layers, a subset of layers, or a single layer at custom volume levels—independent from the Program Mix. This allows you to adjust the monitoring audio (via speakers or headphones) without affecting what is recorded or streamed.
- In-Ear Monitoring: Show hosts, anchors, or guests often require personalized monitoring setups. For instance, their own microphone input can be excluded from the monitor mix to avoid latency-induced confusion or potential feedback loops.
- Multi-Stream Events and Format-Specific Recordings: For live events with multiple language streams or for simultaneous recordings tailored to different formats (such as D-M-E or M&E), separate audio mixes allow for clean, format-specific outputs.
Opening the Audio Mix Panel
You can open the Audio Mix Panel in one of the following ways:
- Choose Window > Audio Mix Panel from the main menu.
- Press Option–Command–A on your keyboard.
- In Audio Mix dropdown menus where you can create a new audio mix, selecting this option will both open the Audio Mix Panel and immediately create a new mix.
Adding, Removing, and Renaming Audio Mixes
To add a new audio mix, click the Audio Mix menu popup button at the top of the Audio Mix Panel and select “Create New Audio Mix…”.

The newly created mix will be automatically selected, and the configuration section of the Audio Mix Panel will display the volume controls for each layer. Each audio mix receives a unique, automatically generated name.
To rename or remove an audio mix, click the action button to the right of the Audio Mix menu to open the context menu with the relevant options.
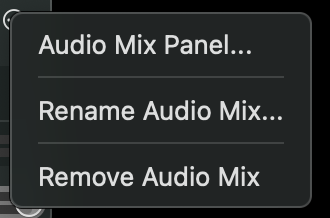
The Audio Mix Panel menu item is not always present
The Audio Mix Panel option is only present in the context menu of supported Output Destinations, not in the context menu of the Audio Mix Panel itself.
Working with Audio Mixes
The mix configuration section displays every layer capable of producing audio—these can be identified in the Layer Stack by the presence of a volume dial knob. Layers without a volume knob do not generate audio and are therefore excluded from the Audio Mix Panel.
Layer Volumes
By default, layer volumes in each mix are chained to the Program Mix. This means they mirror the volume levels set by the dial knobs in the Layer Stack. This setup is ideal for cases where you occasionally want to:
- Mute or solo specific layers
- Adjust the master volume of the mix
- Monitor audio without altering the Program Mix
Chaining and Unchaining Layer Volumes
Click the chain button in the Volume table header to toggle between chained and independent volume modes:
- Chained: Volumes follow the Program Mix.
- Unchained: Volumes can be set independently, allowing full control over the mix.
An unchained audio mix behaves like a separate, fully functional mixer—ideal for creating custom monitor or stream mixes.
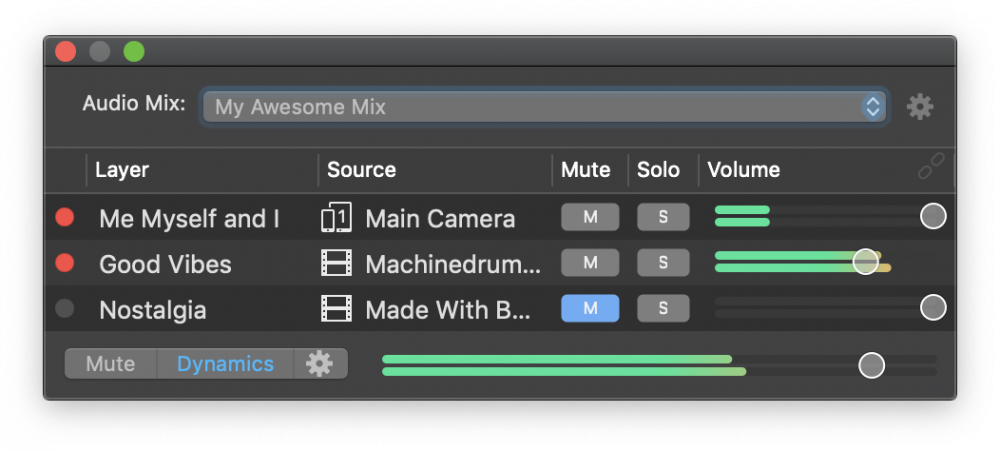
Mute and Solo Controls
- Click the M (Mute) button to mute a layer within the selected audio mix.
- Click the S (Solo) button to isolate one or more layers, muting all others.
You can mute or solo multiple layers simultaneously to suit your monitoring or output needs.
The Program Mix Can’t Be Changed via the Audio Mix Panel
Keep in mind: the audio portion of video sources can be routed to a separate Audio Only Layer for more control. If this workflow isn’t suitable for your setup, consider creating a custom audio mix — these support full muting and soloing of layers, offering much greater flexibility.
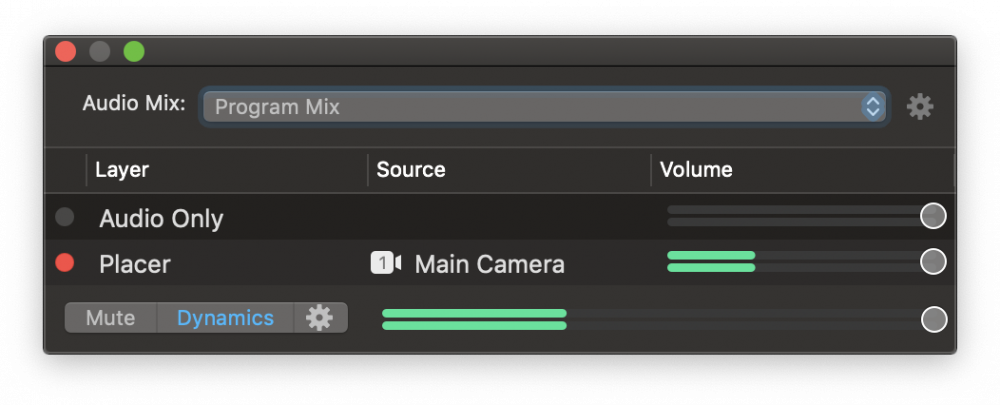
Mute, Dynamics and Master Volume of the Audio Mix
The bottom section of the Audio Mix Panel contains these additional controls:
- Mute mutes the whole audio mix,
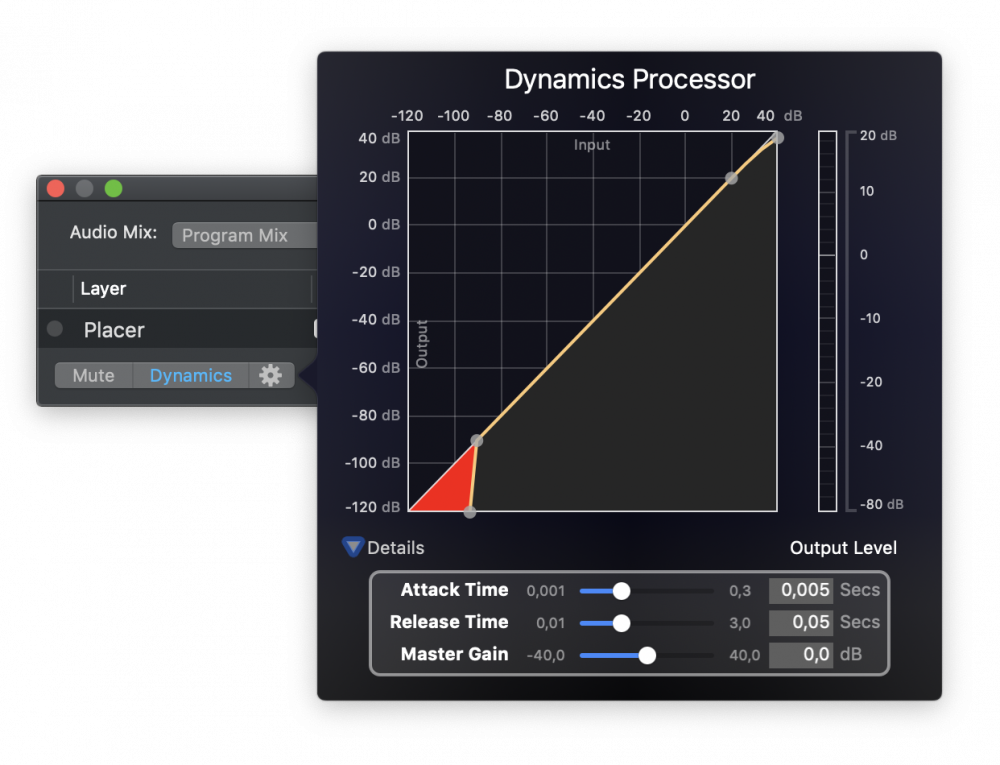
- Dynamics de/activates the master dynamics effect for the audio mix,
- The action button opens the dynamics effect settings,
- The volume fader controls the volume of the audio mix output.
Muting Audio Mixes Can Disrupt Your Production
Muting the wrong audio mix can unintentionally silence critical output. Always remember that an audio mix may be routed to multiple Output Destinations. For example, if the Program Mix is used both for monitoring via an Audio Aux Output and for live streaming, muting it will silence both your speakers/headphones AND your live stream. Best Practice: Instead of muting an audio mix, directly enable or disable the relevant Audio Aux Output Destination — this is far less error-prone. Use muting of audio mixes only as a last resort, such as a kill switch in live scenarios where you need to immediately stop audio (e.g. due to feedback or an unexpected disturbance) without interrupting the stream itself.