
The Placer Layer in mimoLive is primarily utilized for positioning, scaling, and rotating video or image sources within your broadcast frame. Whether you’re trying to fit multiple sources onto one screen, or just fine-tune the position of a single source, the Placer Layer offers the flexibility you need.
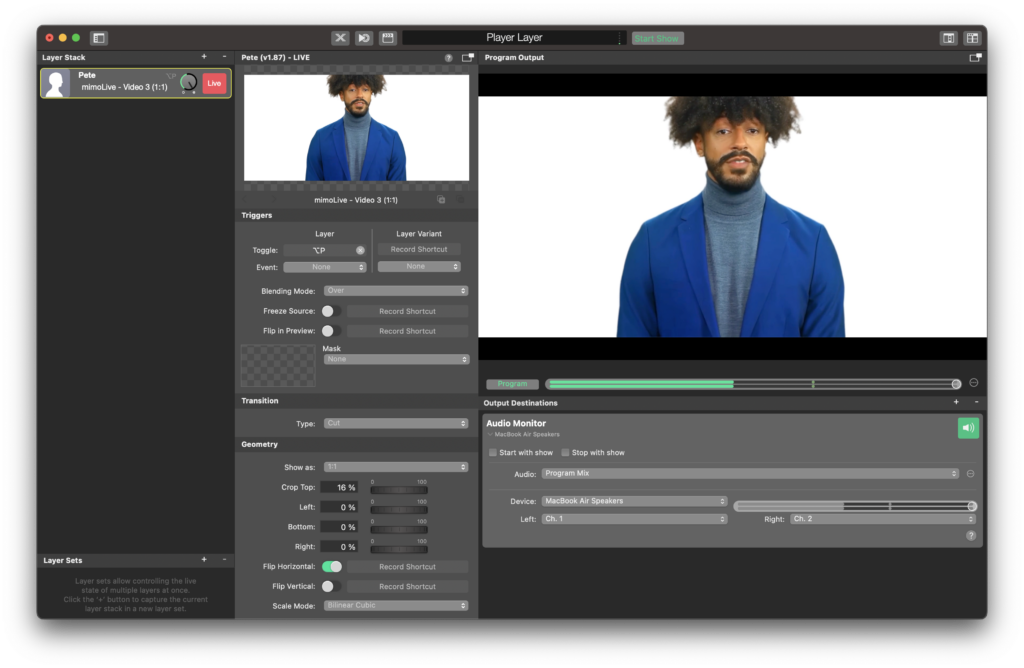
The Placer layer is essential for bringing visual sources to the program output. It takes any visual source (video, movies, images, etc.) and draws it into the program output canvas.
The placer layer has many options which are not noticeable in first sight.
If you drag a source from the Source Library to the layer stack a Placer layer will be added in the layer stack and the dragged source will be assigned to it. (In case of an audio source an Audio Only layer is added)
The Placer Layer is a cornerstone in mimoLive’s suite of tools. It gives users the ability to precisely control the position, size, and rotation of sources, ensuring they fit seamlessly within the broadcast frame.
Adding a Placer Layer
- Launch mimoLive and open your chosen project.
- Head over to the Layers Stack panel.
- Press the “+” button to add a fresh layer.
- From the dropdown list, select Placer.
Controlling the Placer Layer
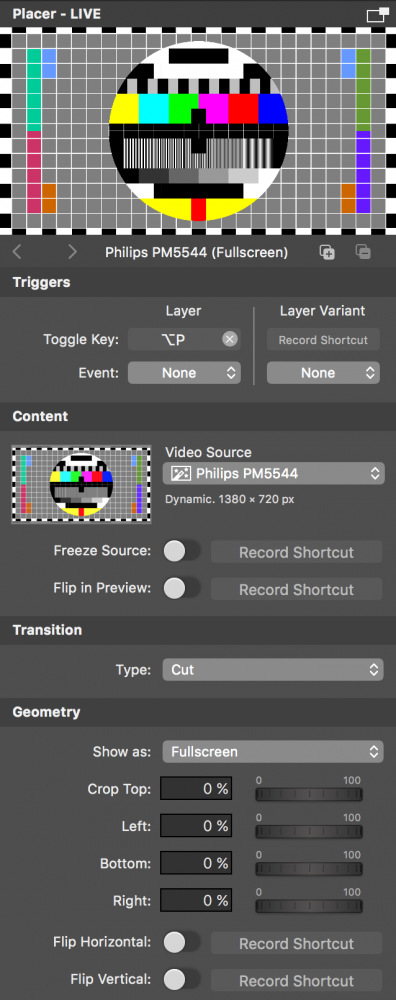
Geometry
The Placer layer has several display options to choose from in the “Geometry > Show as:” popup menu:
| Display Mode | Result |
|---|---|
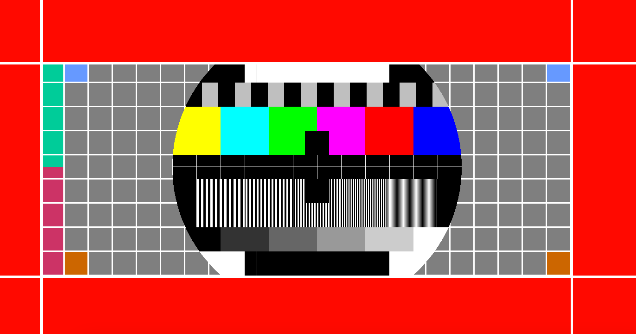
| Fullscreen | The source image gets scaled to fully fill the program output. The aspect ratio of the source remains so that the image gets cropped. |
| Letterbox | The source image gets scaled to the size of the program output. The aspect ratio of the source remains so that black bars will appear if the source aspect ratio doesn’t match the program-out. |
| 1:1 | The source gets drawn exactly in its pixel size of itself. If the size of the source doesn’t match the program output size the images get either cropped or the areas that are not covered remain transparent. |
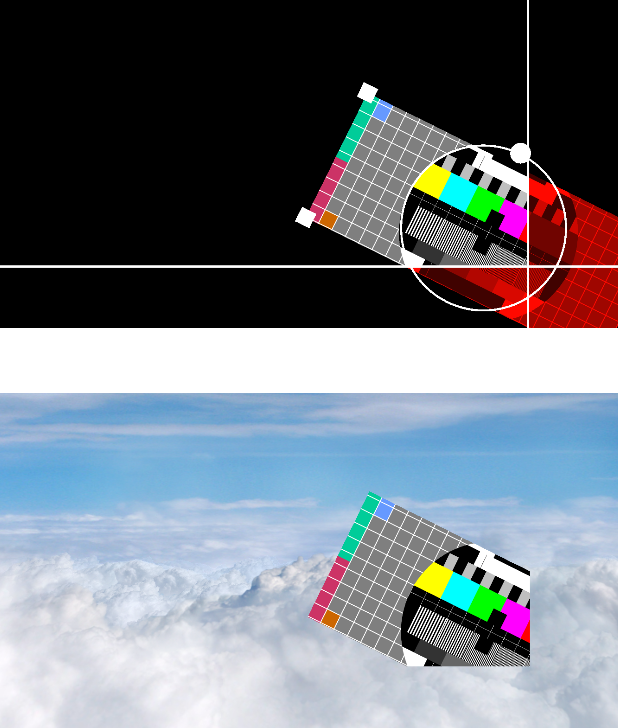
| Custom | The custom mode lets you be rather complex and is described in detail below. This setting provides the most options for custom settings. |
Cropping the Video Source
If your video source contains pixels at the edge that you don’t want to display in the program-out, you can use the “Crop” parameters in the Geometry section to cut them off before the source gets drawn to the canvas. You can manipulate the crop margins in the layer preview while holding down the “alt” key.
Custom Placement of a Video Source
In “Custom” mode you get all kinds of options to place the video source. In the layer preview it is possible to move the video around (just grab it), scale it to any size (by the square handles) and rotate it (with the circle knob). Mask insets from all sides can be used to crop the image further when its gets drawn into the program output.
Special Options
The Placer layer has some special options that are only needed in certain situations:
| Option | Function |
|---|---|
| Freeze Source | This option will grab the current video image and display it until the option is switched off. This is useful if you need to take a closer look at a certain portion of the video image but it’s a moving target. |
| Flip in Preview | Because we are much more used to looking at ourselves in a mirror this option helps when recording yourself and you want to see yourself mirrored. |
| Transition | When switching this layer live it either will show the video immediately (“cut”) or fade it in with a “Dissolve” transition. For the dissolve, there is a duration option in seconds. |
| Flip Horizontal/Flip Vertical | Those options actually flip the video source image before it gets cropped and drawn into the program output. |