
Display live weather data in mimoLive using a DIY weather station

Currently Unavailable
The Weathersnoop Layer Bundle is currently no longer available as the makers of Weathersnoop are discontinuing sales of Version 3 and have begun shipment of Version 4 which is currently not compatible with mimoLive.
If you have a license for Weathersnoop 3, you can continue to use it with mimoLive. We are currently looking into providing support for Weathersnoop 4.
Please contact [Boinx Sales](mailto:sales@boinx.com) if you are interested in integrating a weather station into mimoLive.
Weathersnoop is made by Tee-Boy. Please refer to their website for [more information on Weathersnoop](http://www.tee-boy.com/weathersnoop/).
System Requirements
- mimoLive 2.0 or newer
- WeatherSnoop Weather Station Software (lite version included with the bundle)
- WeatherSnoop compatible wether station hardware. Please refer to WeatherSnoop website for a [compatibility list](http://www.tee-boy.com/weathersnoop/).
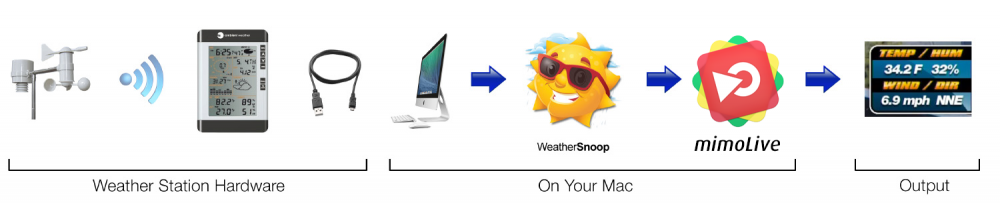
Weather Data Flow Diagram
Installation
To purchase the mimoLive WeatherSnoop layer, please go to the mimoLive Buy page and purchase the “mimoLive WeatherSnoop Layer”. Right afterwards you will receive an email with an unique download link. Please download the .zip file linked and extract it. Finally you will find a .tvlayer file, that you just need to double click. mimoLive will open and install the layer that you will then find in the Layer Template Repository.
Setting Up WeatherSnoop
After you successfully connected your weather station hardware with WeatherSnoop app you can start the build-in HTTP web server by selecting WeatherSnoop 3 ⇢ Preferences…. This will get you to the preference pane of WeatherSnoop:
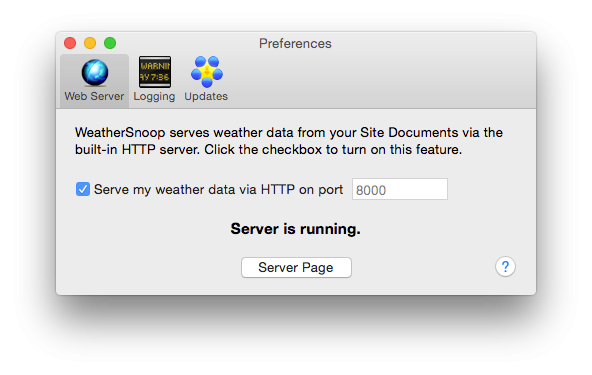
To start the web server of WeatherSnoop check the Server my weather data via HTTP option. The status line below should change to “Server is running.” * Now click the Server Page button below the status line in order to open the webpage WeatherSnoop is serving. Your preferred web browser should open and display the following web site:
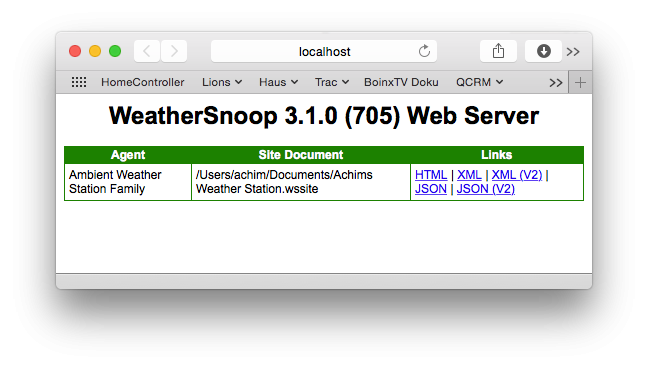
Please right click on the “JSON” link to reveal a context menu to copy the link to the clipboard. You will need the link in the WeatherSnoop layer in mimoLive in the next section.
Setup mimoLive
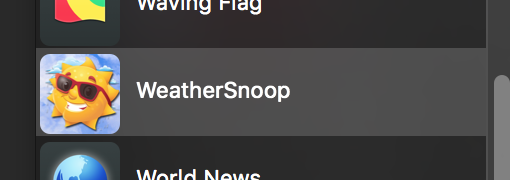
Switch to mimoLive. * Create a new blank document or open up an existing document where you want to add the live weather data. * Make sure you have successfully installed the WeatherSnoop layer by selecting the “+” button at the top of the layer stack of your mimoLive document window. Scroll through the layers list and find the sunny Sun:
By drag&drop add the layer to your Layer Stack at the very top. * Select the WeatherSnoop layer in the layer stack and find the WeatherSnoop HTTP Server section in the settings pane on the left:
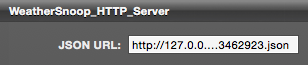
Paste the URL you copied in the previous section into this field.
*Sometimes the URL isn’t working out of the box.
You may have to replace the host name in the URL by the IP adress the WeatherSnoop HTTP server is on. If the WeatherSnoop app is on the same machine as mimoLive you can enter 127.0.0.1 as the host. The URL should look something like this: http://127.0.0.1:8000/A3069703-47D4-4134-AA87-6CE853462923.json
Done! After some seconds the preview of your layer should display the weather data from your weather station. Now you can switch your layer live to see its output in your video production.
Customize the Layer Output
Now that you successfully installed the connection from mimoLive to your weather station hardware via WeatherSnoop its time to customize the visual output of the layer. Because the layer inherits from Static Text Layer the basic graphical parameters of the layer are described here: Static Text Layer.
There is an additional parameter group called Units:

| Parameter | Function |
|---|---|
| Pressure | Select the prefered pressure units for output from inHg (Inches Of Mercury), cb (Centibars) or mb (Millibars) |
| Temperature | Options for temperatur units are F (Fahrenheit) or C (Celsius) |
| Speed | Speed units can be mph (Miles Per Hour), kph (Kilometers Per Hour), mps (Meters Per Second) or kn (Knots) |
| Rain | The rain fall can be outputted as in (Inches), mi (Miles), mm (Millimeters), cm (Centimeters), km (Kilometers) |
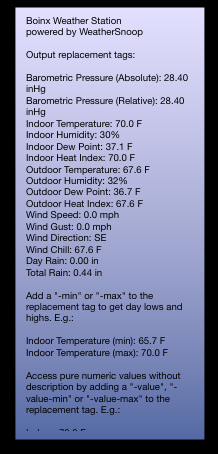
In the text field you can use several replacement tags that will be replaced automatically in the live output:
*Note
This list may vary from the used weather station hardware. Please check the JSON output of the WeatherSnoop HTTP server for the actual key values if you don’t see any text in the output of mimoLive
| Replacement Tag | Example Output | Available Units |
|---|---|---|
| absoluteBarometricPressure | Barometric Pressure (Absolute): 28.40 inHg | inHg, cb, mb |
| relativeBarometricPressure | Barometric Pressure (Relative): 28.40 inHg | inHg, cb, mb |
| indoorTemperature | Indoor Temperature: 70.0 F | F, C |
| indoorHumidity | Indoor Humidity: 30% | |
| indoorDewPoint | Indoor Dew Point: 37.1 F | F, C |
| indoorHeatIndex | Indoor Heat Index: 70.0 F | F, C |
| outdoorTemperature | Outdoor Temperature: 67.6 F | F, C |
| outdoorHumidity | Outdoor Humidity: 32% | |
| outdoorDewPoint | Outdoor Dew Point: 36.7 F | F, C |
| outdoorHeatIndex | Outdoor Heat Index: 67.6 F | F, C |
| windSpeed | Wind Speed: 0.1 mph | mph, kph, mps, kn |
| windGust | Wind Gust: 0.2 mph | mph, kph, mps, kn |
| windDirection | Wind Direction: SE | |
| windChill | Wind Chill: 67.6 F | F, C |
| dayRain | Day Rain: 0.10 in | in, mi, mm, cm, km |
| totalRain | Total Rain: 0.44 in | in, mi, mm, cm, km |
There are several extensions to be added to all the replacement tags to get different outputs:
| Replacement Tag Extension | Description | Example | Example Output |
|---|---|---|---|
| -min | outputs todays low for this value | indoorTemperature-min | Indoor Temperature (min): 65.7 F |
| -max | outputs todays high for this value | indoorTemperature-max | Indoor Temperature (max): 70.0 F |
| -value | outputs the value only and its preferred unit | indoorTemperature-value | 65.7 F |
| -value-min | outputs the value only and its preferred unit of todays low for this value | indoorTemperature-value-min | 65.7 F |
| -value-max | outputs the value only and its preferred unit of todays high for this value | indoorTemperature-value-max | 65.7 F |
| – | outputs the description expressed in the selected units | indoorTemperature-C | Indoor Temperature: 23.7 C |
| outputs the value only expressed in the selected units | indoorTemperature-value-C | 23.7 C | |
| outputs the value only expressed in the selected units of todays low for this value | indoorTemperature-value-min-C | 20.2 C | |
| outputs the value only expressed in the selected units of todays high for this value | indoorTemperature-value-max-C | 27.3 C |
*Note
Valid options for the key are depending on the value you are displaying. If you use an invalid unit the replacement tag won’t be recognised.
