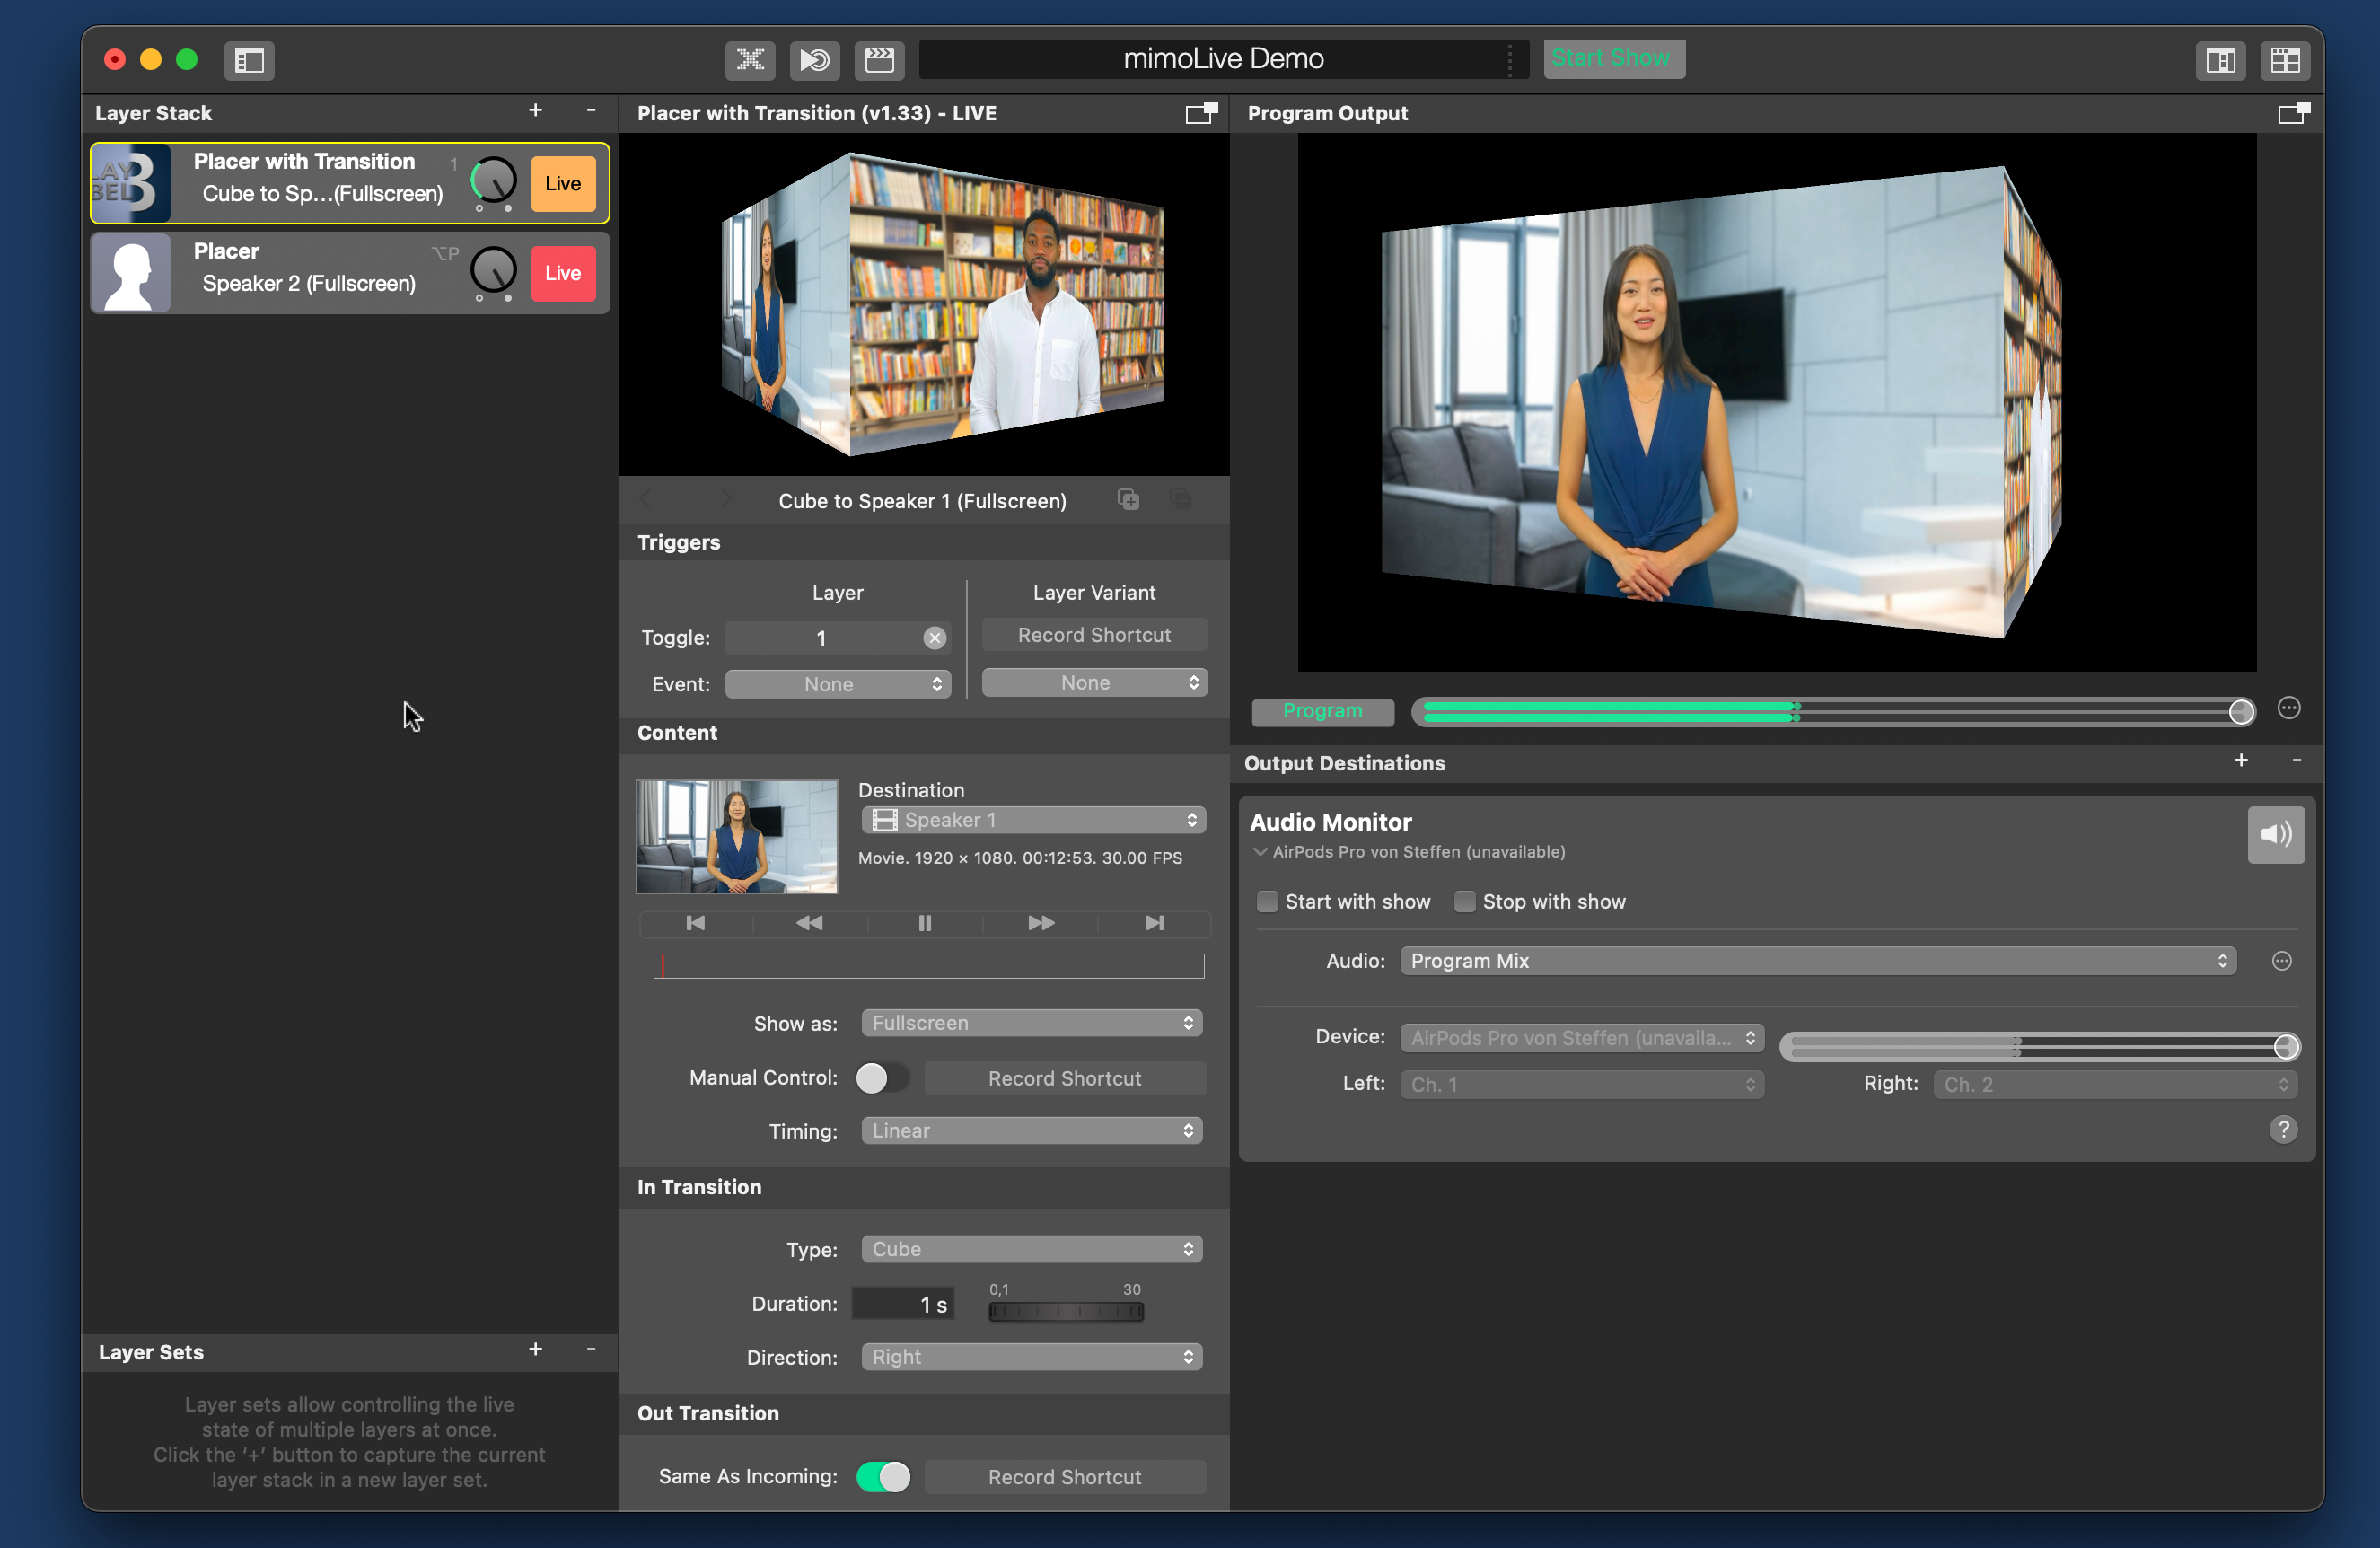
The Placer with Transition layer in mimoLive is a powerful tool that allows users to seamlessly switch between video sources using a wide array of customizable transitions. This layer is ideal for live broadcasts where dynamic switching between speakers, cameras, or media elements is required to maintain a professional flow.

Key Features
- Transitions: Offers multiple types of transitions, including Flip, Wipe, Cube, and Page Curl, each with customizable directions, duration, and softness.
- In and Out Transitions: Separate in and out transition effects allow for unique visual effects when a new source enters or exits the screen.
- Manual Control: Options to manually trigger transitions, giving the user full control during live shows.
- Layer Variants: Pre-configure different settings for various layer looks and switch between them using shortcuts.
- Display Options: Adjust how the content is displayed on screen with Fullscreen, Letterbox, or 1:1 options.
User Interface Breakdown
Layer Settings
- Destination: This section allows you to choose the video source or media file for the Placer. You can assign speakers, cameras, or any other video source as the Destination
Example: “Speaker 1” or “Main Camera.” - Triggers: Use these to assign record shortcuts to toggle layers on or off. This gives the user control over when a transition begins or ends.
- Show As: You can choose between:
Fullscreen: The source takes up the entire screen.
Letterbox: Adds black bars on the sides to maintain the aspect ratio.
1:1: Useful for square formats, particularly for social media platforms. - Manual Control: This toggle allows users to manually control when transitions occur, providing flexibility during live shows. You can assign shortcuts for easy control.
In Transition Settings
The In Transition section lets you define how a new video source enters the screen.
- Transition Type:
- Flip: Creates a 3D flip effect between sources.
- Cube: Simulates rotating a cube face to reveal the new source.
- Wipe: Slides the video across the screen in a specific direction (Up, Down, Left, Right).
- Page Curl: Gives the effect of turning a page.
- Duration: Controls how long the transition lasts. The duration can be as short as 0.1 seconds or as long as 30 seconds, depending on your needs.
- Direction: For transitions like Wipe or Flip, you can control the direction of the animation. For instance, with Wipe, you can choose between Up, Down, Left, and Right directions.
- Softness (For Wipe only): Adjust the softness of the Wipe transition to control the edge. A higher softness will create a more gradual transition, while a lower percentage will give a sharp cut between sources.
Out Transition Settings
The Out Transition section defines how a video source exits the screen.
- Same as Incoming: This toggle automatically applies the same transition settings to the Out transition, ensuring consistent transitions.
- Custom Out Transition: If you’d like the source to exit with a different transition (for instance, a Cube in and a Flip out), you can set the Out transition independently from the In transition.
Timing Settings
In both In and Out Transitions, you can control how the animation behaves:
- Linear: The transition maintains a constant speed throughout.
- Ease In/Out: Adds an acceleration or deceleration to the transition, making it feel smoother.
- Easy In: Starts slow and speeds up towards the end.
- Easy Out: Starts fast and slows down towards the end.
Practical Tips
- Test Transitions: Always preview your transitions before going live to ensure they fit the pacing and style of your broadcast.
- Shortcuts for Efficiency: Use keyboard shortcuts to quickly switch between layer variants or trigger manual control. This will speed up your workflow during fast-paced live shows.
- Layer Variants: By setting up different layer variants with various transition types and destinations, you can effortlessly switch between setups, making your broadcast visually dynamic.
- Combine Effects: Experiment with combining different transitions for in and out animations. For instance, using Flip to introduce a speaker and Cube to move to the next segment can create a visually engaging experience.
Final Thoughts
The Placer with Transition layer in mimoLive is an essential tool for creating polished, professional live broadcasts. Whether you’re managing speakers, switching cameras, or showing different media, the customizable transitions and display options give you full control over how your content appears on-screen. With smooth animations and flexible layer settings, this layer enhances the overall production value of your shows.
By using features like manual control and layer variants, you can stay in control of your broadcast while also ensuring seamless transitions between content.

