
In case the built-in Twitch streaming doesn’t work, there is always the option to use an RTMP fallback.
How to configure RTMP for Twitch
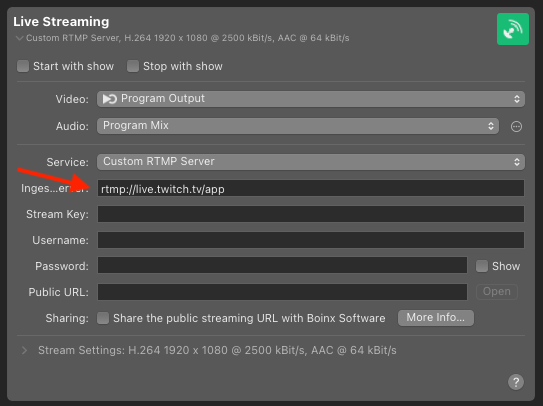
- Add a Live Streaming output destination to your mimoLive document.
- Select “Custom RTMP Server”.
- Set the “Ingest Server” field to rtmp://live.twitch.tv/app/.
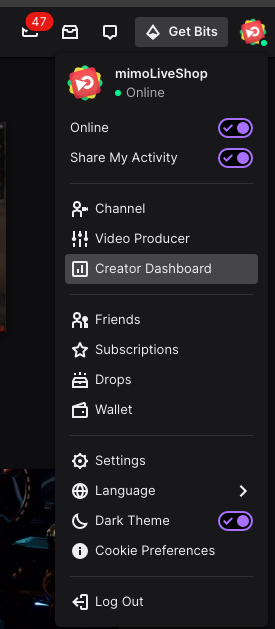
- Log on to the Twitch web site and navigate to the “Creator Dashboard” using your personal menu on the right hand side.
- In the Creator Dashboard, select “Settings” and then “Stream”. This brings you to the page with your “Primary Stream Key”.
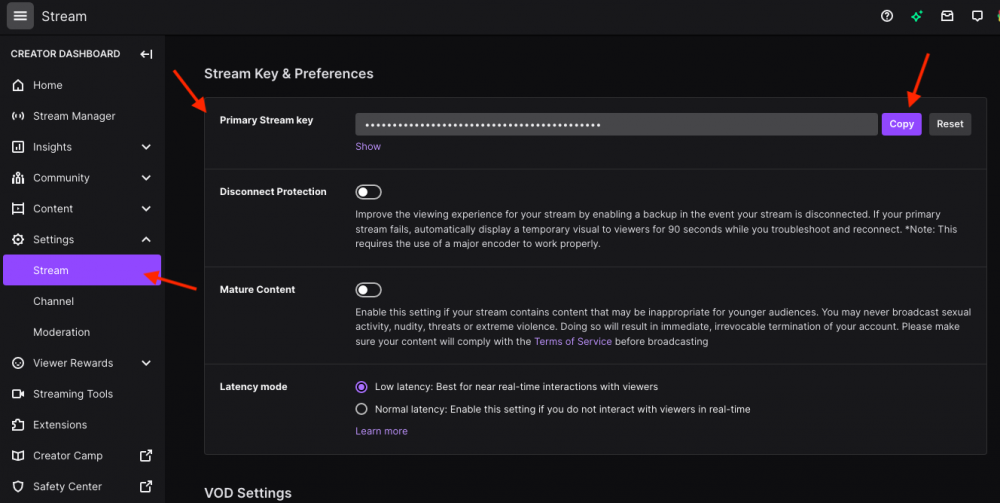
- Copy the Primary Stream Key and paste it into the Stream Key field in mimoLive. The Live Streaming Output Destination should now show the green state.
- Press the Live button of the Output Destination to start the stream. The Twitch stream will be online immediately.