
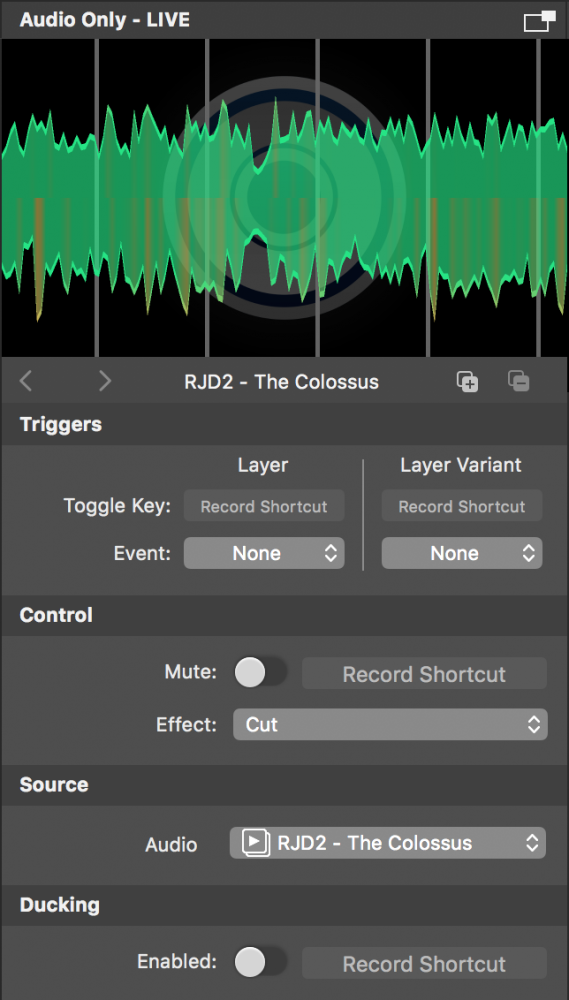
The Audio Only layer injects audio input from any source thats provides audio, like an Audio Source,
a Video Source, a Media File Source or a Media Playlist Source, into the program output. While being active, its preview displays the waveform of the incoming audio signal. The Audio Only layer will automatically be added when dragging an audio source from the Sources Repository to the Layer Stack.
Control
- Mute: Mutes the audio layer instantly.
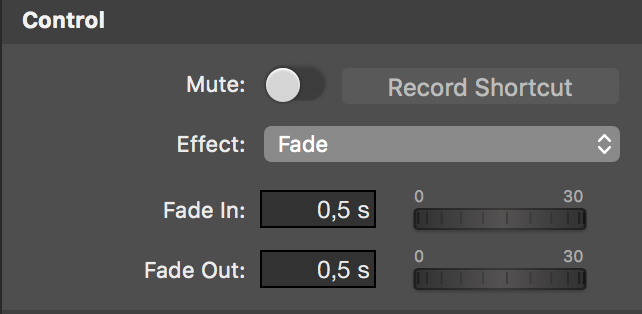
- Effect:
- Cut: When the layer gets activated or deactivated, the layer instantly unmutes or mutes.
- Fade: When the layer gets activated or deactivated, it performs a fade-in or fade-out.
Source
Selects the source whose audio input gets injected into the program out through this Audio Only layer.
Ducking
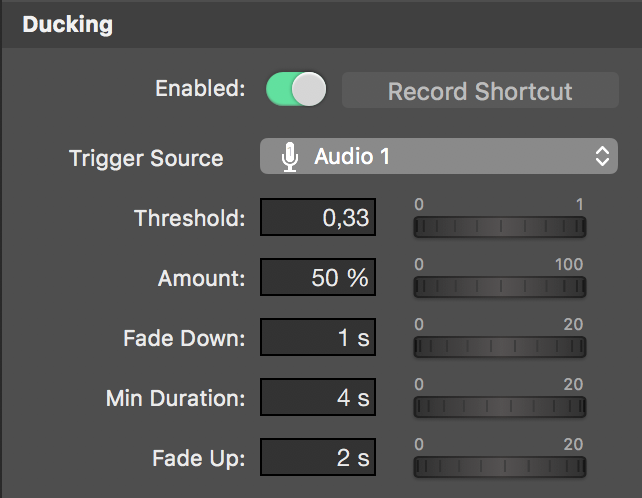
- Trigger Source: Selects the source whose audio input acts as control signal for the ducking effect.
- Threshold: Sets the amplitude of the control signal at which the ducking should be automatically activated, where 0 means ducking is constantly active and 1 means ducking will never be activated.
- Amount: Sets the percentage of attenuation which should be applied to the Audio Only layer’s output whenever it is ducked.
- Fade Down: Sets the time the ducking effect takes to ramp to its destination attenuation level.
- Min Duration: Sets the minimum time the ducking effect should last, which is useful to prevent pumping in the audio output if for example the talking person regularly makes short pauses.
- Fade Up: Sets the time the ducking effect takes to ramp back to the unattenuated level.
Trigger Source Must Be Active!
The ducking effect will only be applied when the trigger source is activated. This means the trigger source must be set as source in another layer and that layer needs to be live.
Ducking Example
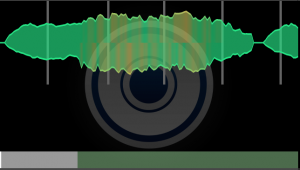
As you can see in the screenshot above, underneath the waveform display there is a two-colored metering bar. The grey area represents the volume range where the ducking effect does not take effect while the dark green area represents the volume range where the ducking does take effect. Changing the Threshold parameter will resize both areas.

As soon as there is an audio input from the trigger source, the metering bar will display its volume level in white and light green. As can be seen in the screenshot above, the point at which the trigger source volume crosses the threshold and the ducking starts to take effect can now easily be identified as the right end of the now white volume range.